Friday, April 26, 2013

Amish Buggy Block Quilt

Sometimes I just need to sit down and sew.
That would be most of the last 2 weeks, though it didn't actually happen that way.

It had been ugly weather outside thanks to our lovely "Spring" storms.
Nothing Spring about it.
We are still in the throes of Winter here.
I actually saw a sign outside the vet's office that read, "We're having a lovely Winter this Spring".
That about sums it up.
One morning my kids hit the bus stop with thundersnow happening.
It was a little freaky to say the least---seeing flashes of lightning while it was snowing.
The record snow fall in April is a bit ridiculous.
We don't care about the records.
We all just want it gone.
Seriously, it is killing us.
You know it is bad when even the Minnesotans are complaining.
We're so done with Winter!

Enough complaining.......unless we get even more snow down the road......
Thankfully today we are going to hit 70.  The Hallelujah chorus sings in the background.  We can't hardly believe.  I'll be eating lunch outside today....just because I can.

I finished both the top and the back for the Amish Buggy block swap that Emily started last Fall.
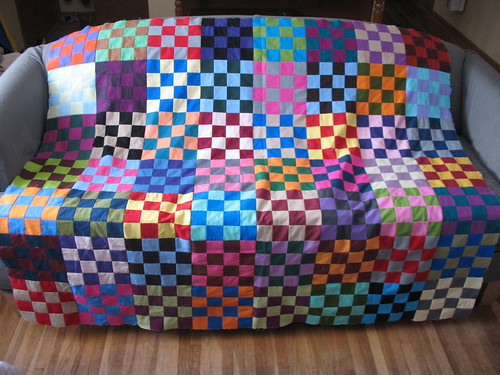

Top pre border attached.

With borders

Blue border cut 2" strips to finish at 1 1/2 inches.
Brown border cut 3" strips
I plan on binding it with the same brown.

The back.
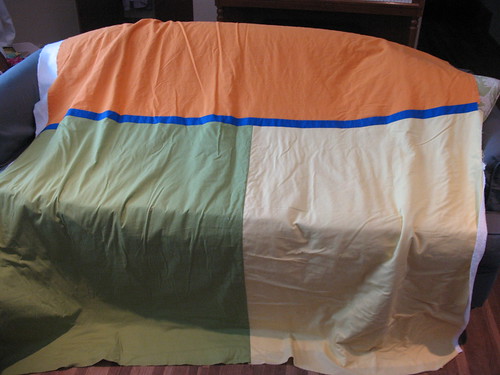
The yellow piece is brighter than it is showing up in this picture.

Now to decide whether to quilt it myself or send it to Lynn.
I'm leaning towards Lynn out of pure laziness.

Thursday, April 25, 2013

Working on the Kitchen

If you have followed our blog for awhile you know that we've slowly done some work on our kitchen.

Removing the half wall.
Removed the rest of the wall between dining and kitchen.
New flooring

Figuring out what to do with the remaining wall--double oven mock-up.

In the meantime it has looked like this.

An open utility shelf that was/is a disaster to say the least.
Please don't judge.
Older homes just don't come with enough storage.
And least of all when you have 7 people living in it.

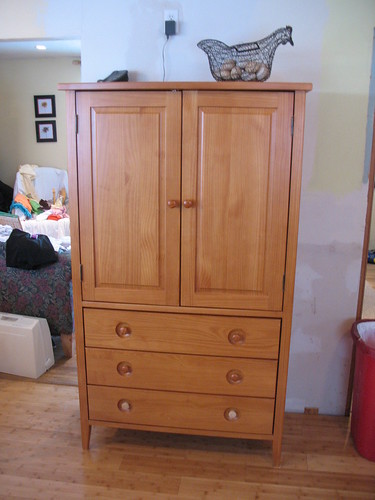
Finally, since hubby has a new job, he commutes more and doesn't have as much time and we might move down the road, I decided we have to do something different.  We still might build in a double oven and cupboards, but until then I bought this.


Bought it on Craigslist for $100.
It was ready to use immediately, unlike some other entertainment units I had looked at that would've needed some shelves built in first. And when and if we do build something in this spot permanently I plan on moving this to my sewing room for fabric storage. (I will need to stain the bottom knobs to match them up.)

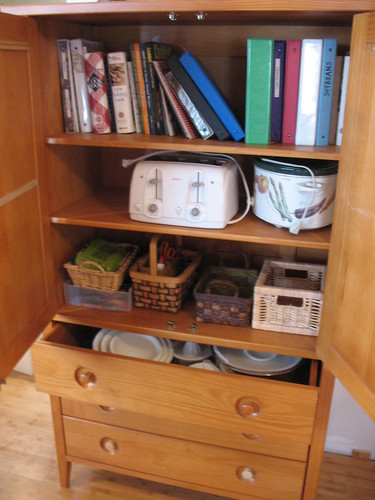
And for the moment here is sort of what I am doing with it.

Cookbooks
Small appliances
Markers and crafty supplies
Big bowls in the drawers
In the bottom drawer I put in baskets and fruit

Anything to get stuff off the counters and out of sight.
Still a work in progress, but much improved.

Wednesday, April 24, 2013

Prom Dress--Part II

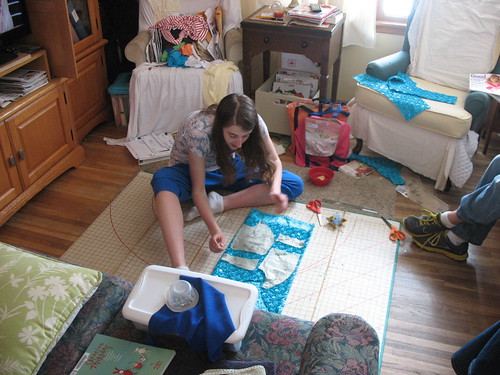
Yesterday the girls came to our house after school to work on their dresses.

Next step was the lay-out and cutting.

I had to give a few instructions to BFF on how to read the pattern pieces and then made sure it was all pinned properly before I let her cut it out.  My daughter had to lengthen all her bodice pieces by 2 inches.

Both got everything pinned and cut in about 1 1/2 hrs--that's both the fabric and lining pieces.  According to my daughter it is slightly nerve-wracking cutting fancy fabric.  She didn't want to screw anything up.


Daughter #1 with the ruched turquoise for the bodice that made her so nervous.
It is $30/yd. fabric (before using a coupon) and so that is why she was freaking out a little.


BFF with her deep purple satin.
It is a gorgeous color that you can't really tell from this pic and the lighting.

Next time we start some sewing.
Fun times!
I think that I might be more excited for them than they actually are.

Details:
  • Both are using the same patterns with some subtle changes.  The most humorous to me is that they are cutting out the skirt pieces the same length but they will fall at different lengths because my daughter is 6' and her BFF is about 5'5".  BFF wants hers to hit right at the ankles and my daughter wants hers a little higher, more tea length.
  • Using Simplicity 1797 for the bodice and raising the back neckline a bit.
  • Using Simplicity 3878 for the skirt.

Note:  Both girls decided to use this dress project as their Integrity value project for Young Woman Personal Progress--make and wear an item of clothing that conforms to modesty standards as outlined in the For the Strength of Youth Pamphlet.

Monday, April 22, 2013

Floral Circle Skirt in Blue & Brown

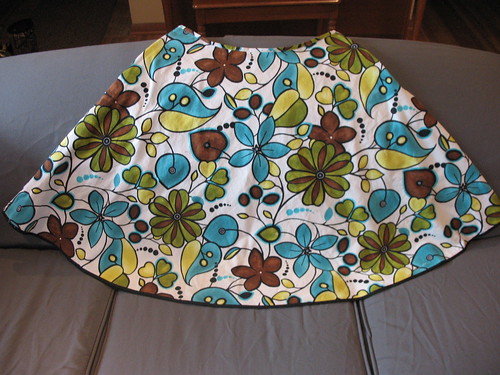
Here's a fun warm weather skirt that I just made for Spring if it ever shows up here in MN.  Found this fabric by accident as I was browsing for something else.  Loved it and decided to keep it for myself even though daughter #1 was eyeballing it rather seriously once I brought it home.  Sorry kiddo, this one is for me.


Already have a cute brown tee to wear with it.
Could also use this cream t-shirt if I wanted.
I wore it on Sunday to Church with a black sweater because we still have snow and it was cold.

Details:
  • Simplicity 4236--this is also a good basic skirt pattern for a straight skirt--not quite pencil, but very close. 
  • View C is not quite full circle skirt.  This pattern does have a full circle version to make.
  • 2 yds. of 60" cotton fabric (I bought the last of this piece or I would've bought a little more)
  • Added 2 inches to the overall length, only because that is as much as the fabric would allow.  I would have preferred about 4 inches added to the length.
  • Used 1 pkg. of 1/4" double fold bias tape to finish off the hem.  I couldn't afford to lose any length at all when hemming..
  • Finished length--25 inches.

Friday, April 19, 2013

My New Normal

My sewing life has changed over the course of the past couple months.
I've had to start wearing reading glasses in order to thread the needles on my machines.
Bummer!
It makes me feel like I am older than I actually am.
Well....maybe I am actually getting older.

Anyway, I'm not particularly happy about it as now I have to make sure I have a pair of "cheaters" by my serger, another pair in my purse so if I need to read something at the store, and another pair by my bed so I can read.  I find that especially at night I need them if I want to read.

But on the flip side, it sure is nice to be able to see clearly where that thread is going and what I am sewing.  My kids also think I look "distinguished" when I wear them.  I'm trying not to feel slightly put out by that comment because when I think of "distinguished" I think of a handsome gentleman with gray or graying hair (like my hubby).  I know they were giving me a compliment, so I guess that I'll just have to accept my new normal.


At least I'm blonde so you can't see all the gray that is coming in too.

Enjoy your weekend!
We are so praying for NO more SNOW!!

Wednesday, April 17, 2013

Prom Dress-Part I

Shopping for fabric....this time around it is for my daughter's first Prom dress and for her BFF's dress.

In February I set her up on my Pinterest account and made a secret board for her so that she could peruse all the modest dresses she wanted and pin what she liked so we could get an idea of what we were going to do.  She and daughter #2 spent a couple of hours looking at pretty dresses and pinning WAY too many.  But they had great sister bonding time over it.

This was probably the top dress overall that she liked.
Latter Day Bride--Shanessa
Color, style, everything.
Not the price, however.
Choke, choke at $475.

After all her pinning we then hit Jo-Ann's and checked out fabric.  Because I knew we could duplicate this dress for way less than that price--even if we spent $100 on materials it would be better.

We found this awesome piece first and decided this is what we were going to work around because it was such cool fabric.

Ruched turquoise taffeta/satin with sequins.

Bought some coordinating taffeta/satin fabric for the skirt and some tulle also.

Her BFF emailed me this picture of what she wanted.


Purple with some black tulle overlay.

Over the weekend she and her mom, along with me and daugther #1, went shopping.
Supplies are all bought.
Now onto the actual cutting, fitting and sewing.
Gotta get these girls to work so that we have plenty of time to put them together.

Monday, April 15, 2013

What about Orange?

I think that we all have a favorite color....or two.
Sometimes that changes with time and age, sometimes not.
I have to say that as much as I love bold colors, I never thought that I would have much interaction with the color orange.

As a teen, orange was one of our rival high school's school colors.
Therefore, not cool to wear it.
I was also told I was a summer (remember the seasonal color thing that was so "in" during the 80's) and so orange was not in my color range.  It also proved to be wrong--about the summer thing for my skin color.

Much later I grow up, get married to a hunter (think blaze orange) and have some kids.
Who funny enough all love the color orange.
Our local HS colors are orange and navy.
I now own an orange t-shirt that I wear to our daughters' swim meets.

How did this happen to me?
I've sewn more things made out of orange fabric than I can think about.  And just recently I bought a lovely piece of orange rayon fabric that I am going to use for MYSELF to make a new skirt--out of ORANGE.  It's just crazy!

I need an orange skirt!
from Pinterest


Who knew that orange would become such a part of my life?

Anyone else using colors that they never thought they'd have in their life?

Saturday, April 13, 2013

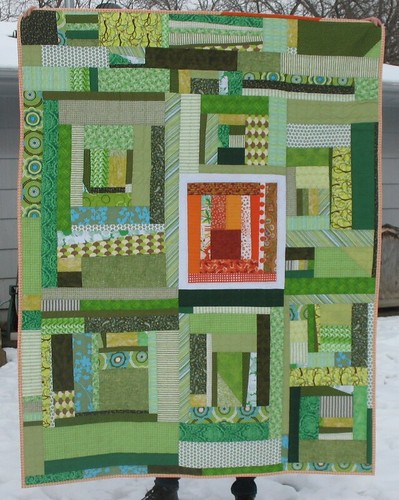
Green Splash Quilt FINALLY Finished

I've been trying to get this quilt finished for some time.  The top has been done since November of last year.  I worked on some of the quilting in February when we all had our little retreat to St. George.  I just had the white border around the orange block to quilt and then it could be done.

With all the nasty snow we received this past week (and more forecasted for tonight--UGH!) It was a good week to stay home and get some things accomplished.  Happy day I got this one out of the sewing room and into the living room to be used.


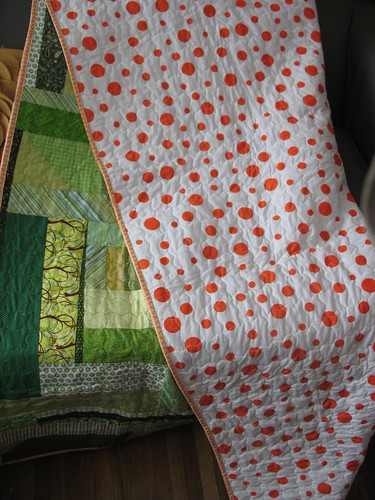
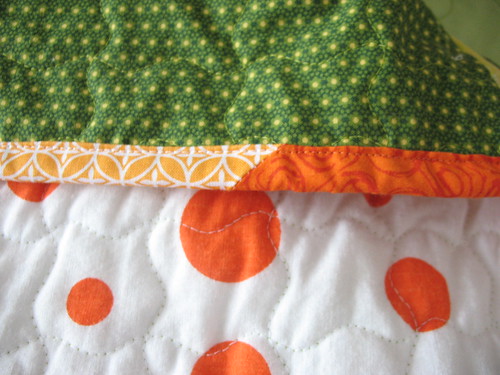
Used a little wavy line quilting stitch on Emily's new machine to do the majority of the quilting.
Straight line quilting across the orange block
Pebble quilting within the white border around the orange block.

Finished dimensions:
53" by 67"

Pattern from Sunday Morning Quilts pg. 72-75.

Monday, April 8, 2013

Tomato Soup for food allergies

As Emily wrote about earlier last month, we all are having some changes occurring in our respective lives.

A couple things for us includes:

  • Two new vehicles this year, unplanned on both accounts.
  • Hubby's new job which after working from home since last August has greatly increased his work commute.
  • This change of job may also include a move down the road....but not right away.
  • Oldest daughter getting her driver's license--both great and scary all at the same time.
However, the most stressful for me has to do with our #2 daughter.  She has a wheat intolerance that we've known about for at least a year now.  Removing wheat from her diet improved her lifestyle for awhile and then last Fall sometime she started complaining again.  Recently I took her to a naturopath (because the pediatrician wasn't as helpful as I'd like) where we had some blood work done and the results came back that she also has a dairy, egg, and peanut issue too.

I have to say that after dropping her back off at school after that appointment and then browsing through the grocery store to see what kind of options she'll have, I went back out to my vehicle and cried...and called my mother.  I felt like dealing with the wheat issue was a piece of cake (yeah, punny) compared to this new diagnosis.

It was a temporary meltdown on my part, but right now I have a love/hate relationship with food because of all of this going on with my daughter.  I think that is normal.  I'm pretty sure I'll get over it, because we sort of went thru this when we discovered the wheat issue--denial, anger, acceptance, etc. all those grieving steps.

Anyway, the saddest part about all this for me, thinking of my daughter, is that she will eat anything, and likes about everything, and here she can't have all these things.  That is probably a huge blessing too, because I'm not sure any of my other kids would have as many options as she has because of their food "pickiness".  We're working through it and she is being a good sport as we try new recipes and I figure out a new way of cooking for my entire family, because I am not making a couple different things every night just to make everyone happy.

She and I have a shared love of tomato soup.  Regular canned soup, i.e. Campbell's, has wheat in it--if you didn't already know that.  Gluten-free canned soup is expensive, and really neither one is as good as homemade.

I found this tomato soup recipe from The Chew--one of my favorite shows to watch.  I made it the other night night and it was delicious.  #2 ate hers with some Glutino pretzels and was super happy with it.  I've been eating the leftovers for lunch.

Cream Tomato Soup Clinton Kelly
pic from The Chew

Recipe changes/details:
  • I used 4 pints of my own canned tomatoes
  • Substituted rice milk for the cream.
  • And didn't use as much garlic as the recipe called for.
__________________________________
Down the road I'll probably be sharing some things here and there with what we are doing to make her life better and some things that I've learned or I am doing to switch up the diet.  There are certainly lots of websites and books out there to help us out.

Here are a couple helpful books I found at our local library.


Wednesday, April 3, 2013

Lace Dresses

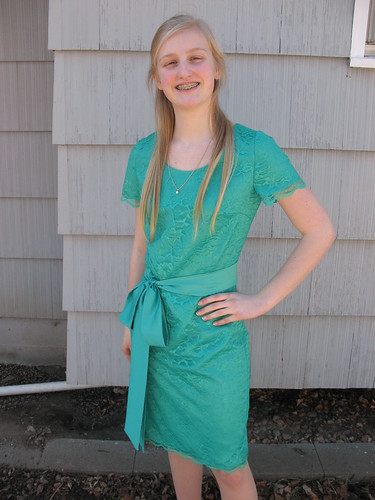
My 2 oldest girls have been obsessed with lace dresses.  There are some really pretty ones out there as well as ones none of us here would be caught dead in (too revealing and sexy for teenagers AND mothers of 5 children too.)

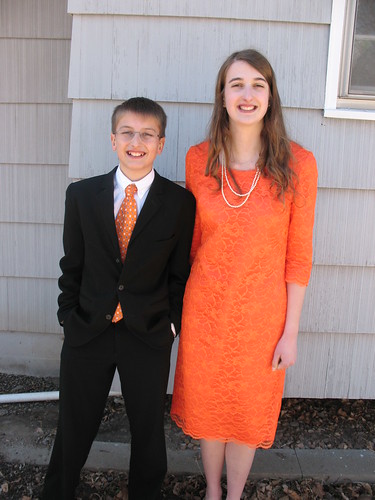
They picked out the colors and slightly fought over who would wear which one.  The lady who helped us cut fabric at Jo-Ann's convinced them which color looked best on each.  Heaven forbid they should listen to their mother's opinion.  Just glad it worked out and they were both happy.

These were their Easter dresses, and they wore them even though the temps were in the 30's (you can't tell from these pics) and the wind was super cold.


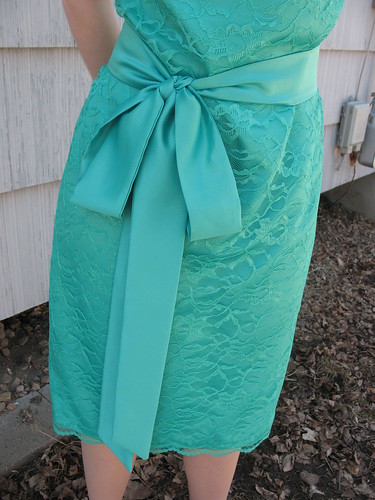
I really like this with the bow.


Daughter #1 with my oldest son and his "new" suit from his cousin.


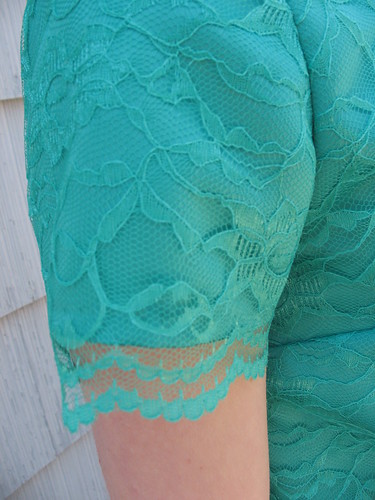
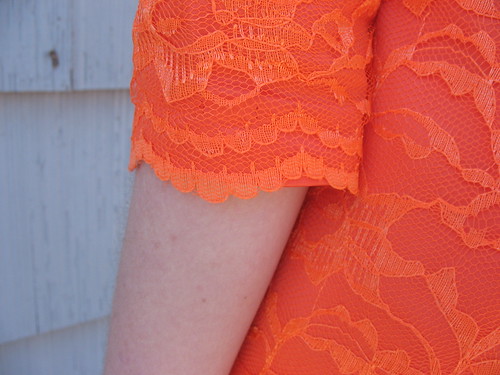
3/4 sleeve hem.


And here is how the invisible zipper looks with the lace/satin combo.

They received quite a few compliments at church.  Lots loved the colors and others loved the "retro" feel of the dresses.  I didn't think we were doing anything all that retro, but I'm just happy that they are pleased with how their dresses turned out.

Details

  • Used pattern Butterick 5706
  • We had to take the dress in quite a bit on the sides at the waist so that it would look more fitted.  And this was after the back darts too.  I don't know if it was just the pattern or because my girls swim and they have broader shoulders and need a different size there than in the waist.
  • Made a bow for each but daughter #1 didn't wear hers this time. 
  • Invisible zipper
  • Blind hem stitch on the satin layer.
  • Added a facing to the neckline instead of how the instructions indicated.  

Saturday, March 30, 2013

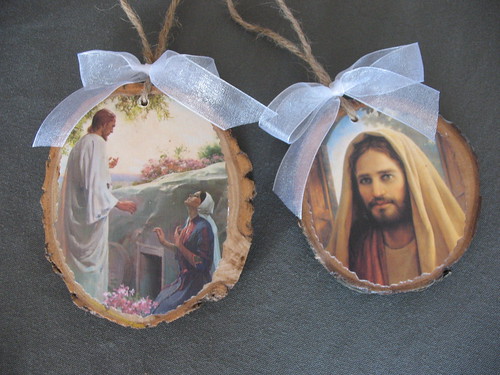
Christmas Ornaments of Christ

I know this is super early for the season but maybe not so inappropriate with Easter being tomorrow.

Some time last Christmas I was talking with my mom and I was telling her how excited I was to have bought a white Christmas tree and what new decorations I was going to do with it.  We then got talking about what she wanted to do to redo her tree.  A number of years ago she had some ornaments that depicted the life of Christ.  I remember these.  She is now down to one left.  She said that she wanted to have those again and I suggested that maybe over the summer we should do a Christmas in July project and make some.

Well, I'll be honest, I couldn't wait quite that long.
After we talked about it I just got too excited about the prospect of making these for her as a surprise gift.

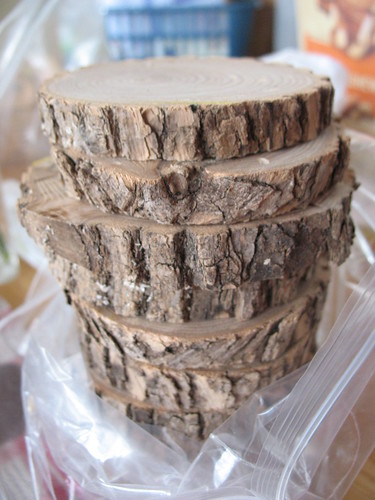
I roped in my hubby and got his advice and then raided our wood pile for good sized logs and cut them into slices using his miter saw.


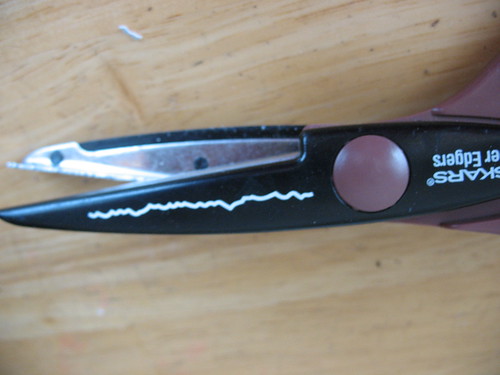
I cut the pics down using one of my scrapbook scissors that looks like torn paper.


Then I got busy Mod Podging them on.
Once they were all dry, I drilled a hole in the top for a loop of twine and then added a little ribbon for some contrast. She ended up with about 2 dozen ornaments.


In the drying stage


I gave these to my mom for her birthday earlier in March.
She was very surprised and very happy.
I was pleased with how they turned out.


Happy Birthday Mom!

Details:
Bought the picture packets from Deseret Book, but you can order them online.
  • If the Savior Stood Beside Me by Greg Olsen
  • Beautiful Savior by Greg Olsen
  • Wood slices 1/2" thick or less. ( I like less if you can do it)
  • Mod Podge at least 2 coats.
  • Make sure you don't have any air bubbles 'cuz that'll make you super mad.
  • Jute for hanging the ornaments
  • 20 yd. spool of 5/8" ribbon cut into about 12" lengths for the bow. ($3.99 per spool--but don't forget to use a 40% off coupon.)
I'll have to get a pic of her tree later this year.
I also gave her some red bead garland that I found at the Thrift store to use along with her white lights.
It'll be so fun to see it all done up.

Here is another way to do this same theme/idea.

Wednesday, March 27, 2013

Change

change: [cheynj] a transformation or modification; alteration

It has come time for some change here on the blog.  
After much consideration we have decided to split up or creative lives in order to more fully allow each of us to grow and evolve in the directions we want to go.  While all of our past projects will remain archived on this blog, Renae will be the sole contributor of new content here. Emily will now be posting over at her new blog simplegirlsimplelife.com. Leslie will continue to jump in every now and again on both blogs.  

We feel blessed to have had the opportunity to create and craft together for the past four years!  Thanks to all of you for following us along this path.  We hope you continue to support each of us as we embark on our new adventures.

Sincerely,
Renae
Emily
Leslie
(The Creative Chicks)
 

Monday, March 25, 2013

I Love Invisible Zippers

It has been a long time since I've sewn in a regular zipper on a dress that I've made for myself.  I absolutely adore good topstitching, but invisible (or concealed) zippers just seem to me to be so much more professional and polished on dresses.  And to be quite honest I do think they are easier to do than a regular zipper.

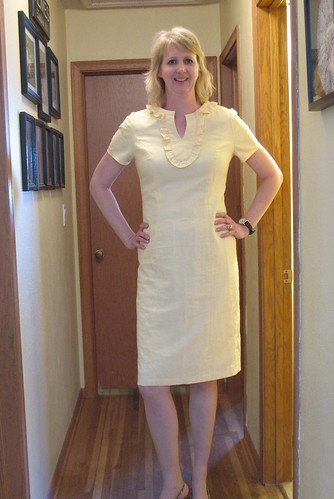
I've had this dress pattern for some time and finally got motivated to get it done.  I love the yellow version the most.

And hey, I made myself a yellow version,


I'll probably wear this for Easter this year, unless we are still too cold here in MN, which is highly possible with Easter being in March and we are still in the 30's around here.  Or maybe I'll just go ahead and to heck with the wintery weather.  We should just think positive, don't you think?

Notes on invisible zippers:
  • There are written instructions on the inside of the invisible zipper package to help you, but if you need an in depth tutorial you can search online and there are a number of really helpful videos that I saw.  You can also check here for good written instructions and pics.
  • An invisible zipper foot is great to use if you have one for your machine (see pic below).  This foot has a groove that keeps the zipper teeth to the side so that you can get a close seam.  Check your manual or online for parts to order one for your specific model.  When I bought mine a number of years ago (like 15) it was $5.99.  Now online it sells for $16.
  • You can put in an invisible zipper with a regular zipper foot, just not quite as easy as with a concealed zipper foot.  
Dress Details:
  • Butterick 5638
  • Pale yellow linen from the stash.  Leftovers from this dress project.
  • Added about 6 inches in length to the dress and then also moved the front slit up slightly.
  • Used the A/B cup version and didn't have to make any adjustments on the bust for me.  Yeah!!
  • Super comfy dress.

Saturday, March 23, 2013

Selling chairs

Hubby starts a new job next week.  It extends his commute quite a bit, especially since he's been working from home since August last year. ;)  Besides this new opportunity there will probably be some other changes going on here---like a move down the road.  But we'll have a HS senior in the Fall and that complicates things.

In the mean time, mentally I am doing some planning (and plotting) for a move.
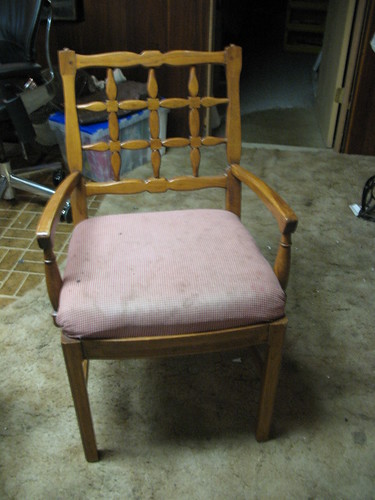
I sold a pair of these chairs on Friday via Craigslist for $20.

.
They may not look like much but hubby and I bought these originally in 1995 for $1.50 each at D.I. in Provo and they were painted some yuck color and had vinyl seats.  We stripped them down, stained them, and then reupholstered the cushions.  This current seat, which looks awful, is round 3 of cushions since we've had them.

They have served us well.  AND we made some money on them.  As a side note, we bought a couch from D.I. while at BYU for hubby's schooling and when we left we donated it back to them.
As much as I love the lattice back on these chairs....LOVE them....we just don't have room and I can't have them sitting around waiting for us to maybe have room.

The couple who bought them from us were thrilled, and daughter #1 almost started crying when they left the house. Have I mentioned before that my entire family is much more sentimental and has greater hoarder tendencies than I do?  I, however, feel relieved to do something, anything, to get the ball rolling.  It'll be an interesting process.  That last time we moved we had 1 kid and a futon.  Next time around will be much more exhausting.

Friday, March 22, 2013

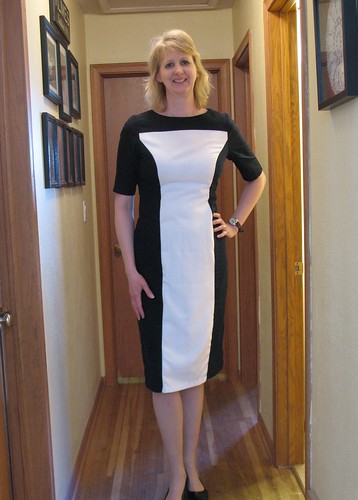
Stella McCartney Color-blocked Dress Knock-off

Although it is technically Spring, per the calendar, you sure wouldn't know it around these parts. On Wednesday, the first day of Spring, it was -5 degrees with windchill at the bus stop for my kids.  Ouch!  We are so done.

But because of such "lovely" weather I haven't really been able to take any pictures of Spring projects I've been working on.  Since I'm not sure when it will really warm up around here, and the drifts of snow at the end of my driveway melt away, I'll go ahead and post anyway.  Just excuse the not great pictures--I don't have fabulous lighting in my house.


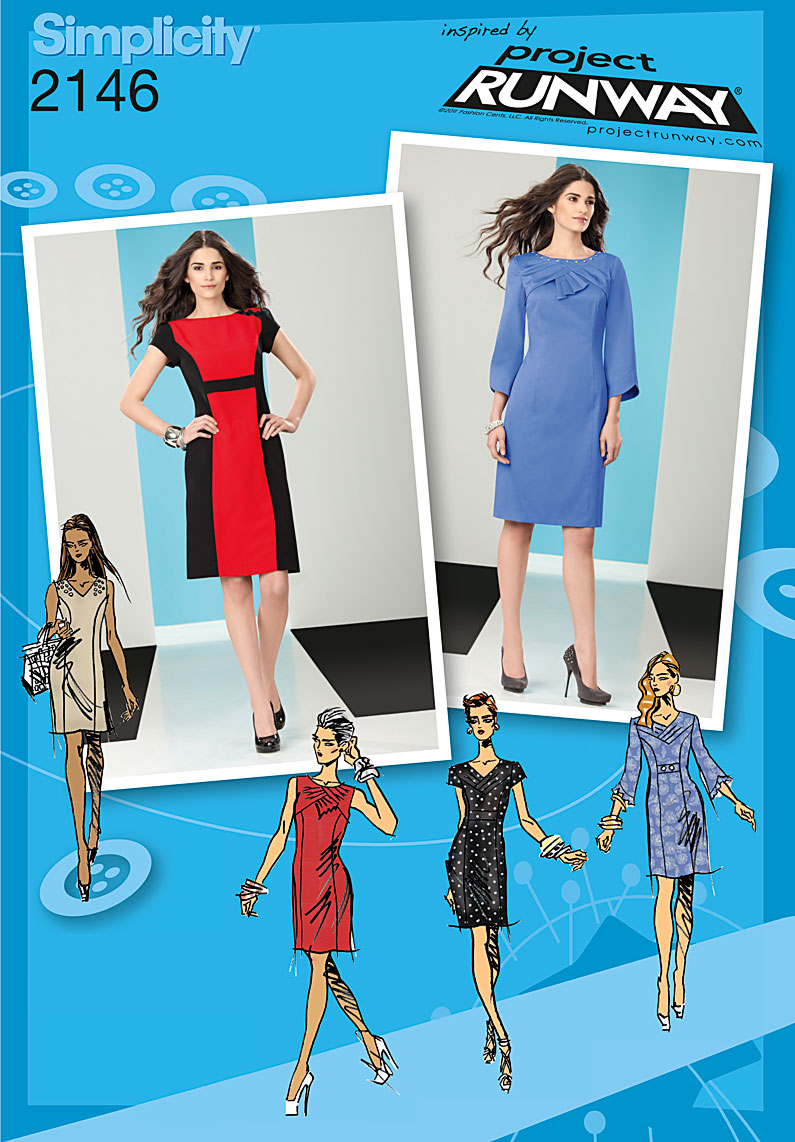
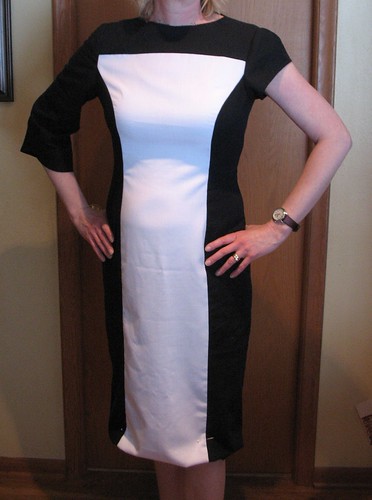
I've seen this dress on various celebrities and just love it.  It is color-blocked in front and one color in back with a zipper closure. But there is no way I would pay $795 for a t-shirt dress, which is basically what this dress is, even if I had the money to do so.  I knew I could duplicate this and I've been wanting to make a version of it all Fall and haven't got around to it, until now.  There are a number of patterns out there that you could use to duplicate this dress but I used the Project Runway pattern Simplicity 2146.


Originally hubby told me to make the sleeves exactly like the Stella dress--fitted short/elbow length.
I wasn't sure so I made the cap sleeve and 3/4 bell sleeve, exactly from the pattern, to make a determination.  See below.


Basted the sleeves in, asked my family to tell me which one they liked best, and the long version above won out.  (Judging the sleeves were me, daughters #1 and #2)


Then I basted in the sleeve my hubby preferred and it won out over the 3/4 sleeve.

Daughter #1 was all over the 3/4 sleeve.  That is her personal favorite but I when I asked her what looked better on me and not what she liked best the elbow sleeve won out.

Hubby loves it when he's right--'cuz as he said, "I called it first."
He was spot on with the sleeves once I tried them all on.

Final Version:


Details:
  • Simplicity 2146 cut & lengthened 8 inches.  Comes in petite and misses sizing.
  • Made the red/black version without the contrasting "belt" in front.
  • Altered sleeve using the bell shaped pattern piece and then shortened it and took it in at the underarm seam to look more fitted.
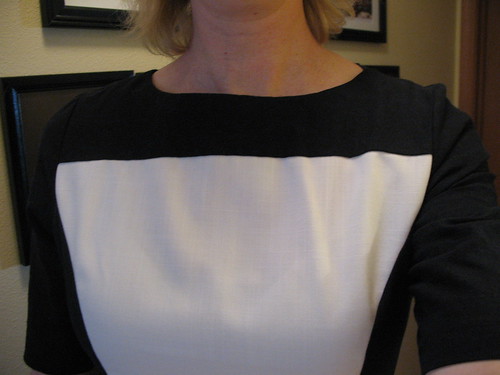
  • To make the contrasting band along the top neckline I just found the spot I liked, and cut the white piece adding 5/8" seam allowance.  Then did the same for the top navy piece--adding the 5/8" seam allowance.  Love how it looks!
  • Navy and white linen from my stash.  This pattern is not for knit fabrics although the original dress is made from spandex/knit.
  • Invisible zipper
  • Machine blind hem stitch used for both the dress hem and sleeve hem.  Because I am all about using my machine any time I can and avoid hand sewing.

Other pattern options: 
Simplicity 2648 
McCall's 6432 (out of print) if you prefer a raglan sleeve style.

Monday, March 18, 2013

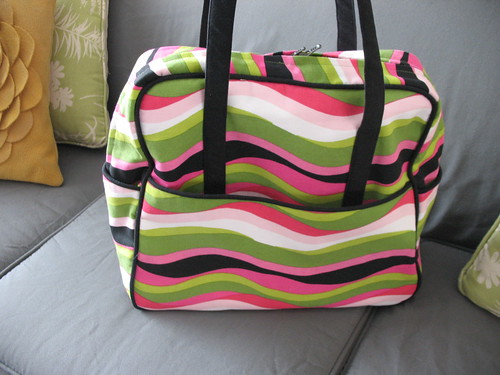
Amy Butler Weekender Bag

I've thought long and hard about this post, ...'cuz I'm not sure I should share my true feelings about this pattern.  Tiffany and I made this during our girls weekend in February and although we expected some issues,  and after making sure we had the 6 pages of corrections printed out so we wouldn't screw it up, and reading all sorts of blogs from others who have made this bag, I still think "Curse you Amy Butler!"

And I know how to sew.
I've made wedding dresses for crying out loud.
Yes dresses, more than one--3 actually.

O.K. now that that is out of the way I sure do love the way it turned out---a full weekend of sewing later, when I had planned on making a couple OTHER items too.

It should never have taken that long.

I blame Amy Butler.

Sorry, but I do.


This funky striped one is mine.


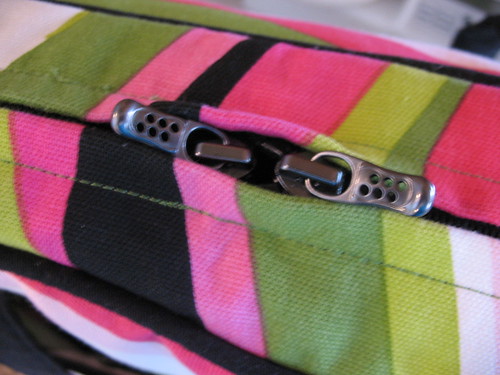
We made it with 2 zippers that meet on the top middle.  I really like it this way.


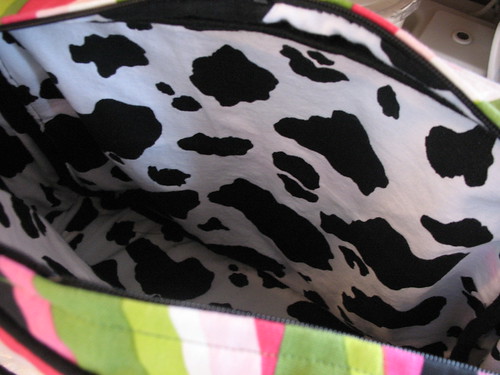
My equally funky lining.


This one was going to be for my daughters to share, but Emily wanted one too, so we worked out a trade.

Not sure I'll make another one, and I can't imagine why anyone would make these to sell on Etsy.  All the ones I've seen are pricey, but after making my own, I'm not sure that money is worth the trouble.

O.K. ...I'm really done now.

Thursday, March 7, 2013

Broken Chevron Quilt Finished

Remember this quilt top?  It is finally finished up and ready for its new home today.


I sent it to Lynn to get all fancied up and then finished off the binding when I ran away from home last month for our girls weekend.


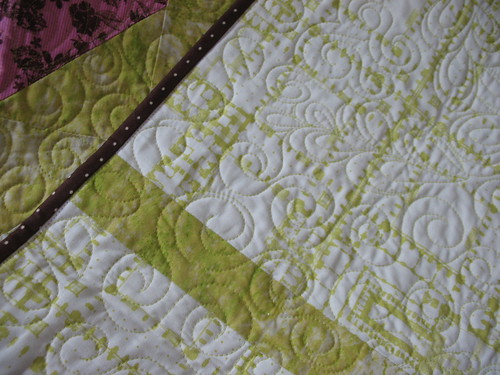
Found some great brown polka-dots for the binding.
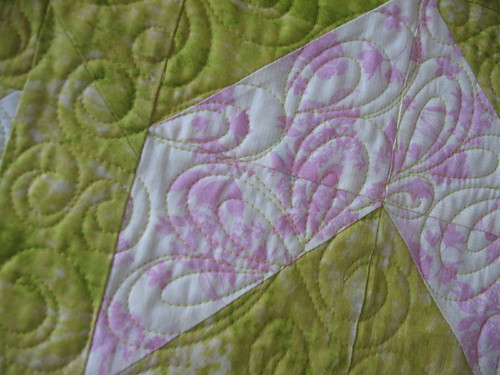
And the backing is a piece of some lovely designer print that I found on clearance at my fabric store.
Emily knew who it was right away just by looking at the fabric.
I can't remember who it was and don't have a selvage to get the info.
If you really need to know she could tell you.
I just am not into that and buy what I like--designer or not.


Back view.

I had intended to make and give my friend Andrea something awesome last year for her birthday.
It didn't happen.
So Happy 1 yr. Anniversary of your 40th Birthday Andrea!
I'll see you at lunch today.

Finished measurements:  58 inches wide by 75 inches long

LinkWithin

Related Posts Plugin for WordPress, Blogger...