Showing posts with label Scraps. Show all posts

Wednesday, April 26, 2017

Scrappy Rectangles #2 Completed


Details:
And yes, crazy me, I've started the next round of blocks for version #3. 

If interested in purchasing this quilt you can find it in my Etsy shop.

Friday, February 24, 2017

Spool Quilt for my Birthday

This weekend is our annual Sewfest Weekend in St. George.
For various reason I am not there this year.
Mostly I'm O.K. with it.
I am planning on sewing as much as I can here at home while my sisters and cousin
are doing their thing.  I'll post some of my finishes later.

Until then I'll show you what my sisters, Emily and Leslie (and a few of their buddies)
did for me last Fall for my 50th birthday. 

I have to say I was super surprised.  Not that my gift was a quilt, but that it was this quilt.  I knew Emily was working on it but I didn't have a clue that it was coming to me.

I LOVE it!! 


The two different fabrics that make up the backing.

The fun quilt label.

And Awesome binding.


THANKS!!

Wednesday, June 15, 2016

Scrappy Rectangles Quilt Version #2

I hadn't necessarily meant to make another one of this quilt pattern.  However, daughter #2 has overtaken the first one and uses it on her bed constantly.  She loves it--mainly for how large it is.  I assume that when she leaves home this is one of the quilts that she will take with her.

So as I was trying to clean out and purge part of my sewing room, fabric, and materials, I decided to start another one of these.  And it just went from there.  I'm kinda hooked on this pattern design. Normally I'm not a big fan of putzing around with small pieces, etc. but this one is good.  And really this is probably as small as I will go on cutting pieces (2 x 3 1/2) for a quilt.  I'm no CrazyMomQuilts when it comes to scrappy quilting.


This is how I start it off.  Put all the pieces in a bucket.  Then start sewing.  Then add more pieces, keep sewing.  Repeat until you have 90 blocks.


Almost completed blocks.


Finished top overtaking my basement.

So move it outside and have 2 kids help hold it for pictures.


Details:
  • See post on Version #1 for quilt pattern info.
  • This is a good quilt pattern for "ugly" fabric.  Cutting it down small enough makes it appear lovely.

Monday, June 13, 2016

Modern Improv Solids #2


The second modern improv solids quilt top in progress above.

Can I just say, once again, that I always think scrappy quilts will use up more fabric than they actually do?  Even after finishing this one I still have MORE solids I could do another top.  Not sure that will actually happen, but seriously, it is hard to purge when you know that you could get another quilt top out of those scraps.

And here it is completed--well at least the top.


Here you can get a little bit of the scale of some of the sections.

I have a pile of quilts to send out to be quilted, this being #4 now I think.  However, I need to save my pennies to get them quilted. So for now I'll just hang onto this until I sell a child (kidding) or someone I don't really know dies and leaves me all their money (completely unrealistic). 

As Leslie says, "The struggle is real." 
Too much creativity floating around in my head and not enough money to fulfill it all.

I think I know what I am going to do with some of the rest of my solids scraps--black, grays, yellows, white and red.  Equilateral triangles scattered about something like this pin.

Details:

Monday, April 11, 2016

Modern Solids Improv Quilt #1


This was an exercise in doing something out of your comfort zone.

I had a bunch of scraps left over from three different solids quilts that I had made and didn't feel like throwing them out or giving them away.  So I thought I would try my hand at some modern solid improv and this is what I ended up with.


Details:
  • Quilted by Lynn Peterson
  • Solids from the Omaha quilt, son #1 quilt, and son #2 quilt.
  • Some Kona cottons and then an assortment of scraps from wherever.
  • 6 inch white border (I wanted it bigger than it was)
  • Backing used a Ralph Lauren chambray sheet.
  • Binding is a combo from the scrappy solids also.
  • Finished dimensions: 56 inches by 69 inches.  The inner improv piece without the border is 45 x 57--definitely not big enough for our tall crew.

Wednesday, March 30, 2016

Blue HSTs quilt

Here is a quilt that I had sent onto Lynn beforehand to get quilted so that while I was at the sewing retreat with my sisters and cousin down in St. George in February I could get the binding sewn on.  I actually had 3 quilts to bind while I was there.  This is the first one to show.


Scrappy HSTs from my stash.


Backing from 2 scrap pieces: chambray striped ticking and a navy print.


Close-up of the quilting.


Debating on selling this one.  Square quilts aren't my favorite, probably because we are all tall around here and we need them long to actually use them.  So....this one may go.


Details:
  • Started with 6 inch squares that were then cut on diagonal. The squares then finished at 5 inches each.
  • Previous post here including quilt pattern design info.
  • Yellow print for binding found in my stash
  • Backing also from my stash.
  • Finished size: approx. 63 inches square.

Tuesday, July 28, 2015

Quilt in progress

I don't need any other projects right now, but I started another one anyway.
My youngest daughter started a scrappy quilt project and since I had a TON of blues we are now both using those scraps right now.


This is on pause for a couple weeks while I take care of some other things....like go retrieve our daughter from college.  It'll probably have to be 'til school starts up again before I get back to this.  There really are other projects that need more attention than this one.


Details:
  • Based on the pattern "Rainbow Stash Buster" from Modern Quilts from the Blogging Universe, pg. 60-63
  • As of now if I even out the sides it will measure 62 inches square.  I cut 6 inch squares instead of 5 1/2 inch squares like the pattern indicates.  I am going to add at least one more row all the way around to make it larger for us tall folk.

Monday, July 20, 2015

My version of the Up, Up, and Away quilt

I've been working on this quilt this year. 
I got it back from the quilter in June, but just haven't posted about it yet.

This uses corner scraps attached to 3" triangles.


Close-up of quilting.


Back of quilt
Not my favorite backing ever, but it'll work.
I was trying to clean out some of my fabric stash.

Details:

Monday, November 17, 2014

Quilts in Progress


I have started a "Solids" quilt.  I'm not sure I am going to have enough scraps to complete an entire quilt.  At least one large enough to cover a grown person.  We'll have to see.  I am working an a quilt for my youngest son and once that is complete I will have some more scraps to add to it.  I have an idea what route this quilt might take, but it won't be for awhile.

The other quilt I have started is the "Up, Up and Away" quilt from Sunday Morning Quilts, pg. 132-137. This is the one that uses all your triangle ends.


I am using 3" squares instead of 2 1/2" squares so my quilt should end up a little larger than Amanda Jean's.  We'll see how many scraps I really have.  I have 54 blocks assembled above in the pic and you need 589.  That means I'm about a tenth of the way there.  Right now I am cutting out white squares and sewing more triangles to them before I do any more assembly.

This will be the 4th quilt pattern that I've made from this book.  And I have one more in mind in the blues category that I haven't yet started. Most of the fabric for this idea is packed away.  So I'll just have to let it mull over and keep working on my other projects.

Sunday Morning Quilts that I've done.
#1 Splash Pattern
#2 Candy Coated Pattern
#3 Checkerboard Pattern

Monday, July 28, 2014

Wonky Roman Stripes

Here is another stress-induced sewing finish.
Started these blocks last Fall or so and during last week with mounting stress I finished them up.


It won't get a back anytime soon however, because I know I have some fabric that will work, but it is packed and somewhere way back in the storage pod.  After the move....Lynn may end up with a pile from me to quilt.

Details:

  • Inspiration from Block Party: The Modern Quilting Bee, Wonky Roman Stripe, pg. 50-56.
  • Cut 14 1/2 inch blocks instead of 15 1/2 (because I screwed up one block--bummer)
  • Did a 4 by 5 block configuration instead of 6 by 6 per the book instructions.
  • Will probably add a border because I'd like it a little bigger, but I ran out of a couple of the scrapsand so couldn't make enough blocks.
  • Background pieces are 3 different shades of  blue/grey solids.

Friday, July 25, 2014

Improv Color Blocks

Stress release for me includes a good chunk of time down in my sewing room.
I've had some stress lately with all our house stuff going on and hadn't sewn for weeks, and possibly months.
Let's just say I needed to sew.

I had started some improv blocks last Fall sometime and went to town this past week to whip up some more.  Got all the blue ones completed and then did some green/orange combos.

I didn't have enough scraps to make enough of the green bunch so I decided to combine the two colors.
I laid out a design, found my Kona grey yardage and whipped out the quilt top.

It makes me happy.


Details:
  • Inspiration idea from Modern Quilts from the Blogging Universe, Improv Color Blocks, pg. 70-77.
  • Her quilt pic here at FromTheBlueChair.
  • Made 12 improv blocks.
  • Blocks cut to 16 x 18 inches.
  • Cut 4 grey blocks to size.
  • Used Kona grey as the background fabric. (can't remember which one exactly, but it is light grey)
  • 4 by 4 block configuration.  
  • Added 4 inch strips on each side and 8 inch strips across the top and bottom to make the quilt larger.

Thursday, July 3, 2014

Trio of Grad Quilts from Emily

Last week we had our family reunion and while we were there Emily gave the 3 graduating nieces their quilts she had made for them--my oldest daughter being one of them.

They are all the same pattern and design, just with different color schemes.


#1--Tiffany Blue for Miss H. who's heading off to BYU-Idaho


#2--Black and White and Pink for Miss M. who is heading to U of Nebraska Lincoln.


Back and binding

#3--Scrappy for Miss L. who is heading to BYU in Provo.


Floral back and binding


They were each pretty happy with their gift, as you can see.

Each one was quilted differently and includes their name quilted somewhere in the sashing portion---so no one else can claim the quilt for themselves.

Friday, December 27, 2013

Scrappy Hexagon Finish

Merry Christmas to my MIL Carla!
I had to wait a day or two before posting so there wouldn't be a slip up on the surprise.


Bound in a fun yellow print (not the same as the yellow hexagon) but hard to see that it is a print in this pic.


Fun swirly machine quilting from Lynn. Look closely at the navy hexagon.  She did that in each block.
Back is entirely from that blue/yellow floral.
And Carla, if for whatever reason you don't like the quilt, L. says she'll happily take it from you.
She was a tad disappointed that it wasn't coming to her.

I forgot to take measurements before sending it off to Idaho, but that is my 6 footer daughter holding it up with only her feet peeking out.

Here is the beginning of this quilt.

Tuesday, November 19, 2013

Starting class quilts again

This is my year again for class quilts.  I try and do them every other year, as doing them every year would probably put me over the edge. And I just don't want to do it every year either.  Plain and simple.

My youngest daughter is a 5th grader this year, last yr. of elementary school, so she was begging me to do this with her class.

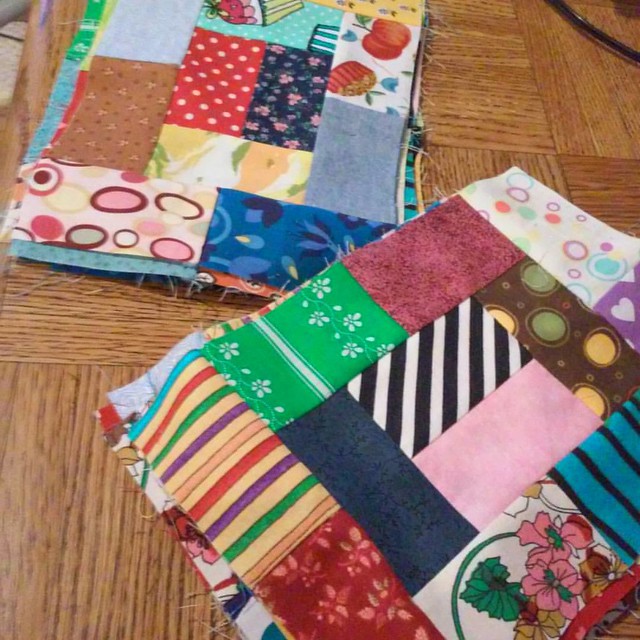
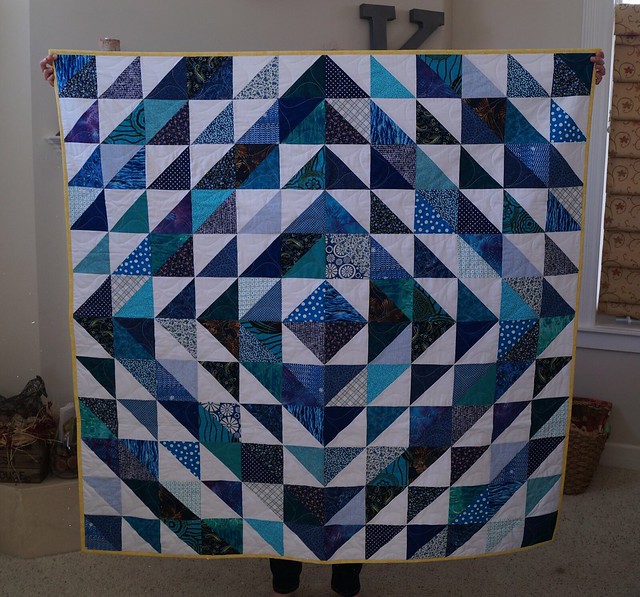
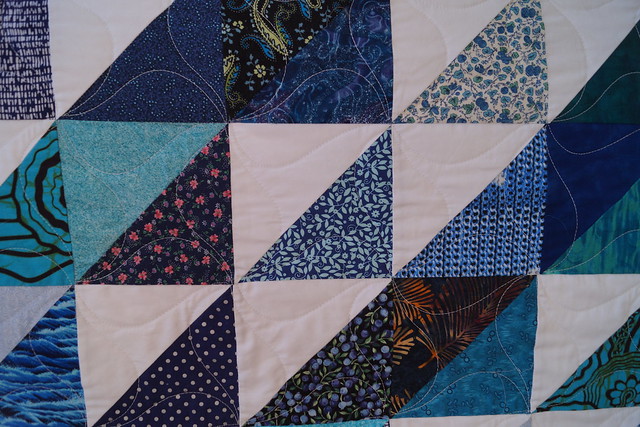
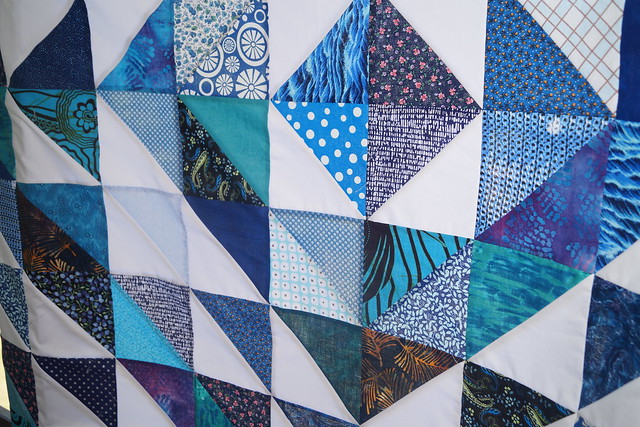
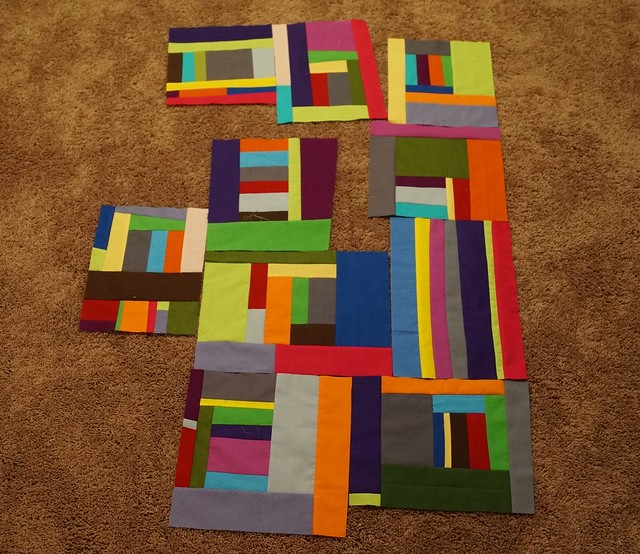
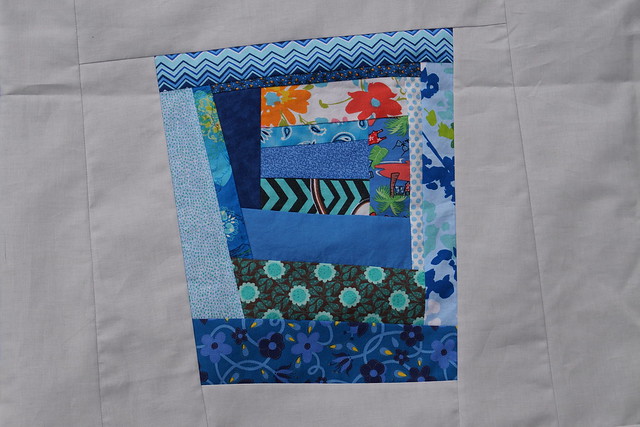
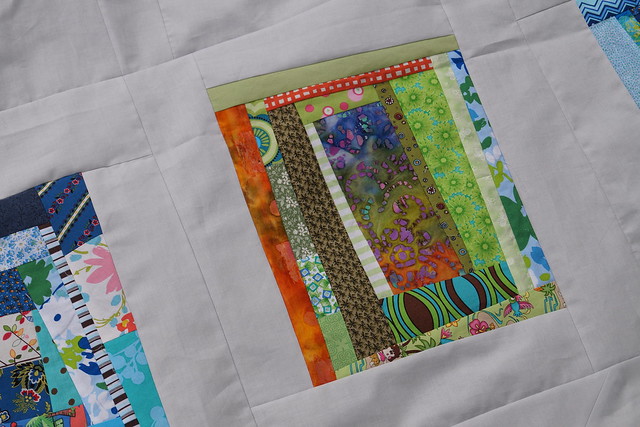
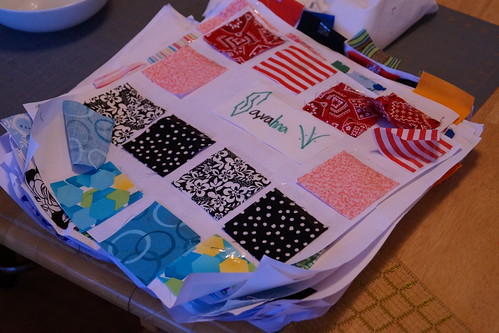
I picked a little different block design than I've done in the past.  I felt the need to change it up a bit even though I am still trying to use my scraps. (I swear that they just don't end)  I really like how it worked out. Below are a couple sample designs that I made and took with me to show the kids what they might do.


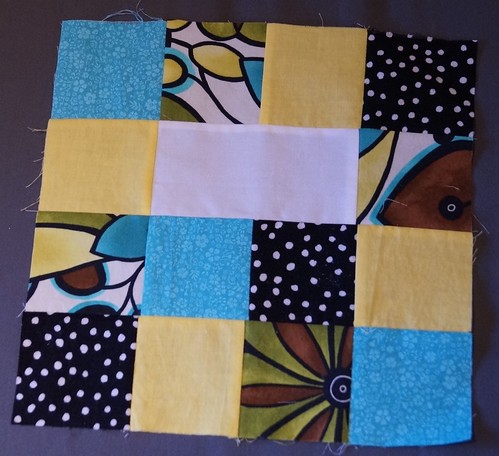
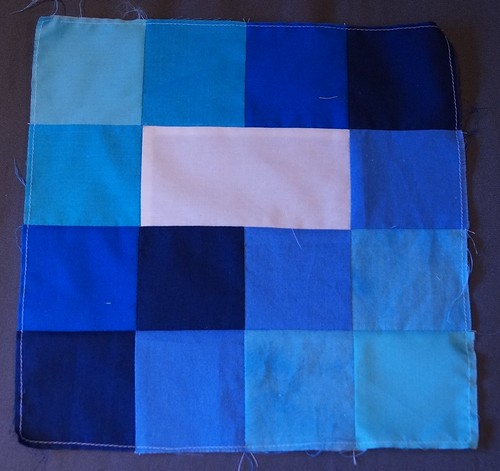
Cut 3 inch squares placed in a 4 by 4 design.
White piece for their name is 5 1/2 by 3

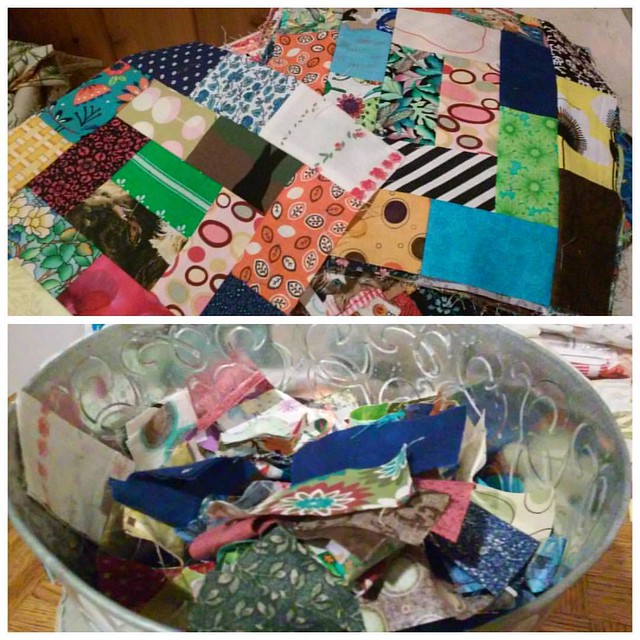
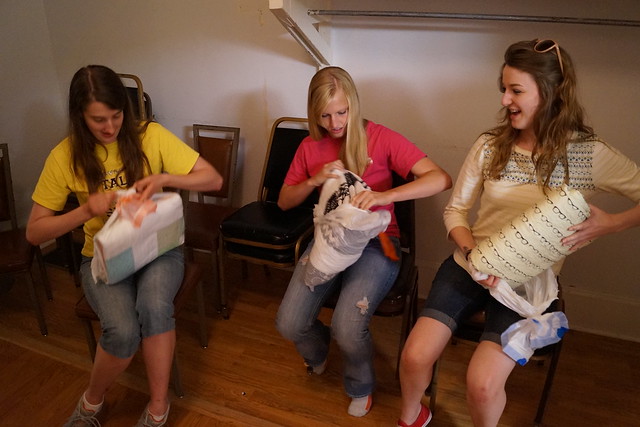
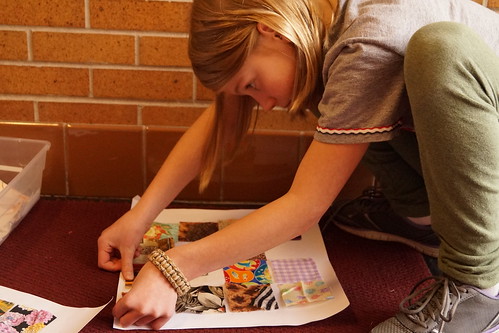
Yesterday I went and set up the station and then had the kids rotate through.  As usual some of the boys were a little more obnoxious than others.  Typical for 10 yr. olds.  We survived, made a mess in the foyer outside their classroom, and now onto sewing the blocks together.


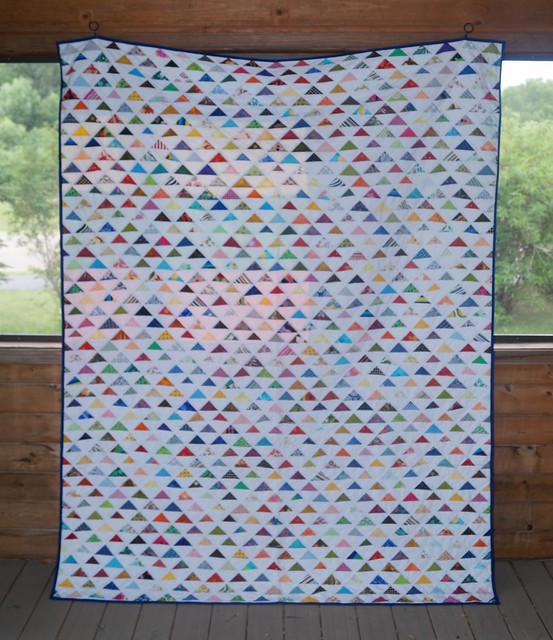
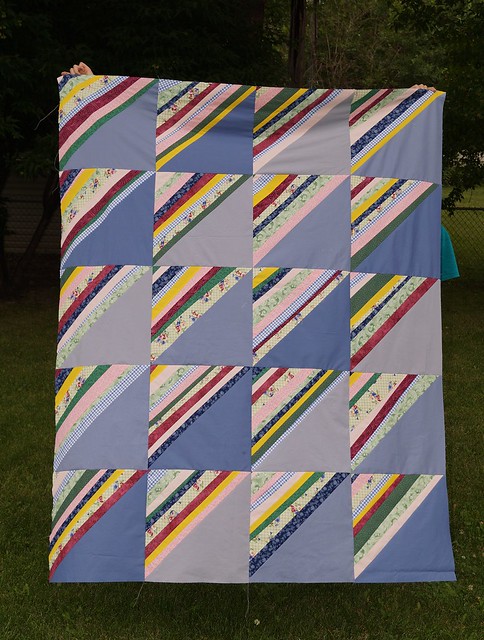
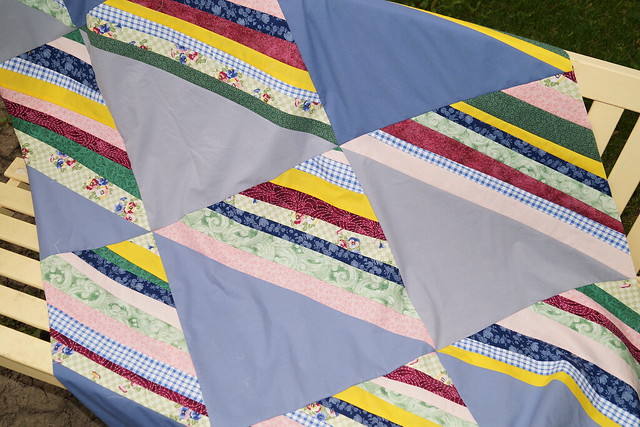
I had already visited my son's second grade class back in October and their blocks are complete.  I am in the process of putting those all into a quilt top.


Since I don't have to actually have these 2 quilts completed until February I am doing well.  My goal is to complete them by the time that school starts up again after Winter/Christmas break.  Because I know that I will want to be doing something else by then.

Note:
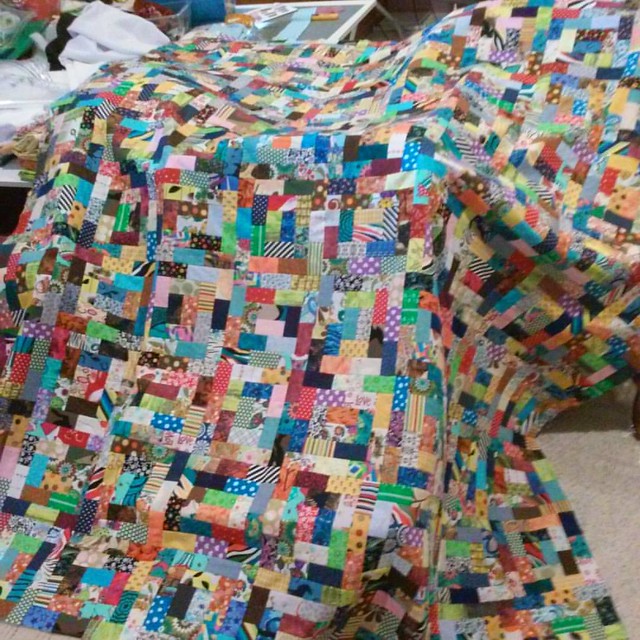
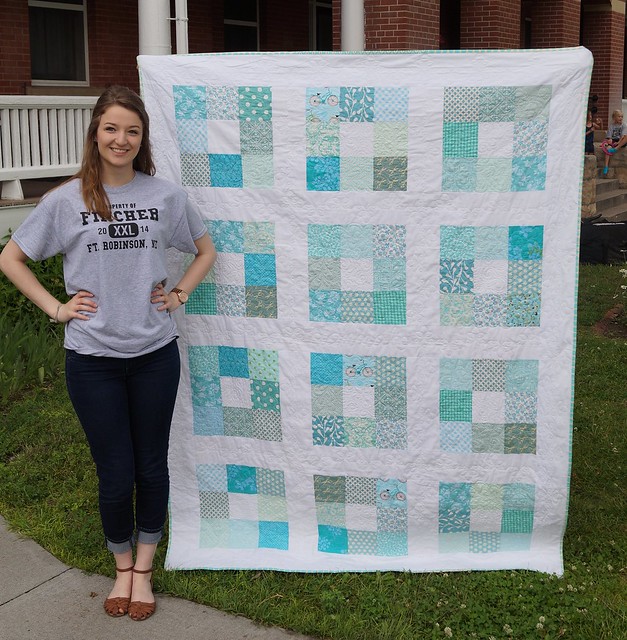
Put your kids to work.
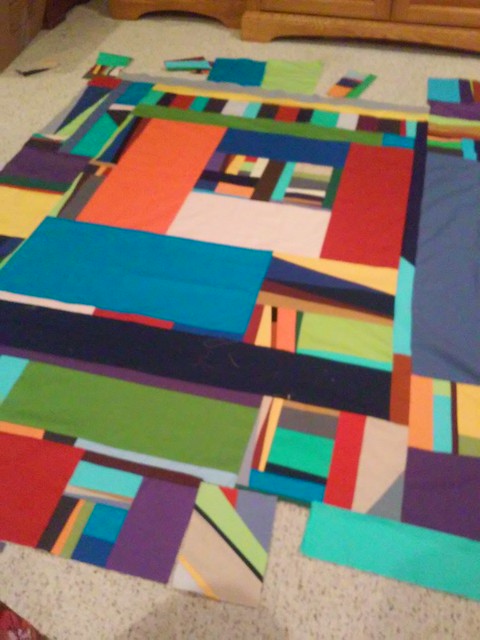
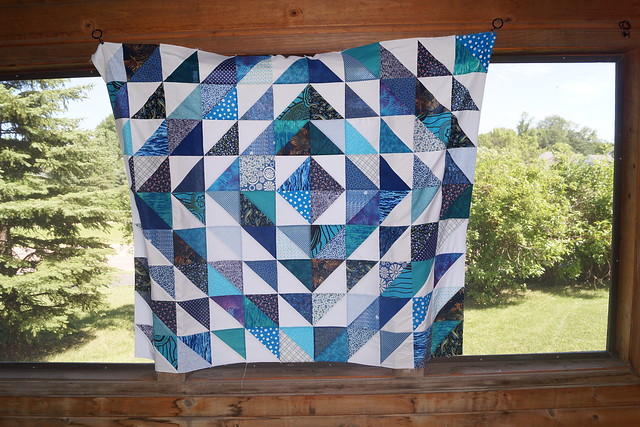
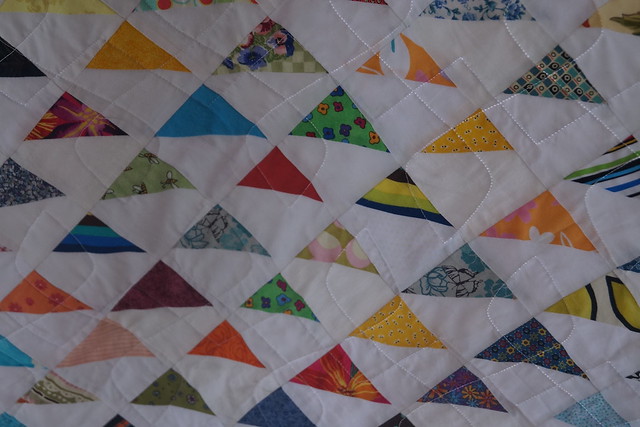
My kids love helping do the layout part.
We spread the blocks all out on the floor and then they move and arrange them to how they think looks good.  Even the bigger kids give their 2 cents worth to the layout.

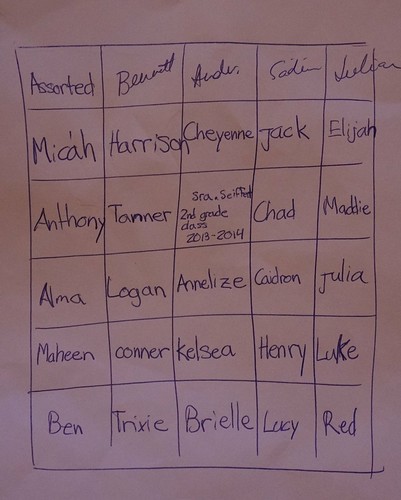
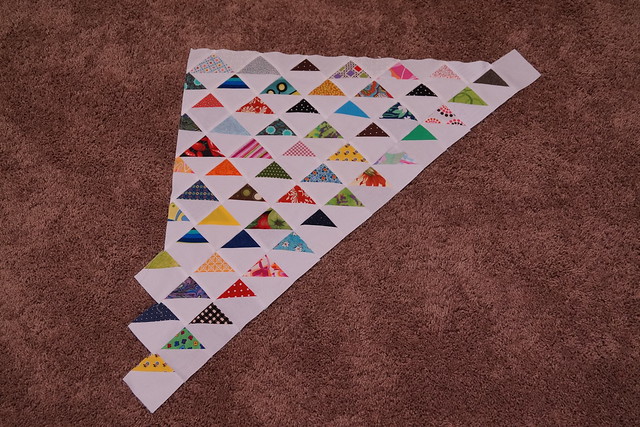
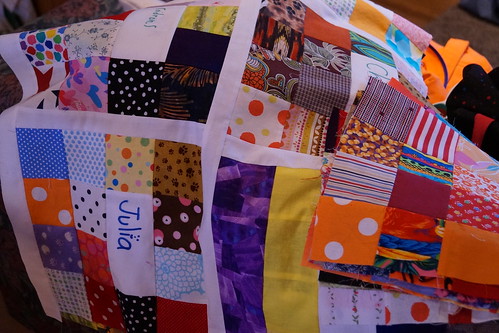
This is my daughter's note for the 2nd grade quilt once the layout was in place.
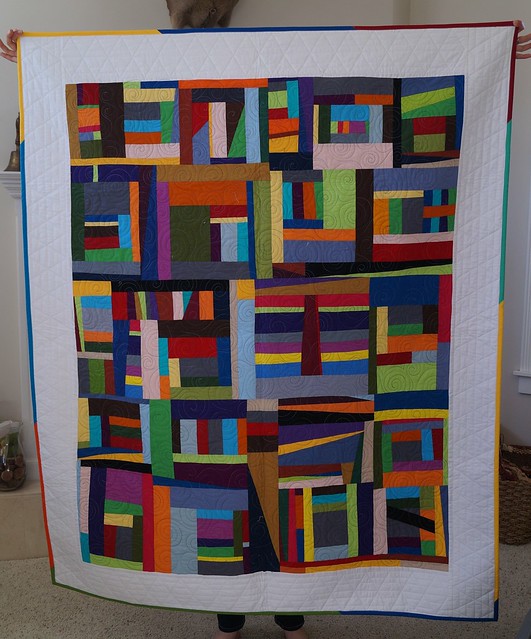
27 kids' blocks
One block for the teacher's name, class and year
2 blocks for opposing corners with all assorted squares--no name block.
5 x 6 configuration.

LinkWithin

Related Posts Plugin for WordPress, Blogger...