Wednesday, November 26, 2014

Names of Christ Ornaments

Last year I made ornaments for my Mom's "Christ"-mas tree which she loved.  I made a couple for me too, but I still need some more before I do a complete Christ centered theme tree.

I had also made some wooden plaque ornaments of Christ's names that apparently I never posted about. Just recently I made another set (28 total) that will eventually be gifted out.


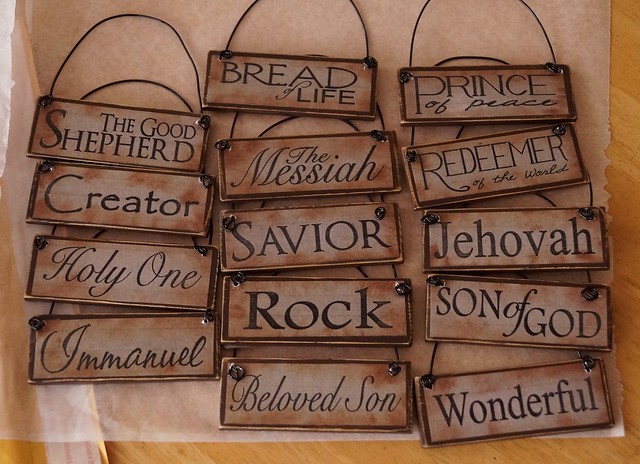
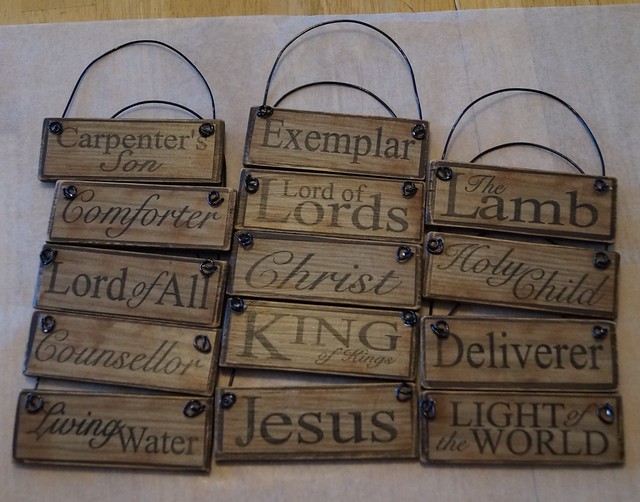
I "distressed" the edges a bit just by using some brown ink and a cottonball to smudge on the edges of the papers before I did the Mod Podge.  I really am happy with the wood grain paper I found in the scrapbook section at Michael's.

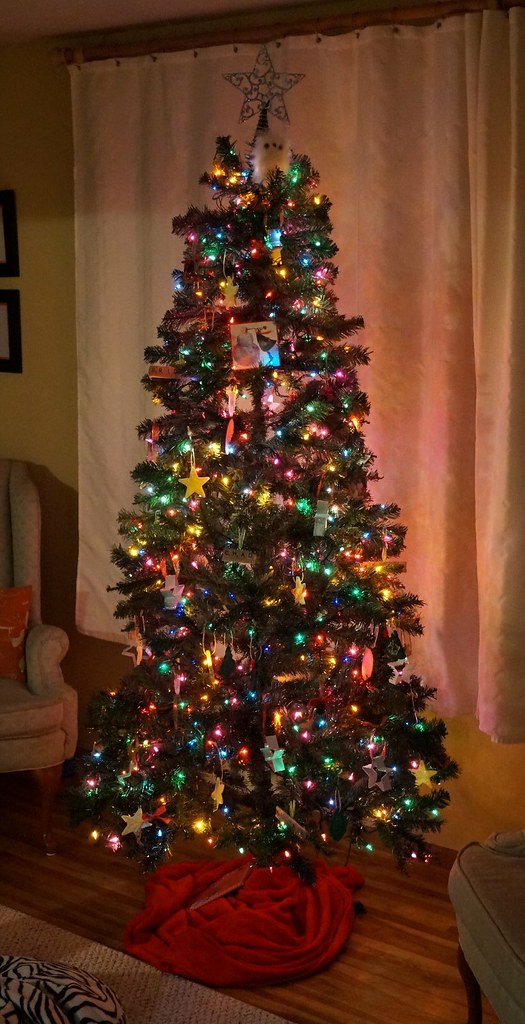
In the meantime I've also added some ornaments for my own Christ themed tree.
Besides the Names of Christ plaques I made this year attributes of Christ wooden plaque ornaments.


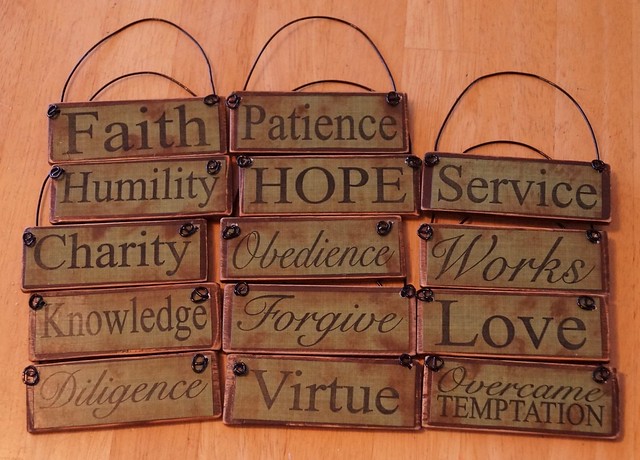
I added them to our tree this year.
I don't really have a theme going on this year, but felt that I could use the reminders myself of trying to be more Christ-like.


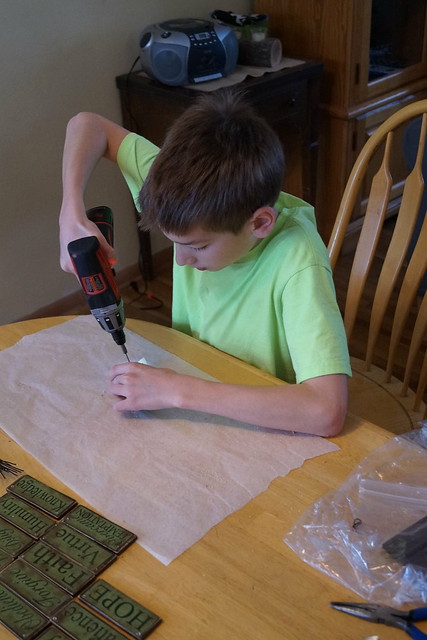
Here's my crafting helper re-drilling out the holes after the Mod Podge.


Details:
  • Original idea from HERE. Scroll way to the bottom of the link for the Names of Christ pdf.
  • Used 5/64 drill bit for the holes in the wood.
  • Darice Black Aluminum 14 gauge wire (or could use 16 gauge).  I bought mine at Jo-Ann's and one roll of  3 yds. allowed me to cut 14 - 9" lengths.  If you didn't want black wire you can find cheaper wire at any home improvement store.
  • I bought my 5 gallon paint sticks at Wal-Mart $.37/ea.  The freebie ones at Home Deport were too narrow for the printout.  You can get 4 plaques from each stick.
  • Matte finish Mod Podge--2 coats on the front only
  • Scrapbook paper in whatever color and style to you prefer.  I did copy some onto a bit more busy looking paper and I felt it distracted from the words and names.

Monday, November 24, 2014

Getting into the Holiday spirit

We put up our tree last week.
We needed it.
It was feeling drab and down in our house.

The theme of our tree this year is "hodge podge".
Whatever boxes of Christmas items we could easily find in the POD and whatever I could find at the Thrift store or dollar store is what we used to decorate.  The kids even made some cookie cutter ornaments to hang on the tree.


I want to go buy some more of those cute snowy owls to have for the future.

This tree was my great Friday Find of last week.
Since our tree is waaaaayy in the back of our POD I decided to find another one to avoid the couple hours of unloading, finding, and then reloading in order to get it.  No thank you.  We already did that one Saturday looking for Winter coats.

As luck would have it, I found this tree at the thrift store.  Brand new, still had the assembly tags on it and no price.  The store priced it for me at $12.99 and with it being their 25% off day it came to $9.74.  Woohoo!!  My kids were kind of hoping for a real tree this year, but honestly we do not have much space in our current living room and live trees are wide at the base.  And turns out they are more expensive than this tree.

The other change I made was to add this:


My lighted JOY marquee I made last week at a Home Depot Do-it-Herself Workshop. It is an Ana White design plan and we completed it all that night.  The kids thought it was TOTALLY  COOL when I brought it home, especially when I showed them that the lights have 3 different lighting modes.  I am so glad that I went--invited a couple friends to go with me too.  Home Depot does this the 3rd Tuesday of every month so check your local store for their projects.

The garland swag above the sign is made from the weeds I picked a number of weeks ago that had been sitting on the piano in a vase.  I just split them in half and then duct taped them in the middle and wrapped a pretty burlap ribbon around them.  It hangs from a little 3M hook placed above the marquee.  It gives the sign something a little extra.  Without it the marquee seemed a bit boring.

Once Thanksgiving is over I will adjust the vignette on the piano and add some nativities.  At least I hope that I can find some easily in my packed up life.

Monday, November 17, 2014

Quilts in Progress


I have started a "Solids" quilt.  I'm not sure I am going to have enough scraps to complete an entire quilt.  At least one large enough to cover a grown person.  We'll have to see.  I am working an a quilt for my youngest son and once that is complete I will have some more scraps to add to it.  I have an idea what route this quilt might take, but it won't be for awhile.

The other quilt I have started is the "Up, Up and Away" quilt from Sunday Morning Quilts, pg. 132-137. This is the one that uses all your triangle ends.


I am using 3" squares instead of 2 1/2" squares so my quilt should end up a little larger than Amanda Jean's.  We'll see how many scraps I really have.  I have 54 blocks assembled above in the pic and you need 589.  That means I'm about a tenth of the way there.  Right now I am cutting out white squares and sewing more triangles to them before I do any more assembly.

This will be the 4th quilt pattern that I've made from this book.  And I have one more in mind in the blues category that I haven't yet started. Most of the fabric for this idea is packed away.  So I'll just have to let it mull over and keep working on my other projects.

Sunday Morning Quilts that I've done.
#1 Splash Pattern
#2 Candy Coated Pattern
#3 Checkerboard Pattern

Friday, November 14, 2014

Friday Finds

Found this gem at my thrift store.  I'm sure it is a corner piece for a sectional couch, but I like it just as a chair. ($11)  It is super comfy and other than smelling a bit like cigarettes, it'll work great.


I had it sitting out all day the day I got it and sprayed it with Febreeze to see if that would help.  It may need another time or two of airing out as well as Febreezing.  The plan is to make a slipcover for it and redo the 2 cushions.


When the middle school kids came home from school they were happy to try it out and use it as a homework space.  They also told me that they would happily have it in their room.


Nice try.
This will either go in the LR or in the master BR when we get a new house.


Our lovely neighbors Carol and Doug gave us a meat slicer, still with the box, that they've probably used twice--for both HS graduations of their children.  At least one of their kids is now a grandfather.  It has been a long time.

I think they figured Hubby could use it for the next time he gets a deer.  We do already have a meat grinder, we make our own venison hamburger, but we didn't have a slicer.  We'll just add this to our other food storage equipment.


Found this spiky-ish Fall wreath at the Thrift Store that I decided I liked.  Took off the gold ribbon/bow and have hung it by my front door.  (My other Fall wreaths are packed somewhere).


Wednesday, November 12, 2014

Braided Cable Scarf

Winter has come to Minnesota.
We received 6 inches of snow on Monday and we are in the 20's for the next 2 weeks for sure.
That means we need to break out all the winter gear, including the scarves, or maybe especially the scarves.

I like knitting with chunky yarns.
Your project comes together so much quicker.
And as one of my teenage daughters said, "Chunky is in."
Thank you, I'll take that as a compliment.


CO 28 stitches with size US 13 needles.
RS: K1, p1, K1, p2 then follow the 18 stitches on the chart as row number indicates (even rows 1-12), p2, k1, p1, k1.
On every WS (odd row) pattern is as follows: K1, p1, k3, p18, k3, p1, k1.

Details:
  • Finished dimensions: 6 1/2 inches wide by 68 inches long. (Don't forget to block the scarf)
  • 2 skeins Lion Brand Wool-Ease Chunky in Pumpkin (bought on clearance somewhere).
  • Pattern inspiration found here.  The pattern is in Russian but there is a chart to use also.
  • Knitted 20 repeats for the infinity scarf.
  • Size 13 needles

LinkWithin

Related Posts Plugin for WordPress, Blogger...