Showing posts with label Holiday. Show all posts

Wednesday, October 22, 2014

Despicable Me costumes

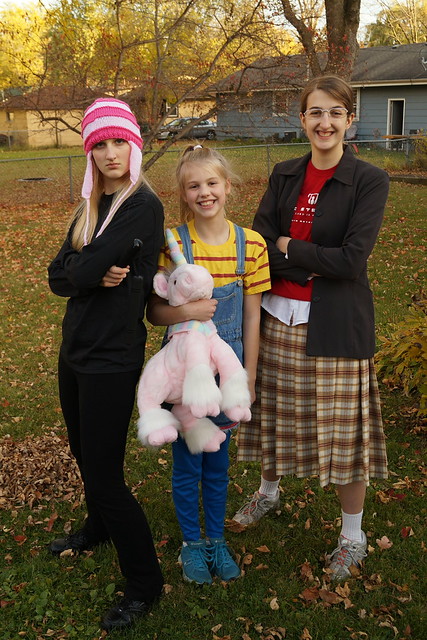
This year my girls wanted to do a group costume and this is what they came up with.

Meet Gru's girls.


Edith, Agnes, and Margo from Despicable Me

Love how it all came together.


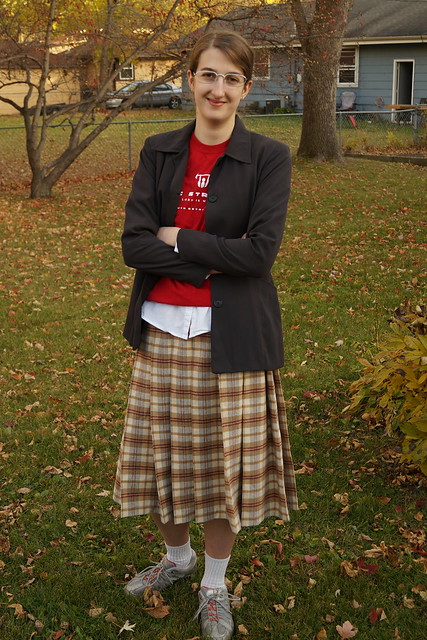
Margo
Plaid skirt--we made this.
Thrifted jacket and white shirt
Add a graphic tee over top--she already had this
Bought dollar store wire frame readers and popped the lenses out.
Tennis shoes and socks
Hair back in a low ponytail.


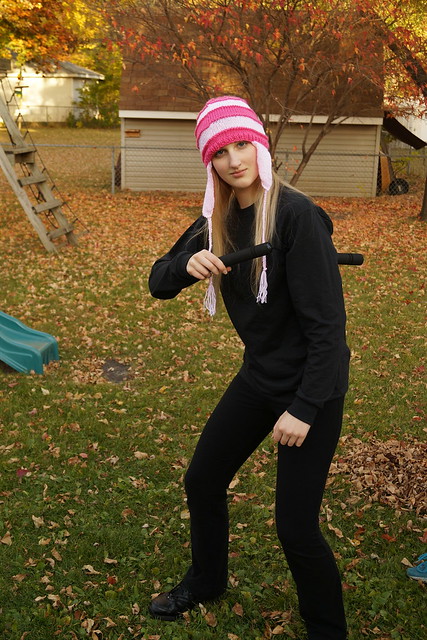
Edith
We went with the Ninja version for ease of costuming
Black t-shirt and pants.
Nunchucks ($1 at the dollar store)
Pink striped stocking cap--knitted this up, winging it as we went but turned out great. Based on this pattern.
If you didn't have long blonde hair like my daughter you could easily throw a blonde wig on under the hat.


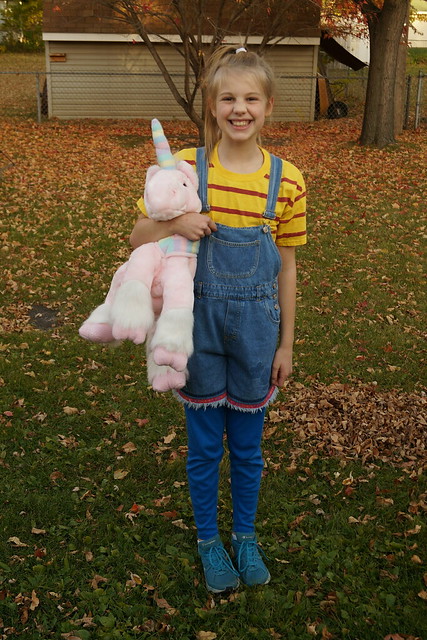
Agnes
The unicorn is what makes it.
We found ours amazingly enough at the thrift store for $3.
Short overalls also thrift store purchase.
Yellow t-shirt w/ red stripes.  Made ours by painting the stripes onto a Michael's bought tee.
Ponytail on top of your head.  Later on we sprayed her hair black, but it wasn't for this picture.

Happy Halloween everyone!

Monday, April 21, 2014

Dress Week---Easter Dress for the youngest

This year's Easter dress for my youngest daughter is bright and happy.
She is currently going thru a green and blue phase.
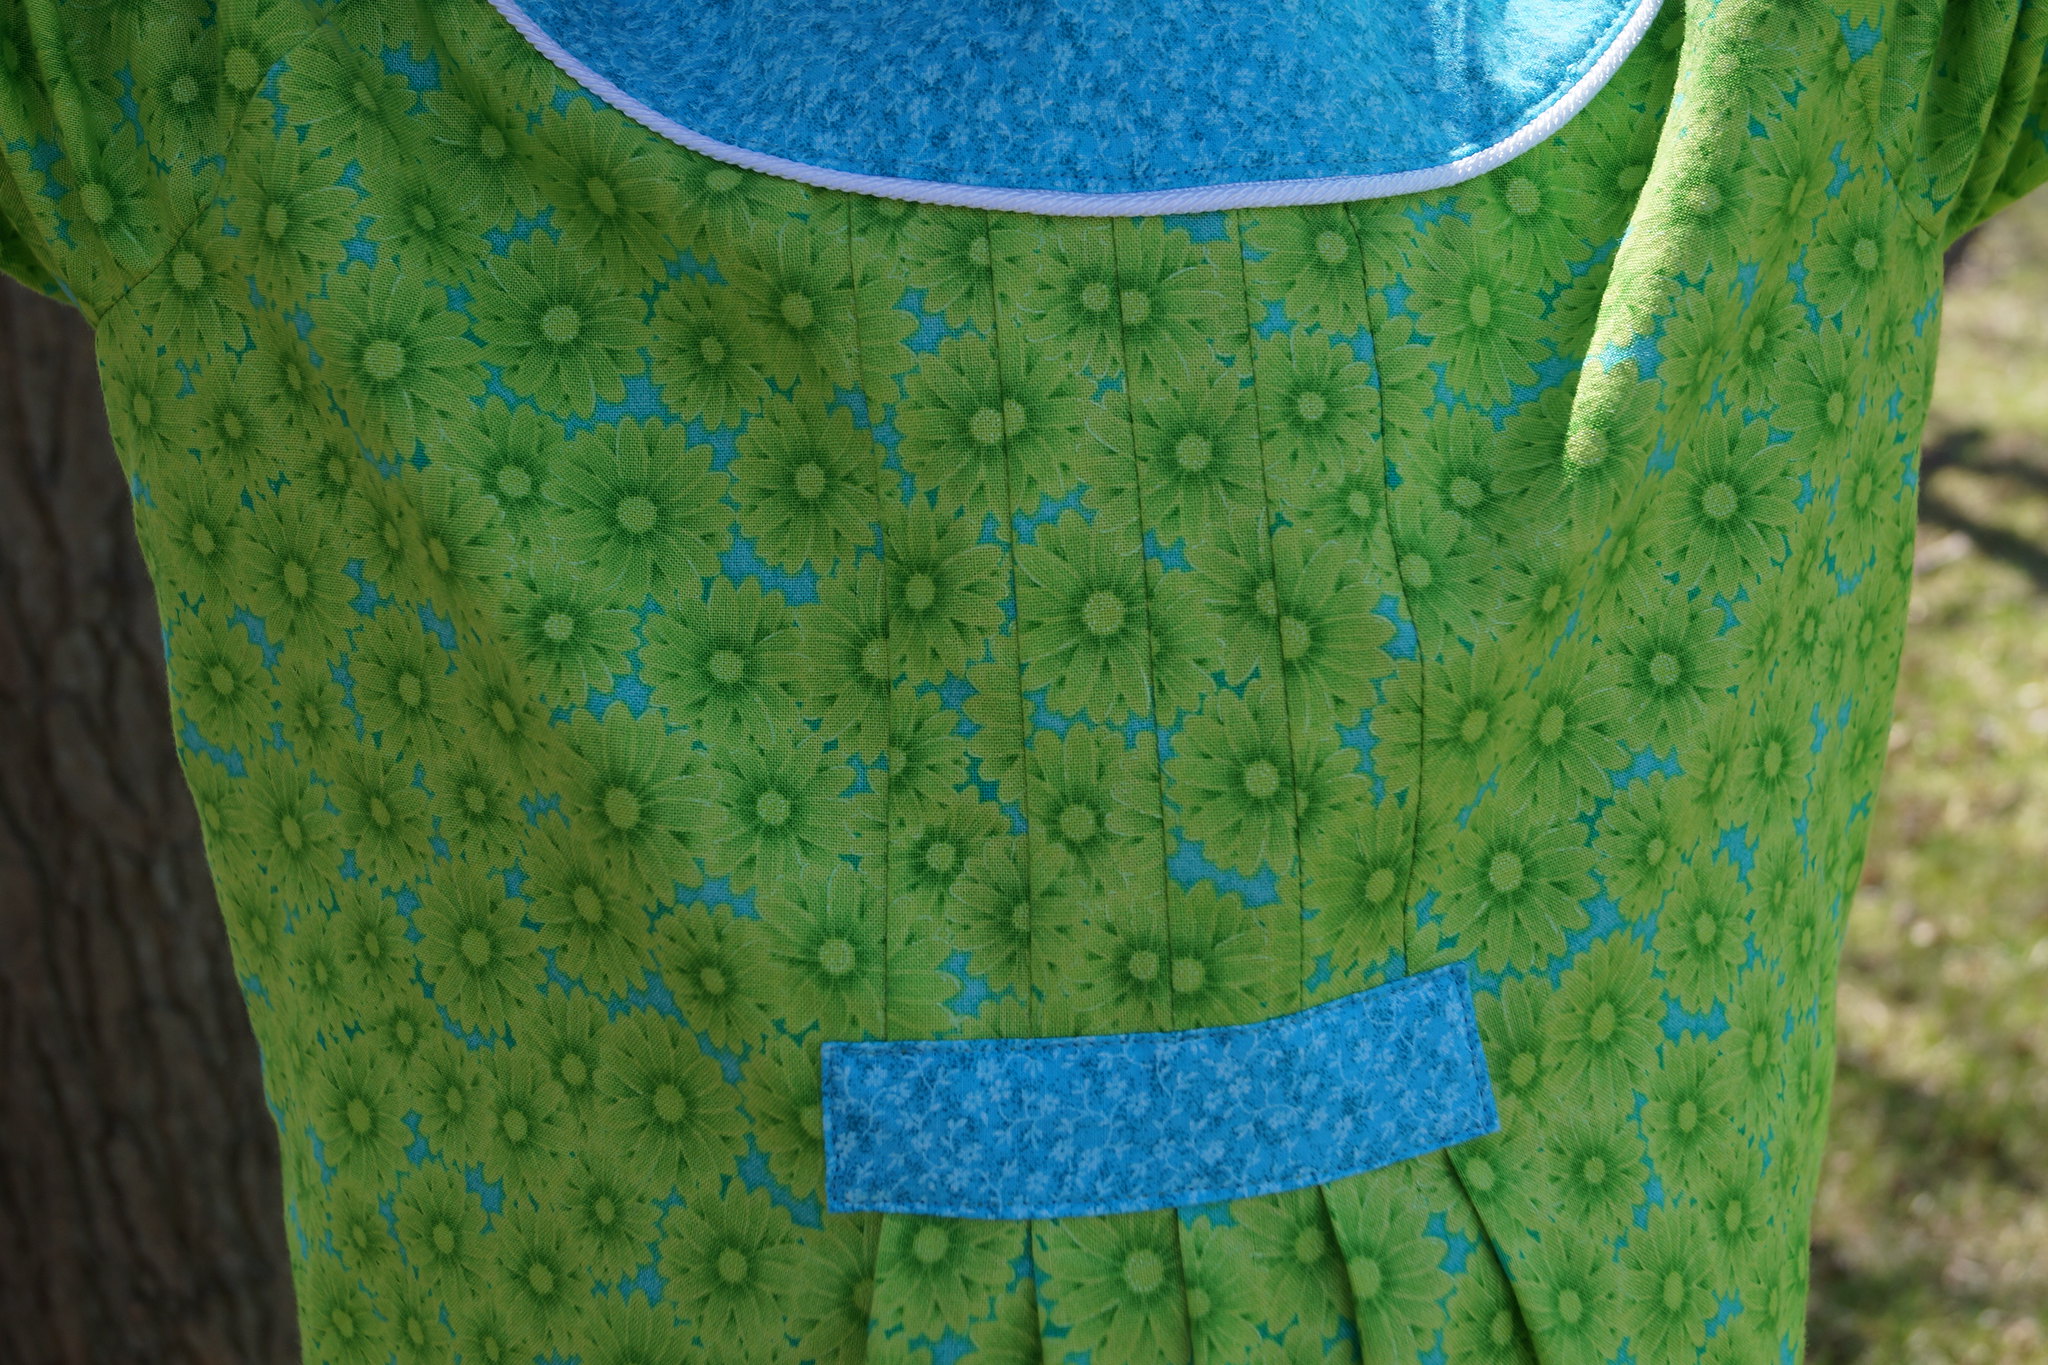
I found the green floral at the thrift store for about $3 for a couple yards.
Then I bought a coordinating blue to match and break it up a little.
She is super pleased with it.
And happy day we hit 71 degrees on Easter Sunday.
First time we've seen a 70 degree day since last October.


Details:
  • Simplicity 2715
  • Contrasting yoke with white piping
  • 3/4 length sleeves
  • Added sleeve and lower hem bands
  • Invisible zipper


Past versions of this pattern to view:

Thursday, December 5, 2013

Thoughts about Christmas Trees

So....here is the dilemma for many of us every year, especially once we are married and have kids that are old enough to voice their opinions (which is at about 2 years old):

Real vs. fake tree. 
White vs. green tree.  
Colored vs. white lights. 
Star or angel on top. 
Traditional decorations or not.
Same decorations every year or change of theme.
Stockings hung all season or just the night before.

The list probably goes on and on when you try and mesh two family traditions into one.

My hubby grew up in Idaho where every year they drove up into the hills and cut down a live tree and brought it home to decorate.  I grew up in Kansas.  No hills.  When we got a real tree it was at the tree lot down the road.  That was my normal.

I vividly remember our neighbors, the Sauers, had a white tree with pink decorations (early 70's decor).  I was in kindergarten or first grade then.  A white tree was not right to me at that age.  I just couldn't believe that they had this ugly fake white tree.

Then somewhere along the line we got a fake green tree.  Less mess, you know exactly what size it will be from year to year and you can wire on the decorations and leave them if you want.  I also went to college and apartment living requires fake trees.

Once I got married and finally got out of apartments and into a house we went back to real trees.  Then we had more kids and less room and those trees you buy at the tree lot become a lot bigger once you open them up.  I bought a fake SKINNY green tree on clearance one year.  It has made me really happy because it doesn't overwhelm my whole living room.

Then last year during the holiday season I found a skinny white tree at the thrift store and bought it.  I had visions of the Sauers' tree once again, in disbelief that I was seriously entertaining the idea of a white tree for my own home.  But it really made me excited to think about it.

I warned my family that the following Christmas (meaning this year) I'd be putting up a white tree and that there had better not be any complaining.  It didn't mean that we'd always have a white tree, but this year we would.  So basically....deal with it.

Here is how it all turned out.
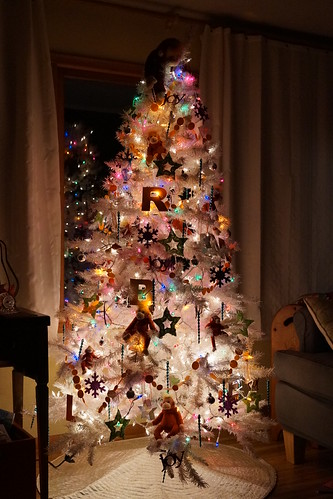

A lit view at night.
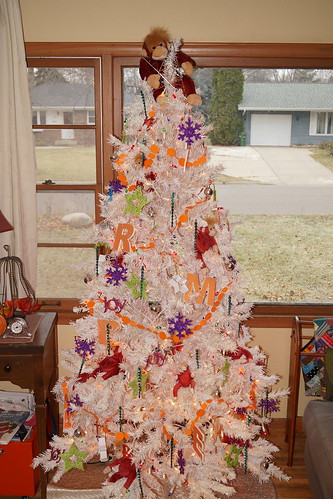

And a daylight view (before our dumping of snow yesterday)

My oldest son told me that he prefers the white tree. (that is a bit shocking)

My oldest daughter said, "I don't get the monkeys."
The other kids replied, "It's just 'cuz they're fun."
Yep, that's about it.

Our neighbors across the street told me that they like to see our tree at night through the window too.  Thank you!  I hope you all take some time to sit by your tree, at night, with only the tree lights on and enjoy some time by yourself or with your family.

Details:
  • Silver wire star thrift store purchase for $2
  • Stuffed Beanie Babies orangutans acquired at the thrift store for $.75 each, except large one on top for about $2.
  • Initialornaments inspired by this pin.
  • Various clearance ornaments (purple snowflakes, green stars, joy, blue icicles and silver disco balls) last year from Target and Wal-Mart.
  • Made the orange dot garland from scrap paper and thread.
  • White star cookie cutters turned into ornaments.
  • Both colored AND white lights on the tree.  Oooh! Who knew you could actually do that.
Wednesday, October 30, 2013

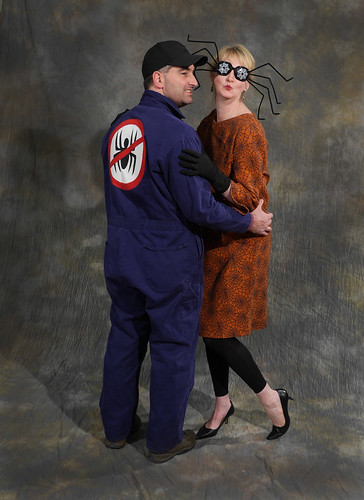
Opposites Attract Costume for Couples

My husband and I haven't always done a couples costumes for Halloween.  Most times, in the past, we've just done our own thing.  Which usually translates into I have a costume of some sort and he just shows up in his hunting gear to the party, having just come straight from actually hunting.

Last year we did this and now it seems we have set a precedent for ourselves and an expectation from everyone else to come up with something again this year.  Our original plan A fell through, or at least we weren't able to get it all together in a timely manner, so we'll save it for next year.  (I'm already thinking through it some and will probably hit the thrift store post Halloween to round up the things we need).

Anyway, plan B came about in a long way.  I had the fabric for my dress in my Halloween stash.  I had bought it last year and was going to make some pillows or use it as a tablecloth or something.  I just never did anything with it.  So this year, when I found it again I decided I would see if there was enough to make a dress.  Then I could be a witch or a spider lady of some sort.

I started getting excited about my costume and then hubby was like "well, what am I going to be?"
Hmmm, not sure.  I hadn't really thought about it.
He decided he would be my pet spider at first and then he had a brainstorm.
Be very careful when someone else comes up with a "brilliant" idea that you then have to execute.

When we first met he was selling pest control door-to-door for the summer.
So the new plan B for him was to be an exterminator.
We'd be "opposites attract"--the Spider Lady and the Exterminator.

After all the drama surrounding the costume situation I couldn't say no.


Details:
  • Dress based on pattern Butterick 5522.  Just cut the sleeves one piece instead of 2-tone.  Added a back zipper since the pattern is for stretch knits and this fabric is not.
  • Glasses from this idea.  I am LOVING these!  They were a hit at the party (although really hard to see out of at night)
  • Bought black leggings and gloves.
  • You could also make your own and use pattern Butterick 5695
  • Coveralls $7.99 thrift store purchase
  • "No spiders" sign inspiration from here.  
  • Used WonderUnder and fabric to assemble and then topstitched it onto the back of the coveralls.

Tuesday, October 29, 2013

Halloween Costume Ideas for couples or groups

Last weekend we attended our Church's Halloween party.
Always fun and always great to see creative costumes.

Here are some costumes that might spark your creativity.


Jenny and Patrick and their son.  
He was the firefighter that rescued them from a "house fire" in the middle of the night

Natalie with her son and his friend.
Medusa, Jason Grace and Percy Jackson


Cindy, Larry and kids
Minions from "Despicable Me."


One more minion for good measure.
Go B.!


Cutie siblings
Burglar and S.W.A.T. team members


Our cousin Nancy & hubby John
Lovely garden gnomes


Shelby, Kerry and kids plus one friend.
Eowyn and Aragon plus assorted other costumes

Happy Halloween Everyone!

Monday, October 28, 2013

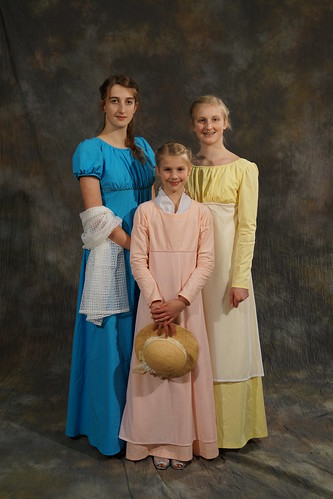
Pride and Prejudice--Group Costumes

All 3 of my girls decided they wanted to dress up like the ladies from "Pride and Prejudice".  We found a good pattern and off we went doing some sewing.  We took advantage of our 3 days break earlier in October and got most of it done then.  Our Church party was over the weekend and then Halloween upcoming.  At least 2 times to wear it--that's what we like.


Details:
  • Simplicity 4055 was the best choice for us.  Thanks to Jo-Ann's for their little 5 for $5 sale.
  • You could also use Butterick 6630.  We just didn't like the lower cut neckline on this pattern, though the jacket/coat is gorgeous.
  • Yellow twill-ish fabric 60 inches wide -- 5 1/2 yds. for $7.50.
  • Peachy fabric 60 inches wide -- 4 yds. for $4.50.
  • Bought drapery lining at $2/yd. for the overlay and found another piece at the thrift store for about $3
  • We found our pretty braided hair ideas online, after watching the movie again...and maybe again.

Thursday, October 10, 2013

Love is in the Air Quilt

From one OCD week (or two) of canning to another OCD week of putting quilt tops together.

Our parents are heading to Utah towards the end of the month and then will be visiting us the end of November.  So in thinking about that I am hustling to put together as many WIP quilt tops that I can to be sent to Lynn for quilting so that our parents can drive them back with them and then on up to us.  Save me some shipping costs.

This is the first one.
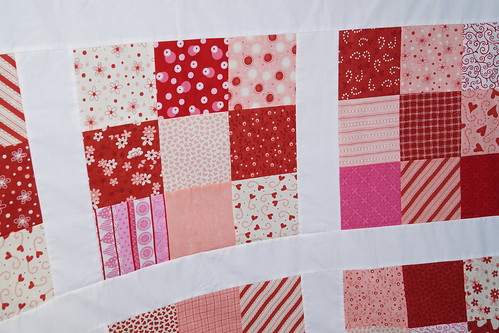
Super easy design.
5" charm pack squares put randomly into 9 patch blocks.


Details:
  • Thrifted charm packs--Love is in the Air from Moda
  • "Vintage-ish" sheet for backing fabric
  • Sashing also thrifted white sheet
  • Used 108 - 5 inch squares
  • Made 12 - 9 patch blocks
  • Cut sashing 3 1/2" wide
  • Border cut 6" wide

Wednesday, July 17, 2013

Glow Bracelet Mania

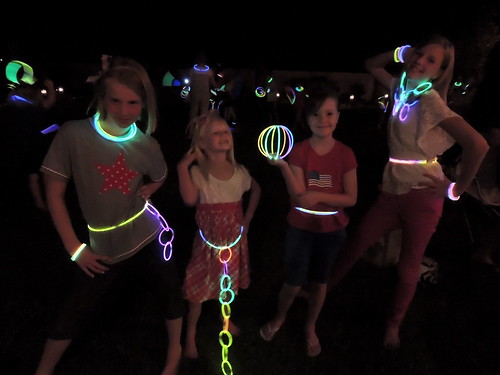
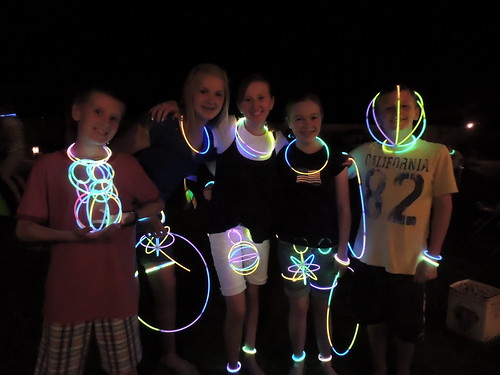
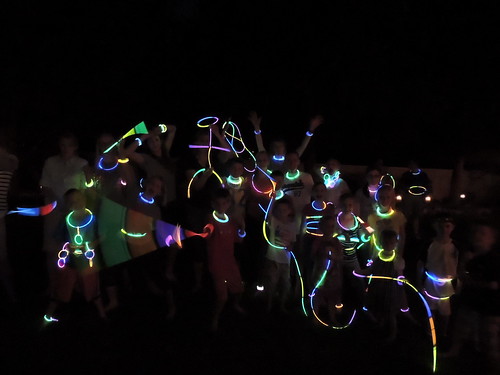
One of the activities "planned" for the annual 4th of July Bash held at my Aunt Gayle's in Provo was to provide glow bracelets for the kids once it got dark.  Well, at least 3 of us cousins brought a number of packages to share with the 30 or so kids (ages 1 to 18) that were in attendance.  After all was said and done we figured out that we had 400-500 glow bracelets to distribute.


This is a portion of the family crew.

Who would have guessed that this would turn out to be the hit of the evening?

They were making all sorts of creations.


Playing ring toss like games with each other.
Even the adults were getting into it.


There might have even been a bit of hoarding going on.

So here is that group shot minus the flash with all those glow bracelets together.


This is definitely on the "keep" list for next year's party.

Thanks Tiffany for the pics.

Wednesday, April 3, 2013

Lace Dresses

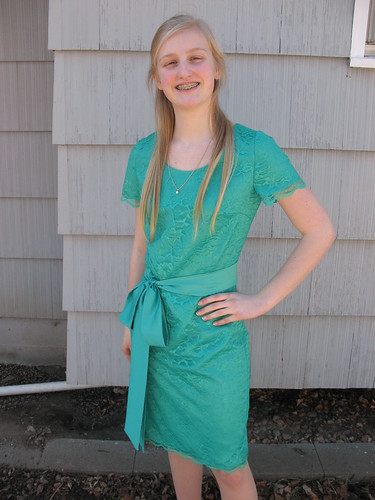
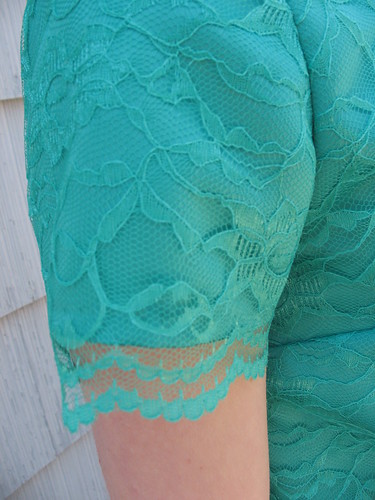
My 2 oldest girls have been obsessed with lace dresses.  There are some really pretty ones out there as well as ones none of us here would be caught dead in (too revealing and sexy for teenagers AND mothers of 5 children too.)

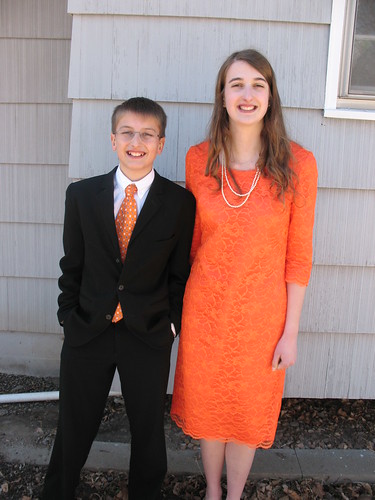
They picked out the colors and slightly fought over who would wear which one.  The lady who helped us cut fabric at Jo-Ann's convinced them which color looked best on each.  Heaven forbid they should listen to their mother's opinion.  Just glad it worked out and they were both happy.

These were their Easter dresses, and they wore them even though the temps were in the 30's (you can't tell from these pics) and the wind was super cold.


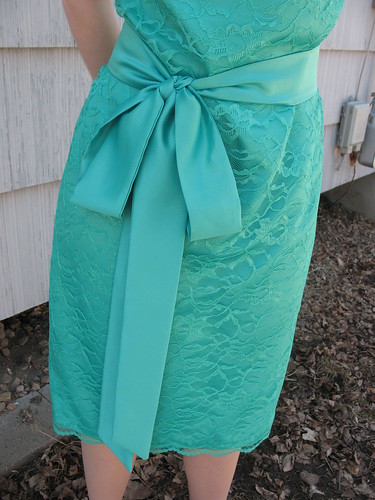
I really like this with the bow.


Daughter #1 with my oldest son and his "new" suit from his cousin.


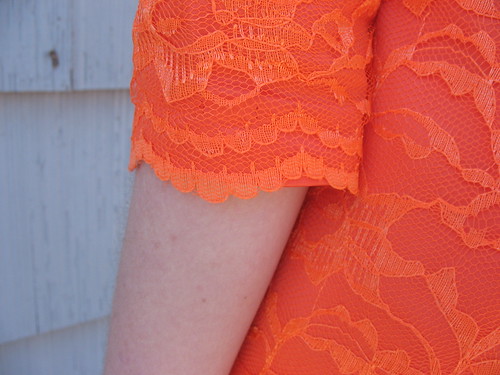
3/4 sleeve hem.


And here is how the invisible zipper looks with the lace/satin combo.

They received quite a few compliments at church.  Lots loved the colors and others loved the "retro" feel of the dresses.  I didn't think we were doing anything all that retro, but I'm just happy that they are pleased with how their dresses turned out.

Details

  • Used pattern Butterick 5706
  • We had to take the dress in quite a bit on the sides at the waist so that it would look more fitted.  And this was after the back darts too.  I don't know if it was just the pattern or because my girls swim and they have broader shoulders and need a different size there than in the waist.
  • Made a bow for each but daughter #1 didn't wear hers this time. 
  • Invisible zipper
  • Blind hem stitch on the satin layer.
  • Added a facing to the neckline instead of how the instructions indicated.  

Wednesday, December 12, 2012

Winter Wreath Update

I need change...more than my family does, but I like a little bit of change every now and again.


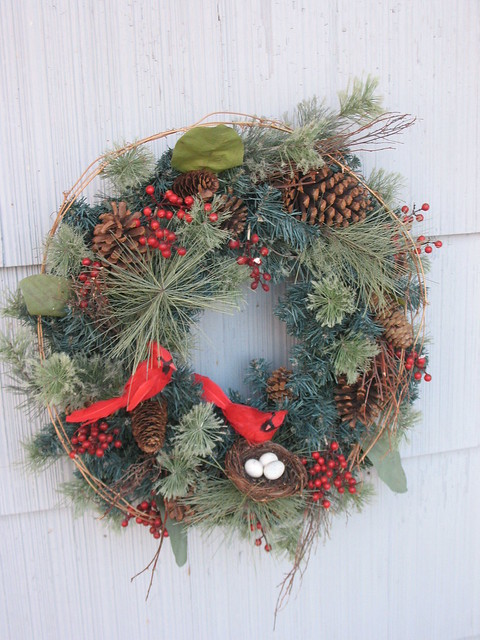
Last year at the thrift store I found this wreath for less than $3 and it worked great on the outside by my front door. As I was browsing the web the other day I found this pretty wreath.  Instead of making a completely new wreath we just added some birds, a nest that someone had given my daughter from something or other, and some eggs to last year's wreath.  Changed the look completely and daughter #3 is so happy.  She loves birds.
I'm happy I only spent less than $2 to change it up.

Details:
  • Pair of cardinals for $1 at the Dollar Store. (wired onto the wreath)
  • Sculpey clay from Michael's to make the eggs. (used a 50% off coupon = $.79). (Hot glued to the nest which is wired onto the wreath.)
  • Paint from the stash.
And one more little update to my home.
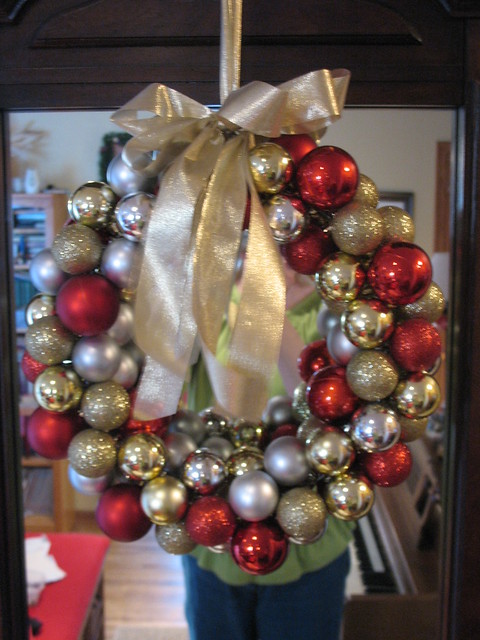
A little wreath I made for my front entry mirror for around $6.
Bought the "glass" balls from the dollar store and strung them onto a wire frame 
and then added a little gold lame ribbon for hanging.  So happy with this one too.

Wednesday, October 24, 2012

Robin Costume--as in Batman and...

So when all the kids were deciding what they wanted to be this year for Halloween, my middle daughter told me she wanted to be a superhero.  I wasn't really on board, because sometimes I just get tired of sewing all the things THEY want.  And we have lots of costumes that she could use, so I tried to persuade her into something else.  I even told her I would make her a cape out of this luscious dark green stretch velour and she could come up with something using that.

However, when little Mr. C. decided to be Batman I kind of decided that it would be fun if someone was Robin.  And daughter #2 (who is 13 and C. is 6) jumped all over that.  Really?!  O.K....  And then when I realized that I had all the colors and fabric I needed already in my stash that made me even more excited.  'Cuz I really am trying to reduce the amount of fabric I have.  Hubby isn't convinced, but really I am trying.  Trying being the operative word.
So here is what we came up with.
This is old school Robin--circa 1966.


Details for Robin:
  • Basic t-shirt pattern--red body and green sleeves. Finish neckline with neckband.
  • Copied Robin emblem from here and made from t-shirt fabric and WonderUnder.
  • Black oval is about 3.75 inches wide and 2 inches wide. "R" is about 3 1/2 inches tall.
  • Green leggings pattern combo of McCall's 6360 and 6173 (only because I didn't have the right size in one and did in the other).
  • Black swim shorts that we already had for the bottoms.
  • Cape pattern based off of Butterick 4319 (just added a collar). Closes with just a hook and eye.  You could use ribbon if you preferred.
  • Mask template from here.
FriDays Made Sweet
Linked up HERE

Tuesday, October 23, 2012

Batman Costume

Little Mr. C. decided he wants to be Batman for Halloween.  Lucky for me we already had a cape that would work--I think I made this cape for son #1 for him to be Batman just for fun--(because the Zorro cape we have, that he did wear for Halloween one year, is lined with red).

Pulled out the cape, he'll use the black sweat pants I already made and then he informed me I had to make a shirt (and socks, but we'll go buy those.)  I might have bought a black t-shirt and saved me some time, but I had a slew of black t-shirt fabric in the stash.

Made a basic black tee and then I used WonderUnder and a little topstitching to secure the batman badge.


I used t-shirt fabric instead of felt, mostly because that is what I had and I didn't want to go buy anything else.  And Mr. C. said that he wanted to wear the shirt afterwards, and I didn't think that felt would hold up well enough under multiple washings.  Hope this way does.


Scalloped edge on the Batman cape to resemble bat wings.

Nice hair!
Not sure what that is all about.

Details:
  • Mask pattern here.  Super easy and 34 cent piece of felt and elastic from the stash.
  • Pattern for the batman badge here.  Printed it out at 80% to fit a size 7 tee.
  • T-shirt pattern is basic KwikSew.  You just need any basic black t-shirt or pattern.
  • Belt made from t-shirt fabric--interfaced both sides.  Attached badge the same as the t-shirt and then velcro closure in back.
  • Cape pattern McCall's 3746 (discontinued)--scalloped the edge on my own. Currently McCall's 2854 looks like it has a good variety of cape styles.
Robin costume on tomorrow's post.

C. suggested that I be Catwoman.  As much as I wish I looked totally awesome in a black catsuit, the reality is I don't.  Still thinking about whether or not I'll appease him and come up with something--more along the line of black sweats and a kitty ears headband, and not a little catsuit number.  We'll see....but really I don't think anything can compare to the "cat" costume I had in college.

Make-up courtesy of my roommate, Jenny, who was a theater major.
This was such a blast to sport all day long to my classes.
(this is probably 1990 or so)

Monday, October 17, 2011

Wreath Transformation

I wanted to make the wreath from here and since I recently received some birthday money and a gift card to Jo-Ann's I decided to use it to buy supplies to make a fun Halloween wreath for us.

I started with this "lovely" wreath that I bought at the thrift store.

I bought it for the wreath form only I assure you.  Although I must say that I feel a little bad about taking this wreath apart as some grandma put a lot of time, effort, pins and lace into making this. 


Oh well....there were about 5 more similar to it at the thrift store. 

Once I removed all the old embellishments it was transformed into this fun Halloween wreath.

I thought about hanging it outside, but was a little leery.  I haven't ever had anything stolen while in our current home, but I've had other decorations stolen off our door while we were students at BYU.  Nice!  Even hanging in between the screen door and the front door wouldn't work as it would get smashed some. 


In the end I decided to hang it on my "new" mirror (scrounged from the biannual city clean-up day) by my entry for just our family to enjoy.  Excuse the pile of shoes.  They really should be in that toy box on the left, but obviously we have issues with that.

To hang it I just used one of those 3M hook things and put it on top of the mirror.  It is high enough that no one can see it, not even my 6' self.  This way I didn't have to put a nail in my mirror.

Little "Hootie" is everyone's favorite part of the wreath--glad we found him. 
We like him better than the crow and spider we were thinking about.

Details:
Wreath -- 12" form for $2.69 at thrift store
                             (cheaper than any of the floral wreaths or other wreath forms I found, even with a coupon, at Jo-Ann's or Michaels).
Tulle -- 4 spools of 25 yds. each for $2.99/spool
Ribbon -- 4 different spools 3 x $2.39 and 1 for $1.99 (you can get 3 good size ribbon roses out of 3-4 yds.)
Owl -- Michaels $2.99
Flowers -- Jo-Ann's clearance $2.39
Squiggly stick picks -- 4 at $.49 each

TOTAL:  approx. $31

LinkWithin

Related Posts Plugin for WordPress, Blogger...