Friday, May 31, 2013

Scrappy Owl Applique T-shirts

This year I am the camp leader for our young women's group at Church.  We have camp the last week of June and it should be a fun time.  (We're staying in cabins this year as opposed to tents last year and I couldn't be happier)

The theme of the camp is "SOAR" and each ward congregation is assigned a bird and a young women's value--we are owls and knowledge (and the color assigned to knowledge is green).

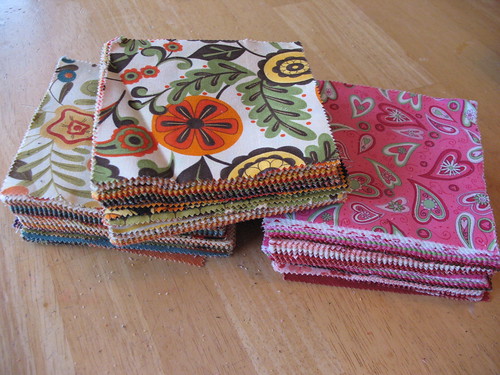
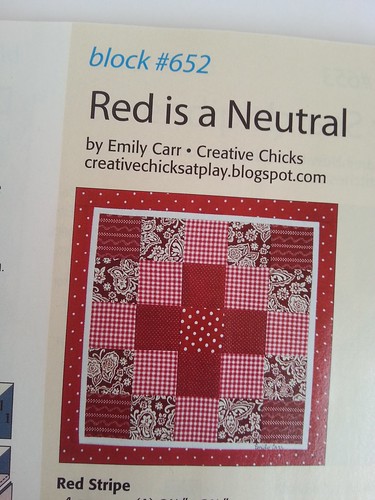
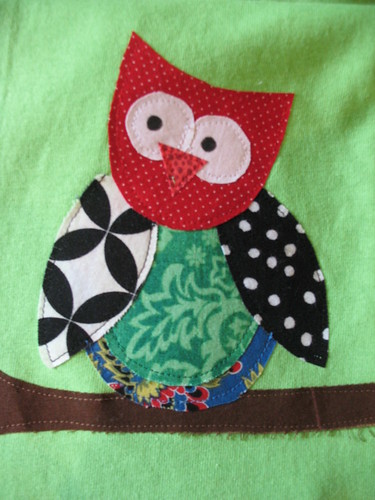
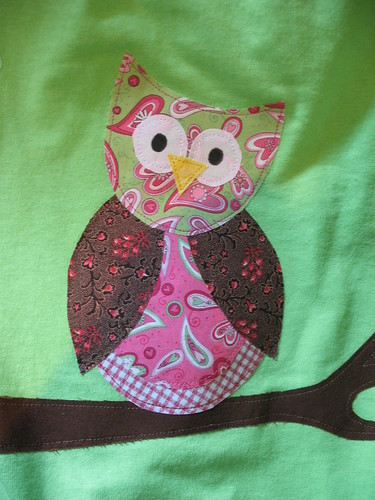
So in keeping with the theme we made our camp t-shirts last Wednesday night.  I found this fun owl applique on Pinterest.  I had to enlarge it and actually did two different sizes for the girls to choose from.  Then I brought my scrap bags and let them choose their design.

I always like to see what the girls will pick.  We'll be the same but different.  The girls had no problems seeing how fun their owls would look with crazy combos of fabrics.  The women, on the other hand, were trying to be too matchy-matchy and it wasn't producing the look they really wanted.  We had to have a short little lesson with them on "unmatching" fabrics.  They just couldn't envision the scrappy look.  In the end we had some awesome little owls.


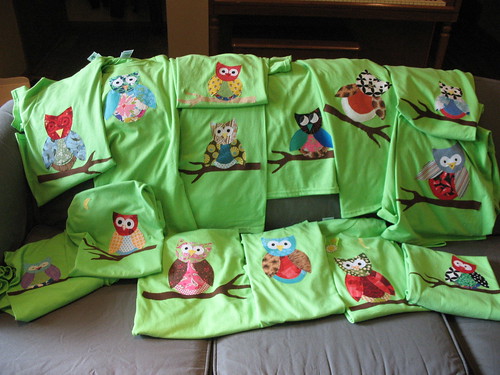
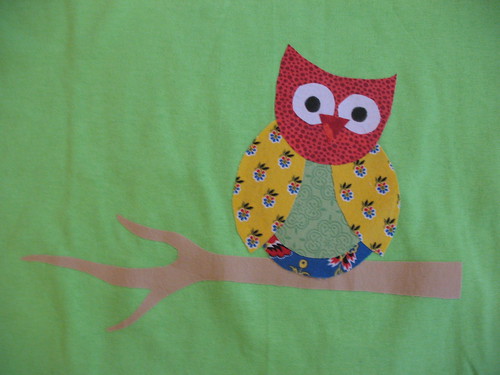
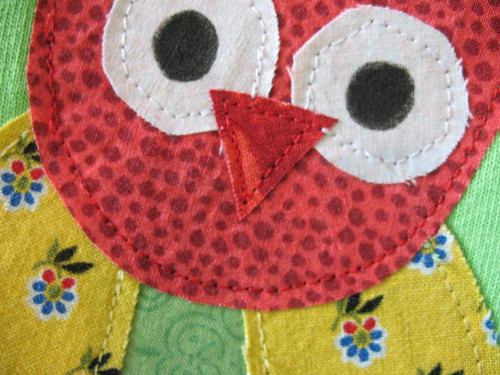
Here's a couple up close and personal.
Each with their own particular personality.


As one of the girls said...We are going to have the best shirts at camp.
I'm just happy that they got excited about the project and are happy with their results.
And yeah, we're going to have the best shirts at camp.

Details:
  • Shirts from Michael's (or Jo-Ann's) when they go on sale. I found ours earlier in the Spring for $1.97/ea.  
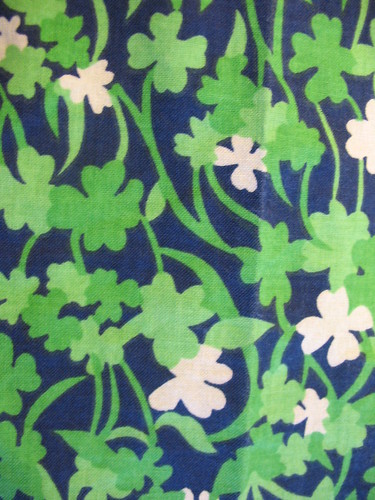
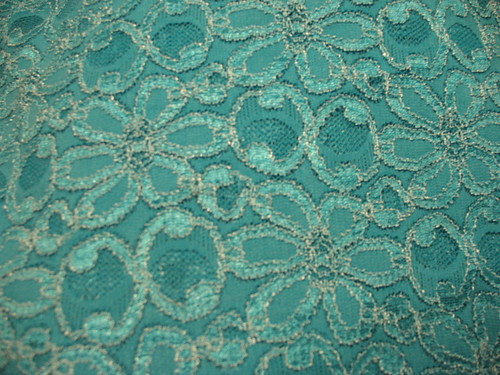
  • Variety of cotton fabric scraps (including white for the eyes and some browns for branches)
  • Black fabric marker for the eyes
  • Pellon WonderUnder for $2.49/yd. from Jo-Ann's (use a coupon if you can)

NOTE:  I took all the shirts home with me and topstitched the ironed on pieces.  For mine and my 2 daughters' shirts that we did ahead of time to use as examples, I sewed each piece as I went along.  I prefer that method.  So if you have enough time or aren't trying to get 12 shirts done in about an hour and a half, I would recommend you sew each piece as you go and not try to topstitch it all down at the end.

Whooo Whooo! Enjoy your weekend!


Wednesday, May 29, 2013

PBJ Wedding Weekend in NE.

Last weekend out niece Bethany, Shauna's oldest daughter, got married in Nebraska at the Winter Quarters Temple.  After our ER/hospital experiences the week and couple days before I was all for staying home.  My family was still game on driving down and they convinced me to do it.   They were good about packing their own bags, etc. so that I wouldn't have to do "everything" to get ready.

It turned out to be a nice weekend.
Bethany's other grandpa came from Arizona and officiated the ceremony on Saturday.
I didn't take many pics, but here are Palmer and Bethany coming out of the temple.  (Last name starts with J, hence PBJ....get it?)


Her dress was really lovely.


And one last pic, Shauna in the middle, with her youngest and my son talking ER stuff I'm sure.  Check out his orange cast just barely showing in the shot.  Matches his tie really well.

I have to say that the reception was very pretty with paper lanterns and white lights everywhere.  I couldn't take decent pictures with my camera and the low lighting.  And final note...the red velvet cupcakes were divine.  I ate two.  Oh well....they were worth it.

Thursday, May 23, 2013

Candy Coated Quilt in progress

After all the stress of last week with our son I finally was able to get a little sewing done.  Have I ever mentioned that truly sewing is my stress reliever?  I actually debated on bringing my machine to the ICU because there was plenty of room and otherwise I was just watching cable T.V. I just needed the repetition of sewing some straight lines and seeing some progress.

I now have 5 rows done for my candy coated quilt and the remaining strips all cut out.  9 more left to sew together.  That is 1/3 of the way to having the top finished. Yeah!


Each size strip is packaged in a gallon ziploc baggie and marked.  I'll just keep plugging away and break out this project when I need some mindless sewing.

Here's a couple other versions of this quilt to check out.
Freshly pieced
Sew Me Something Good
One more from Darci at Stiches&Scissors

Monday, May 20, 2013

Prom Dress--Finale

Well, my intention was to post some more sewing pics of the girls and their dresses, but it turned into quite the week last week for our family.

The Reader's Digest version:
  • Tues. night take son to ER for broken arm--both bones right forearm.
  • Get admitted at midnight because they couldn't get them both in place.
  • Wed. afternoon surgery on arm--2 plates.
  • Complications arose with his blood pressure and by 2 a.m. on Thurs. morning we were transferred by ambulance to Children's hospital and admitted to the Pediatric ICU.
  • Find out that his kidneys are different sizes and this is probably the cause of his high blood pressure.
  • Tests indicate all appears to be fixable at least in the long term.
  • Mon. finally get moved out of ICU to regular room--hope to be sent home on Tues.
  • Broken arm = blessing in disguise.  Not sure we would've found this problem any other way.
Soooooooo....after all that I was not around much to help the girls.
Unfortunately I ended up finishing the dresses for them because that was less stressful for me than trying to walk them through the remainder and still get them done on time.  Mostly it just meant me putting in the zippers and attaching the skirt lining.  They were O.K. with that.  Seriously, after all our time and effort I didn't want them to not be able to wear their dresses to the dance.

So here they are in all their glory.

My daughter with her design.


We just added a pretty little brooch that we found at the fabric store to attach to her ruched piece.
It seemed to add a nice touch without being too over the top for her.

BFF with her purple and black concoction


She bought her flower at Jo-Ann's in the hair/jewelry section.
We took off the clip part and hand sewed it on.
Then added some ribbon to hang down too.


All the girls together.


And again with my friend Amber who was nice enough to do hair and make-up for them all.
They all said they had a fun time.

Details:
  • Turquoise bodice fabric HERE. 3/4 yd. 
  • Simplicity 3878 for skirt pattern.
  • Simplicity 1797 for bodice pattern
  • My daughter opted for no tulle under her skirt once she got it on.  Decided it was fine just the way it was.
  • I think both girls spent under $50 each for their dress materials and embellishments.  Yeah!!
  • Article here about various Mormon Proms held around the country.
  • And another article here.
  • Go here to see the original inspiration dresses.
  • Saturday, May 18, 2013

    New church dress

    My youngest daughter has needed some new Church clothes.  I am tired of her wearing the same ratty-ish t-shirts with her skirts.  (I have plans to make new white tees for everyone.) This dress I made from some of the thrift store fabric pieces I found within the last month or so, and since it is blue she was more than happy to let me make her a new dress.


    Details:
    • Pattern Simplicity 3513
    • Made this pattern before--you can see the dresses here.  I think the turquoise blue one I've kept because it is just too cute and I can't part with it yet, even though no one in my house can wear it.
    • Michael Miller thrift store fabrics for about $6
    • Made size 10 with added band on the dress hem.
    • Didn't put elastic in the sleeve hem.  Made a little band to gather the sleeve onto instead.
    • Added piping to the neck facing for added interest and contrast.

    Monday, May 13, 2013

    Candy Coated beginning

    I decided to cut into the Civil War print fabric stack of fat quarters that I found at the thrift store and see if I would like it for the Candy Coated quilt pattern from the book Sunday Morning Quilts.

    I may not quite have enough to do the quilt exactly like the pattern, i.e. I may have to eliminate a row or two,  but I'll know better on that front once I get all the pieces cut out.  It is going to be close.

    For now this is how it is looking after completing the largest width row.


    Not my normal choice of fabrics or colors, but overall I think I am going to like the look of this.  It is going to have a more manly feel, which is good.  Then the boys at my house will have something else to choose from.


    Friday, May 10, 2013

    Time out for some swimsuits

    Maybe, just maybe, we are done with Winter around here.  It has been difficult do get in the swimsuit mode with snow still lying on the ground.  We are done with that now and it appears the weather is going to stay warm.

    I spent a day or two sewing swimsuits this week.

    My 2 youngest were invited to our 5 yr. old friend's b-day party.
    Whipped up some pink/purple suits for her.  Should make the princess loving Miss F. happy.

    Cut a 3" wide piece for the yellow attached skirt and then hemmed it with a double needle.

    Hubby's youngest sister is having her first baby later in the summer--a girl.  They live in Texas, so of course they are going to need some swimsuits for her.

    One of these for my SIL and the other for my friend's baby shower.

    Both are size 1T.
    Black skirt was about 2 1/2" cut strip--then hemmed it with a double needle.

    Cut a 1 1/4" strip for the neck ruffle.
    I like to have the ruffle almost double the length that you are attaching it to--makes it nice and full.
    I attach it with a multi-step zigzag stitch.
    This allows it to stretch with the suit and not pop some seams.


    Front above and back below.  We love the little ruffle bums.
    I also cut these strips at 1 1/4" wide. (Size 2T)
    These were more like 1 1/2 the length of the bum.  I wanted it fuller, but it still works.


    Another little purple paisley-ish version (2T)
    Those little ruffle embellishments just change the look of the suit so much.

    Enjoy your weekend everyone.
    I'll be back on Monday with a Prom dress update.
    They were sewing yesterday, will do some today, and again tomorrow.
    We are down to 1 week and they have to get it done.

    Monday, May 6, 2013

    Prom Dress--Part III

    The girls are deep into the sewing of their dresses.
    I started them on the skirt and sleeves first.
    That seemed to be easier sewing than putting the bodice together--which is how the instructions start.
    I say let's start with some long straight lines to get their confidence up.


    Daughter #1 pleased with her sleeves.

    Sleeves are fully lined.
    Showed them how to understitch along the sleeve hem in order to make sure the lining fabric doesn't roll out and show.  They did a great job and they look really nice.


    They are working on the bodices pieces now.
    Then we'll move onto putting it together and embellishing.

    My daughter has decided she wants her tulle underneath the skirt with maybe a hint peeking out at the bottom.  I had to buy a bit more for her in order to do that.  She is super excited about the "swish" factor on her dress.  It is getting exciting around here!

    Part I post--picking the dress.
    Part II post--lay out and cut out.

    Friday, May 3, 2013

    Friday Finds

    Before I get into the Friday finds I just have to show you what is happening at my house today---May 3rd people!!  We are getting snow!

    About the only thing I can be thankful for is that in other parts of the state they already received 13 inches of snow in the last 2 days.  Are you kidding me!!  I just want to scream.  I shouldn't be wearing gloves and boots to do my errands in May.


    O.K. back to the schedule....
    I haven't done a Friday Finds in awhile so I thought I'd show a few things that I've acquired over the past weeks...or months.  It has been awhile.
    • 2 yds. of  white and royal blue striped knit for $1.99.  I made a maxi skirt for daughter #1 out of this.  The stripes are super wide on this piece---7 inches.  We used pattern McCall's 6654 for a regular slightly flared maxi. Inspired by this pin.
    • 1+ yds.of green and blue floral cotton print for $.99.  As I'm looking at this up close this isn't really floral but more four leaf clover-ish.  Hope daughter #1 doesn't mind.  I still think it will be a cute skirt.
    • Some baskets for my master bath to use on some shelves that I have't yet put up.  2 rectangle and 3 square for under $6 total.  I'll already spray painted them white so everything will coordinate better.  And the pink check liners will be thrown out and replaced with nothing, or something better fabric.
    • About 9 yds of royal blue swimwear/dancewear fabric for $7.50 for the entire bolt.  There is a flaw on one selvage edge that appears to be thru the entire bolt, but that is still a lot of fabric and I can work around it.  Daughters #1 and #3 will be in blue heaven.  I plan to make some swim team practice suits for my girls for the upcoming swim season.  Last year's suits probably need to be retired--a little too much thinning on the backside if you know what I mean.
    • 6+ yds. of turquoise stretch lace fabric for $3!!!  WooHoo?!  Daughter #1 will probably get a dress out of it--something pretty and flared at the bottom.  I plan on keeping the rest myself.
    • 5+ yds. of navy fleece for $2.25.  I plan on making fleece long johns or sweats for the hunting/scouting crew. 
    • Nine 1 - 2 yd. pieces of Michael Miller and Moda fabrics in various colors for $11.22.
    • 3 stacks of charm squares and a couple additional fat quarters for $11.22.  It appears 2 of the stacks are the same or possibly different colorway of the same. I think this is actually the equivalent of 6 charm packs. The 2 sets will make a fun Fall quilt.  The other group something for Valentine's season.
    • 3 yds. of stretch denim for $3.  I had bought 2 other pieces at my favorite fabric store for $3/yd. So this will give us a nice amount to make shorts, or capris, or a jean skirt.
    Wow, it appears I've gone a bit crazy on the fabric shopping.  Haven't done that in a long time.  Maybe this out of season Winter weather is throwing me off.  Anything to cheer me up....pretty fabric anyone!?

    Wednesday, May 1, 2013

    Quiltmaker 100 Blocks {Blog Tour}

    *EDITED*  This giveaway is now closed.  Thanks for entering.  
    The winner is Amy @ Crafty Shenanigans

    Hi Everyone,
    I'm popping in for a little visit here with Renae.  
    It's good to see you all, again!

    Today is my stop on the Blog Tour for Quiltmaker's 100 Blocks (Vol. 7).
    I was excited to have my block included in this edition. 


    There I am, Block #652 on page 47.
    Red in a Neutral Block

    Last year when I was in the throngs of quilt club block making I came up with this design.  It's not anything innovative or ground-breaking, but sometimes a little tweak makes all the difference.
    After making a block for one of the ladies I decided that it needed a little extra punch.  So I chopped it down, added the white skinny strip and then added the framing border.  I love the addition of the skinny white strip.  In my mind that gives it the extra pop it needs.

    Quiltmaker 100 Blocks (Vol. 7) 
    Here is a little mock up of my block in and edge to edge design. 
    Pretty cool, huh? 

    You could definitely make this design in a million different ways.  I sure did!  
    Here it is in brown and pink
     And purple and yellow.
    And here is the quilt I made out of my red blocks.
    My Quilt in Quiltmaker 100 Blocks (Vol. 7)  
    As some of you may know, I LOVE red quilts.  I even have a pinterest board dedicated to them.  So this is my nod to my love of traditional red quilts.  All the blocks are made with the same layout, but as you can see value placement will changes the look of the block as well.

    And now, for the fun stuff...
    Would you like a chance to win a copy of the magazine??


    I've got an extra copy (or 2) to send out!  All you need to do is leave a comment on this post.  I'll pick winners on Monday.  If you want more chances to win, hop on over to my new blog and leave a comment there as well.  The Quiltmaker Blog is also doing a bunch of giveaways, so make sure you stop there as well.

    Thanks for letting me visit!
    Emily

    LinkWithin

    Related Posts Plugin for WordPress, Blogger...