Wednesday, October 16, 2013

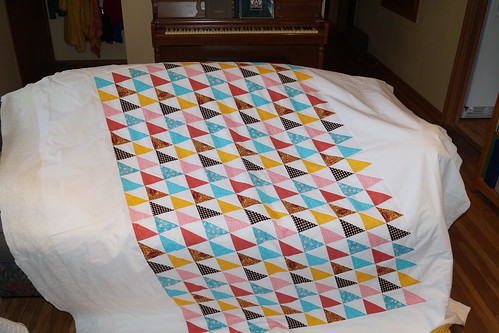
Leftovers Quilt

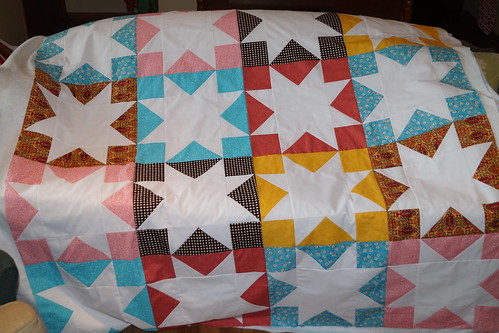
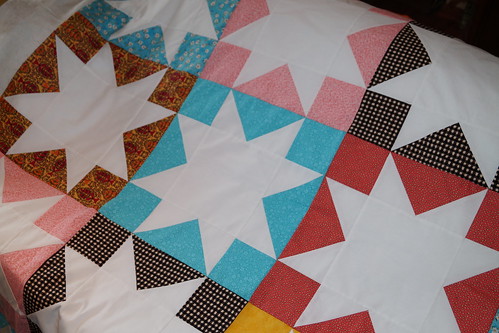
This is the second WIP quilt I sent to Lynn.

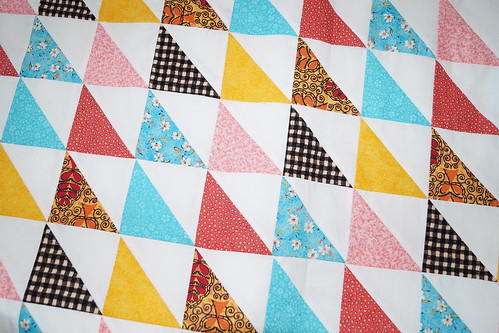
During the time that I was making this quilt for our SIL Tonya I saved the little HST pieces that I was cutting off as I was making the big stars for hers.  I did it as I went along and ended up with 160 HST.

This would've been a nice amount for a baby quilt.  However, no new babies in my circle right now. Besides, one of my girls really liked the colors and said she thought we should keep it, even though we really don't need any more quilts.  I cut and made another 68 more HST out of the remainder of the fabric scraps, even piecing a couple of the main fabrics to get what I needed.


I'm pleased with how it turned out.
I didn't take a pic before sending, but it has a bright yellow print on back with a few of the scraps intersecting the piece.


So off to Lynn it goes.
Bye-bye!  See you later this year when you're all gussied up.

Details:
  • 12 HST blocks across by 19 down = 228 total HST
  • HST Cut to 3 3/4 inch 
  • Thrifted white sheet (brand new) for the sashing--cut 6 inches, 9 inches, 18 inches and 24 inches for an off center placement.

Monday, October 14, 2013

Decisions, decisions....

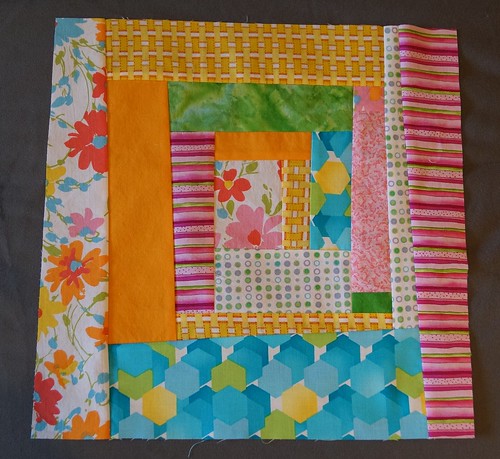
Later this week I am going to do another sewing group/class with some friends next Friday night.  (Finished quilt from the first round shown here.)  I knew I had some people interested, but the timing wasn't quite right for me to pull it all together. But lately I've been feeling the need to clean out some fabric and scraps that I am tired of seeing, but are still useful.  It took me some time to decide what block pattern to use and which fabrics (mainly because I wanted to make sure I had enough to put together 12 packets), but I finally got it.


All but the turquoise hexagonal print came from my stash.  Apparently I didn't have the right blue or enough blue and so I went and bought one yard to cut up and share.

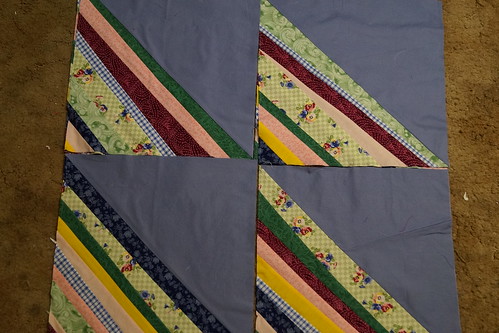
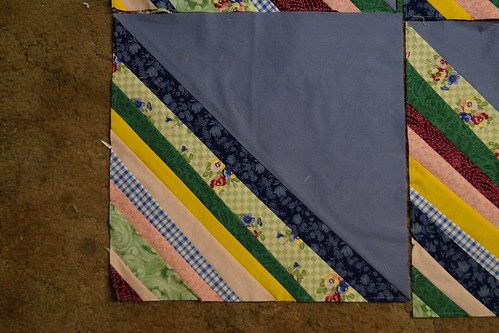
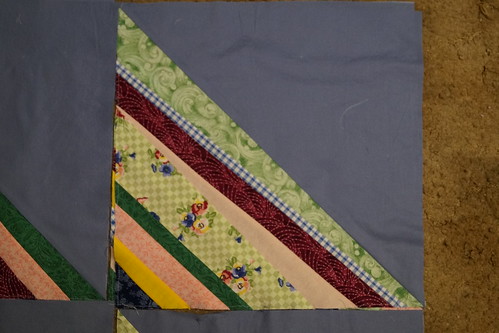
We're going to make Wonky Log Cabin Blocks, pg. 12-19, from Block Party--The Modern Quilting Bee. 


Sample 1


Sample 2

I have a couple repeat seamstresses signed up to join and a couple different ladies who haven't ever sewn with me before so it should be a fun evening.  I told my 2 older girls, too, that if I didn't have all 12 spots filled that they could join too.  They are hoping that only the ones I have now will be it.

The plan is to donate the top to Margaret's Hope Chest when we are all finished.  She always has great charitable projects going on where she can use fun, pretty quilts.

Thursday, October 10, 2013

Love is in the Air Quilt

From one OCD week (or two) of canning to another OCD week of putting quilt tops together.

Our parents are heading to Utah towards the end of the month and then will be visiting us the end of November.  So in thinking about that I am hustling to put together as many WIP quilt tops that I can to be sent to Lynn for quilting so that our parents can drive them back with them and then on up to us.  Save me some shipping costs.

This is the first one.
Super easy design.
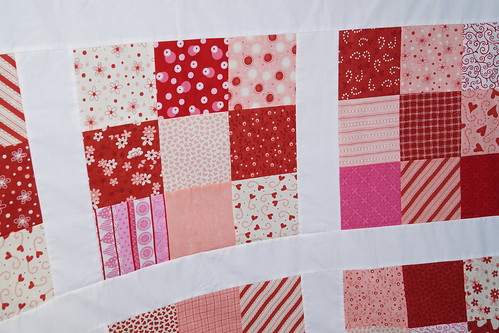
5" charm pack squares put randomly into 9 patch blocks.


Details:
  • Thrifted charm packs--Love is in the Air from Moda
  • "Vintage-ish" sheet for backing fabric
  • Sashing also thrifted white sheet
  • Used 108 - 5 inch squares
  • Made 12 - 9 patch blocks
  • Cut sashing 3 1/2" wide
  • Border cut 6" wide

Tuesday, October 1, 2013

'Tis the Season to be Canning

Two weeks ago a gentleman from hubby's work asked if we'd like some tomatoes.  Earlier in the season he had brought a bunch of zucchinis to give away.  Apparently he is involved in a community garden and was "done" with the tomatoes.  They were also not the variety he thought he had planted and so he didn't want them.  I told hubby I'd take whatever he wanted to get rid of.  I'd figure something out based on whatever he wanted to give.

Be very careful of what you say.

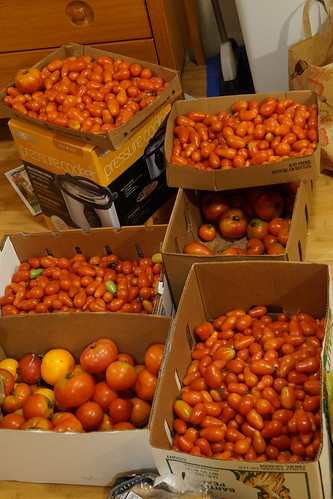
The next day hubby brought home boxes, yes, boxes of tomatoes.
This is what I still had left after canning 35 pints of salsa on that first Friday and Saturday.


It didn't feel like I even made a dent in the boxes, but that's O.K.
I'm not one to look a gift horse in the mouth--or in this case boxes of free tomatoes.
So I got to work and did more canning, almost every day last week.

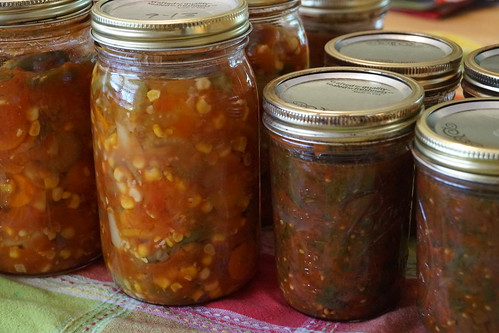
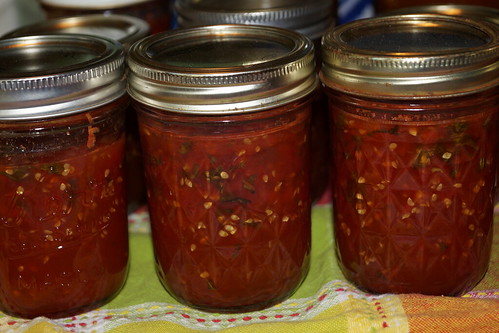
Vegetable soup (left) and Spicy Tomato Salsa (right)

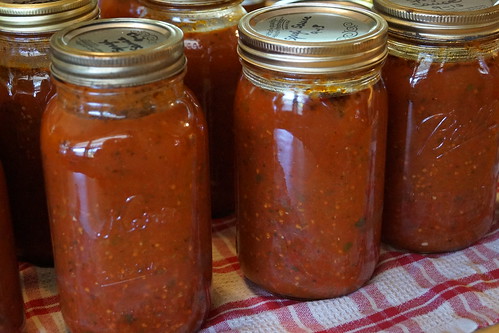
Spaghetti Sauce

Tomato-Basil Jam


Mandarin Sauce

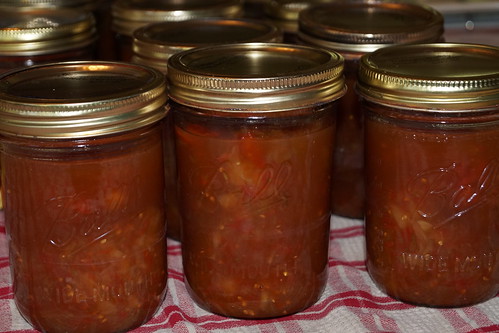
I added quarts of Vegetable Soup, pints of Spicy Tomato Salsa, quarts of Spaghetti Sauce, Sweet & Sour sauce, Tomato-Basil jam..  After all that I STILL had tomatoes. So I did more Vegetable Soup, more salsas and more Spaghetti Sauce.  The boxes are finally empty, after days of working on them.  I'm tired, but it also feels so good to see all that food on my storage shelves.  I am actually to the point where I don't have much extra shelving space.  That hasn't ever happened to us before.  I also had to go out and buy more jars. Also, can't remember the last time I had to do that.

Now on to something else...anything else.  
I really don't want to see any more tomatoes for quite some time.
That was a LOT.

Free Boxes of Tomatoes Yield:
Total Jars:  115 jars of tomato goodness.

Then on top of those I also canned 28 quarts of soup starter (not involving tomatoes).
And 11 pints of Tomatillo Green Salsa with some free green tomatoes from my friend Jenny's garden.  Her pregnant body doesn't want anything to do with tomatoes right now.

That bumps it up to 154 Jars.

Yeah, no wonder I'm tired.
Redbox is looking good today.

Thursday, September 26, 2013

White Stars Quilt

I have been canning like crazy last week and this week.  I plan on posting my tomato madness here tomorrow or Monday, but today I need a break from it all---and some of the tomatoes need to ripen a bit more.  Anyway, I thought I'd post a little progress on a project that came together rather quickly a week ago.

So a little over a year ago we made a quilt for our brother for his 40th birthday.

This past summer while heading out to Utah on vacation, we stopped at their house in Nebraska and his wife Tonya mentioned that she needs a quilt because he loves his AND he doesn't share.  Not even with her. Travis, rude!

Anyway, we missed her 40th birthday this year due to all sorts of craziness for all involved, but we're making up for it now.  Here is the quilt top I put together for her.  She doesn't know it is coming her way, so it will still be a nice surprise.


The only thing Travis said was to make it "girly" as his is definitely not.
I like how the top turned out.  These blocks come together rather quickly (16" square)
Now it is ready to send to Lynn to work her quilty magic on it.

Details:
  • Pattern "White Stars" from Skip The Borders by Julie Herman, pg.26-28.
  • Used 7 different fabrics for 20 blocks.  Need a fat quarter worth of fabric per block.

A couple other versions of this pattern if you want to check them out.

Friday, September 20, 2013

Friday Finds

I'm so glad that school is back in session.  I feel like my life can normalize a little bit now. It has been hard to do blog stuff when we've been working through some medical stuff with 2 of the kids: including new braces, high BP medication, a previous undiagnosed congenital kidney defect, an angiogram/angioplasty, medication changes, a colonoscopy/upper endoscopy, ultrasound, HIDA scan and a couple CT scans on various body parts.  I feel like I've been a crazy woman running to this or that appointment and at times turning into the mean mother bear who wants answers about her cubs---NOW---and who wants them fixed and healthy. Fortunately for us at least one of the kids now has a plan in place and things are good.  Still working on the other one and have more appointments down the road.  I'd really like to find a solution for her...soon.

Anyway, I think one of the things that has helped keep me sane through this is my time being able to wander thru the aisles at the thrift store.  Yeah, I know, probably lame, but I like it.  And my kids usually don't want to go, so even better, I get to go by myself.

This is a partial list of some of the goodies I've found recently or earlier this summer.
  • 2 yds. of very PINK swim fabric for $1.50.  Hello more baby swimsuits with ruffle bums!
  • Porch swing for $30 that we hung on the swing set for all to enjoy this summer.
  • Two Land's End swim skirts from the thrift store.  Both brand new (with the crotch lining protector still intact) in the style we love. Black one for $3 and turquoise one for daughter #1 for $3.75.  WooHoo!!
  • Almost 10 yds. of 1 1/4 inch drawstring elastic for $1.87.  So happy about that one as I have a bunch of sweatshirt material for pants in the Fall for the kids....and me.
  • Gorgeous navy and white swim fabric for under $3.
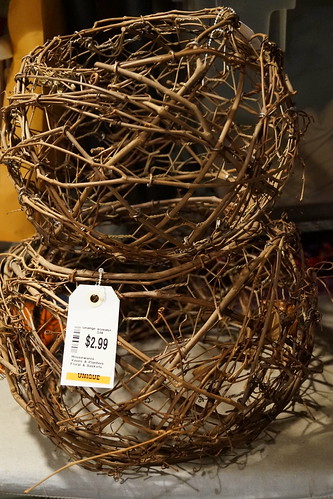
  • Chicken wire and twig ball thingy that I want to use on a lamp somewhere for $2.24.  I actually got 2 of them on 2 different occasions.  Not exactly the same sizes, but close enough.
  • Last week I found a Pampered Chef Apple/Peeler/Corer/Slicer for $4.50.  Retails new for $32.00! And it appears that it's never been used.  This find really makes me happy because my previous PC peeler is dead.  It is old and has served us really well.  The replacement peeler I bought elsewhere isn't as good.  So back to Pampered Chef we go.  Yeah!
  • Sauce Master Food Strainer for $3.50 (minus 2 parts, but I can order them new for $10.)  This retails for $50 new.  I don't know that I "need" 2 of these, but seriously for this price it beats any replacement parts I may need to buy down the road.
  • Just this morning I picked up another Kenmore sewing machine for $15.00.  It is super similar to this one that I got for free.  Same options, etc. though probably a slightly older model.  I think my friend Jenny is going to buy it from me as her machine is junk (really, it is) and she has the sewing bug.

Wednesday, September 18, 2013

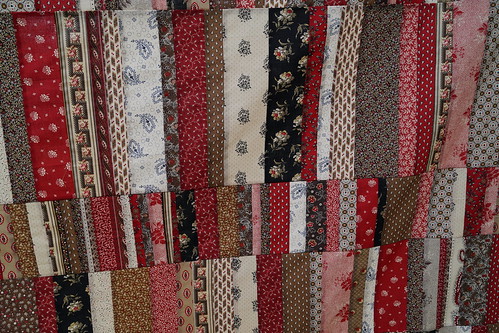
Quilt Top Completion--Candy Coated

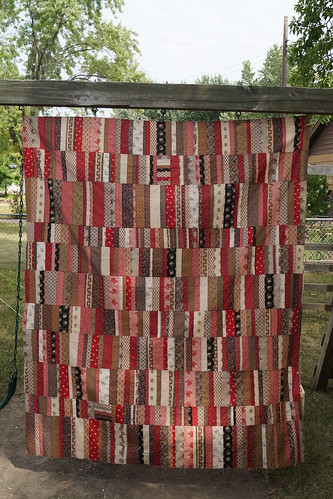
One afternoon last week I pulled out one of my quilts in progress and determined that I would finish it. Period.


Here it is in progress earlier this year.

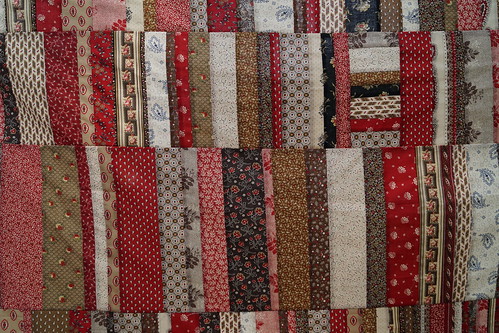
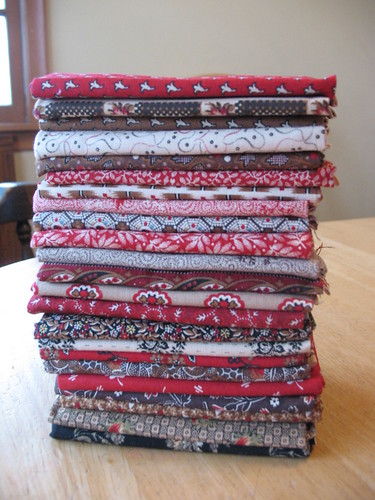
These colors aren't necessarily my first choice though I do love red.  But I scored all these fat quarters at the thrift store.  I have, to date, mostly made any quilts from scraps and not too many that were already coordinated and picked out for me.  I decided this would be a personal challenge to make it into something fun and interesting and not fuddy-duddy.


I ended up with 11 rows instead of 14 as the pattern calls for.  However, I also made my strips a little longer than Amanda Jean's.  I was trying to eek out as much as possible from my fat quarters.

Details:
  • Final quilt top dimensions: 66 inches by 79 inches.
  • Used 23 Marcus Brothers Civil War Print fat quarters


Tuesday, September 17, 2013

A couple yummy recipes

I've been trying to change up my diet a bit--much to the chagrin of my family.
Have I ever mentioned how I like change, and they don't?
Anyway, here are a couple recipes I've found and tried, and liked.

Avocado Smoothie from BHG.

Avocado Smoothie

Super delicious.  My kids don't love it, but hubby does.
At times I throw in a bit of kale or spinach too.
I think the ginger is the key ingredient in this.

Pumpkin Bran Muffins from Woman's Day Magazine


Really liked these.  We froze 2 per baggie and hubby pulls a bag out the night before so he can eat them on the way to work the next morning.  I like these with honey as well as the orange cream included in the recipe.

Monday, September 16, 2013

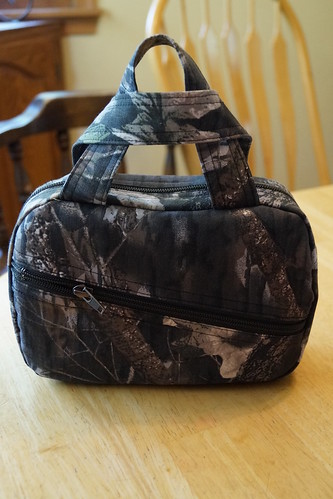
Scripture Totes--Camo Style

Our youngest son is turning 8 later this Fall and that when we make sure our kids have their own set of scriptures to take with them to Church.  Even though he doesn't yet have his new set of scriptures he has been bugging me about making him a scripture tote like everyone else in the family so he can bring them with.

Out of my stash he chose some camo fabric for his scripture tote.  And then I just picked whatever else to go inside.  He didn't care.


And then when that was done, hubby batted his baby browns at me and asked if he could have a new scripture tote too--in a different camo pattern.


O.K. fine.  Not what I really wanted to do at the time, but I did it anyway.

Both guys are now happy.
And I am done with this project.

Details:
  • I don't really have a pattern for this, the basic side piece I use measures 9 1/4 inches by 6 3/4 inches with the corners rounded out.
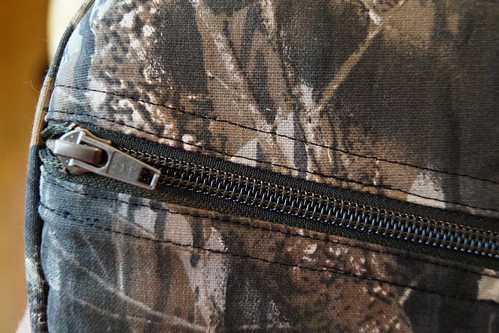
  • Zipper section cut to 3" wide at the length you prefer.  I like the zipper to cover almost 3 sides completely, if not a little longer so you can easier get your scriptures in and out.
  • All but 1 zipper I used from my stash.
  • Made to fit this size of scriptures.
  • Embellish with a front pocket if desired.  I kind of like the slanted zipper.  Then you don't have to worry about being so even, and perfect.
  • You can also add an inner pocket if you like.
  • Inside seams enclosed with 1/2 inch double fold bias tape.
  • Handles are approximately 1 1/4" wide and 10 inches long--finished.
  • On hubby's tote I interfaced almost all the pieces because the fabric was a bit thin.  

Friday, September 13, 2013

Canning Frenzy

In the past 2 weeks or so I have been canning A LOT!

It seems to have all hit at once and coinciding with the start of school.
Oh well, it is what it is.
And with canning sometimes most times you just can't ignore it or you will miss your window of opportunity.
That is what has been occurring with us.

The last week of August (and the week before school started) there were FREE apples.


And I even ended up tossing some out because I just couldn't handle doing any more.  I'm a bit ashamed to say that because usually I just suck it up and do it, but not this time.  I felt like we had plenty and I was done.

Then came Jalapeño Salsa.  


I will need to do more but for the moment we have enough that we don't run out next week or in the next couple months.  And once again, we received a nice little bunch of free tomatoes and were able to use them for this recipe.

Throw in a quick batch of Maple Syrup after opening the last bottle on a pancake morning.

Next up peaches.

Usually in our area you can peaches during the first couple weeks of August.  I am finding that my previous sources to find canning peaches are no longer doing that.  I kept checking and they kept not having anything. Then last week I happened to stop by this smaller grocery store that I rarely use to grab one item quick. And lo and behold there were 10 boxes of Colorado peaches sitting there.  Cue the chorus!

I spoke with the produce manager and he informed me that this was the end and they wouldn't be getting any more and yes, their pears were already over and done.  

I left with 3 - 17 pound boxes of peaches.  I paid a premium, but with peaches, at least around here, you usually do.

Next up were dried beans.


Went down to our pantry to grab some pinto beans for tacos one night and found we had only 2 pints left.
Needed to remedy that in a hurry.

Finally a lucky break, albeit not the timing I would've liked, one of grocery stores advertised $.68/lb pears.


Not specifically canning pears, those are a little smaller in size, but for the price and since I missed everything else earlier in August I bought a 40 pound box.  I know the grocery guys thought I was a bit nutso asking for a full case of pears, and the young lady cashier probably did too, but hubby was beyond thrilled.  He prefers canned pears over peaches and literally we didn't have one jar of pears in our storage.  It has been that way for months.  Thankfully those pears were green and it gave me a few days to recover in between canning sessions before I had to can those.


All the above has netted us:
  • And finally one tired me
Here's to a fuller storage pantry and some time off to do other creative things.
Enjoy your weekend!
Monday, September 9, 2013

Projects I shouldn't be starting right now

I have sooooo many projects that I really should be working on.

Last week I spent a little time in my sewing room combining fabric, patterns, and notions together in big ziplocs so that each project is all in one place.  I actually went back to the store and bought more.  That is how bad it was getting.  And really, I need more bags.  So, so sad.

But sometimes I don't want to do what I should.
I'd rather do what I want.
Do you ever get like that?

So when I should have been working on other things I was making quilt blocks instead.  

Here are the 2 different quilts that I started.

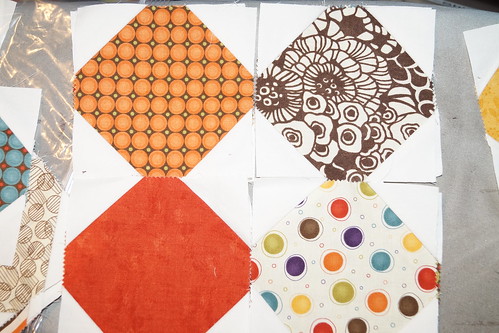
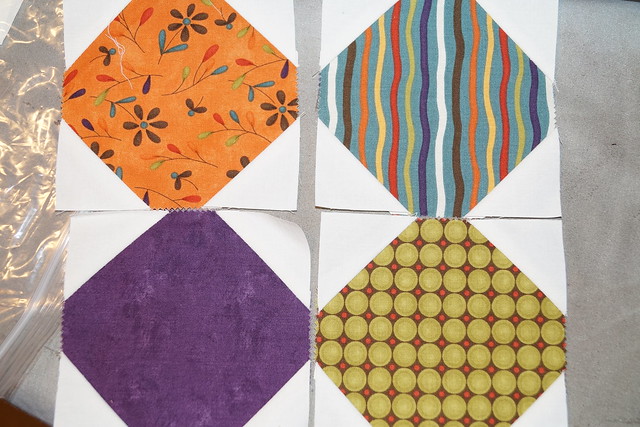
First up some snowball blocks--in Fall prints and colors from some charm packs I bought at the thrift store.


I think I might put a border around each snowball so that I can get a bigger quilt.
Kinda excited about this one.

Then secondly I started some blocks that I have been mentally planning for a time.  Originally I was going to try and recruit some friends and make another collaborative quilt.  I changed my mind.  At the time it felt too difficult to get people together and so I just started them myself.


This quilt pattern is from Block Party--The Modern Quilting Bee, Wonky Roman Stripe Block, pg. 50-56.


I need more blocks and have 2 other base colors in a lighter blue and a grey to combine all together.  I think it will be nice when it is all said and done.

Friday, September 6, 2013

Juicing {The Smell of Fall}


One thing we haven't mentioned on the blog yet is juicing.  Apple season is just about here depending on where you live.  So in preparation for all those yummy apples here is a little insight today on juicing your own.

And just so you know we're not going to reinvent the process.  At the end of this post are a couple links that have good step-by-step instructions, along with pictures to get you going.  We'll just add some of our thoughts on making it as easy and painless as possible.  
_________________________________

First:
Mixing a couple different varieties of apples together tends to make a better juice, applesauce or pie filling. We don't use any specific types exclusively.  Honestly, whatever type of apple we can get free or very cheap is what we use.  Buying "seconds" from an orchard can help you reduce the cost.  These are apples that aren't perfect looking, but work great for juicing or making sauce. The color of the juice (or applesauce) will be slightly different depending on what varieties you use.  It could be a slightly pink or more yellow--we've even had "alien" applesauce as the kids call it because it was slightly more green in color.


Second:
We prefer any method of juicing that only requires you to chunk up your fruit.
No peeling or coring involved.  Just cut off any bad spots there may be.


Third:  
Our equipment of choice for juicing is an aluminum Steamer Juicer (shown below).  Emily owns two of them thanks to one of her quilter ladies who upgraded to stainless steel.

The thing about equipment is sometimes the price can be intimidating.  There is an initial investment, but we feel like the cost is quickly recovered.  The ease of use of some of these items are just so phenomenal that it can't be measured.  And certainly we have bought equipment slowly over the years. Once you know what you are looking for you can keep an eye out at thrift stores and estate sales.  And once people know you can you will more than likely be the first person they contact when cleaning out their relative's home.  Renae has scored items on both those accounts.


Four:  
When canning with a steamer juicer (per their instructions, pg. 4) there is no need to process the jars any further. Sweet!  Adding boiling juice into hot jars is enough to seal it.  If you are concerned, then per Ball® you would hot water bath for 10 minutes.


Five:
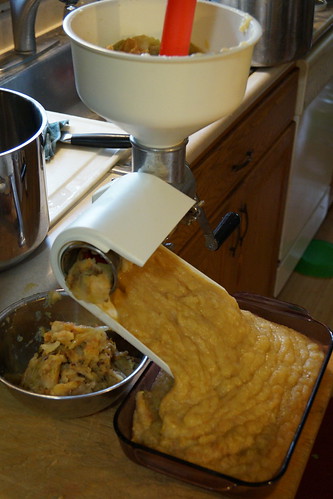
When we juice apples we also make our applesauce at the same time.  The applesauce is made from your leftover pulp.  So there is literally minimal waste.  We just throw the pulp into our food strainer and the sauce comes out one end and the little amount of gunk the other end.  


Super slick.  Once again, no peeling or coring involved.
Then depending on the thickness of your sauce you can add back either some water or apple juice to get it the consistency your family prefers.

Without a food strainer you would place the hot pulp in a colander of some type and strain until the sauce is extracted.  Renae usually refrigerates hers and then cans it the next day or depending on the amount you make you can just eat it within a few days.  Here is how to hot water bath applesauce per the Ball® directions.  If you prefer your applesauce more sweet than it naturally is you can add sugar and/or cinnamon to taste.  This year we did 7 few pints of cinnamon sugared applesauce, based on the sweetness the kids liked and tasted beforehand.  The remaining 16 pints we just left as is--possibly slightly tart, but that is the way they all prefer it.  A big thanks to Jo and Frank from Renae for the freebie apples this year.


More Notes:
  • We use the aluminum Back to Basics Steamer Juicer.  They are between $60 - $70 depending on where you find them.  Renae buys the majority of her canning supplies locally at Mills Fleet Farm.  The food strainer runs around $35-45.
  • A tutorial with pics using a steamer juicer can be found here.  This is basically how we do it.
  • If you don't have one of these awesome steamer juicers you can still make your own apple juice. Ball
    ® Canning has a recipe for Homemade Apple Juice.
  • Here is another link that will show you how to do it without having to peel and core all your apples--which really is the deterrent, we think, to people canning apples in any form.
  • Making your own grape juice with a steamer juicer.  Emily has a nice free source where she lives and make lots of grape juice for her family.  


Monday, September 2, 2013

Basic Knit Skirt Pattern

Tomorow is the first day of school for my kids.
Oh happy day!
A friend of mine said that the first day of school is actually the real Mother's Day.
So true.
It feels like it has been a very long and unproductive summer for me.
My "to do" list is long, both actual and in my mind.
And the truth of the matter is I can't get nearly as much done when the kids are home.
You all know that is true at your own homes too.
So hopefully I can get back into the swing of things and reduce my piles of projects.

In case you haven't noticed, if there is a pattern available, especially for $1 on sale, I use that instead of trying to figure out a pattern on my own.  I figure why torture myself when someone else has already done the work for me.  I can embellish it as I like with a good basic pattern.

Sometime this summer I purchased McCall's 6654 at Jo-Ann's for $1 even though I probably have a couple others that are similar.  It is just nice to have a couple different styles and lengths in one pattern--4 lengths of a knit A-line skirt and 5 lengths of a straight knit skirt.

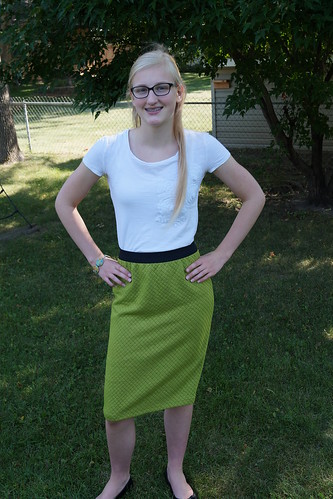
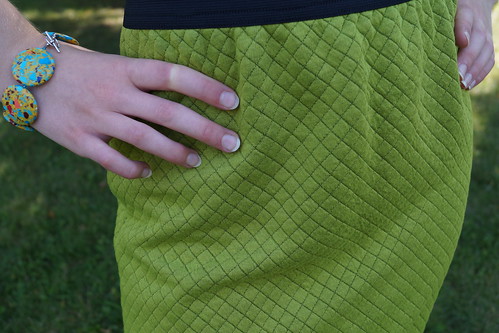
I've already used this pattern a couple times, but wanted to show this fun skirt that I made from a thrift store piece of fabric I found for about $3.  It is a little like a sweater knit, but I just loved the color and texture of the design.  There was enough that I was able to make one for both me and daughter #2.  Here she is showing off hers.


Notes:
  • To make a knee length skirt for my 6 foot + body I had to used view D to get it long enough.  We also lengthened hers too so that it would hit right at the knee.
  • For the waistband we bought wide elastic and used it on the outside.  Basically just topstitching it with a double needle to the top of the waist edge.  This was mainly to reduce the bulk at the waist.
  • Daughter #2's cool bracelet she made with beads bought at Jo-Ann's.

Friday, August 30, 2013

Denim Skirt Reprised

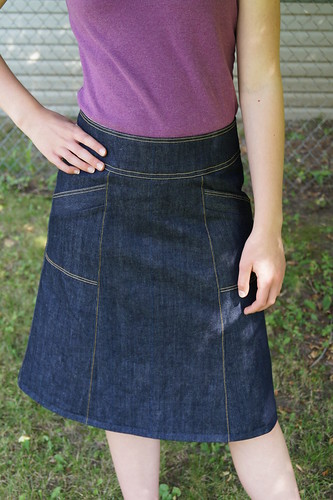
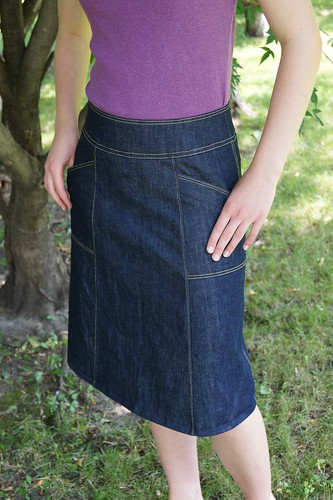
Daughter #2 wanted a denim skirt.  She wanted the same pattern as the denim skirt I made myself last Summer.  AND she wanted to make it herself for a Young Women personal progress project.  Excellent! We raided denim from my stash and she went to town.


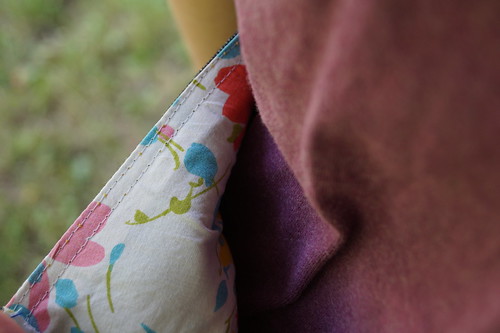
One little trick when sewing with denim.  Sometimes the multiple layers are just too thick. So instead of using the denim to line the yoke, she picked out a fun floral piece of cotton.  It reduced the bulk and gives it a fun little surprise inside.


Details:
  • Simplicity 2152--view E lengthened slightly
  • You can also check out the previous post on this pattern for some hints and tips.
  • Denim from the stash---at about $2/yd.
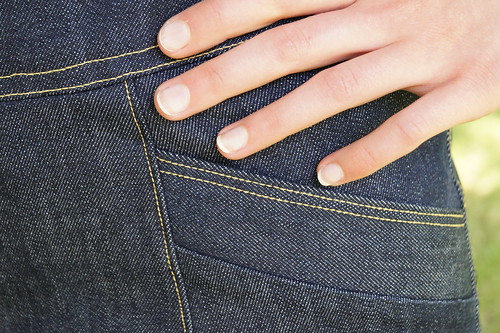
  • Coats & Clark Dual Duty XP Heavy Duty thread--or just call it denim topstitching thread.  It comes in a variety of colors.  This time around we used the color SPICE (#7450)  There is also a lighter color gold (#7430).  
  • We could've used a 6,0 size double needle to topstitch (or a 4,0 size). Instead she just stitched a straight line twice using a denim/jean needle.  The thing about double needles is that when you use one on the backside it appears as a zigzag.  For a good portion of the topstitching (i.e. pockets and yoke band) we didn't want that on the other side.
  • Blind hem stitch for the bottom hem.  She could've done a topstitch on the hem also, but opted not to.

NOTE about topstitching
Even though we did it this way, I don't recommend you have beginners use contrasting thread on their first topstitching projects.  It does take a little practice and any deviation is amplified with contrasting thread.  Try a project with matching thread first, or do lots of sample practicing before trying it this way.  I ended up doing about half of the topstitching for her as her A type tendencies were annoyed with some of her own topstitching.

Wednesday, August 28, 2013

Wheat Free Zucchini Bread

I happened upon this version by accident.
Hubby has been bringing home LARGE zucchinis from work.  Apparently a few people are bringing their extras (you know how zucchini can overtake everything in your garden) and then leaving them out for others to enjoy.  We have been enjoying them, for sure.

I made some zucchini bread for us and then needed to make a loaf for our #2 daughter who needs a wheat free diet.  The recipe I normally use makes 2 loaves and since I was messing around with a recipe I didn't want to possibly waste 2 loaves if it didn't turn out, so I used another recipe I had but had never made before.

Here it is:
Sorry no pictures but I forgot and they all got eaten.

Wheat Free Zucchini Bread
Mix together:
  • 2 beaten eggs
  • 1 1/4 cup sugar
  • 1/2 cup oil
Add:
  • 2 1/2 cups WonderFlour (this is not a GF flour, but you could substitute your AP GF flour instead)
  • 2 tsp. baking powder
  • 3/4 tsp. salt
  • 1 tsp. cinnamon
  • 1/4 tsp. ground ginger
  • 1 tsp. Xantham gum
  • 2 cups peeled, seeded, shredded zucchini
Mix well.  Spoon batter into greased loaf pan.  Bake at 350 for 50-60 minutes.  Makes 1 loaf.

I turned these into zucchini muffins for my daughter instead of a loaf since she is the only one eating this version.  That way we can freeze them and she can grab one when she wants. It makes about 21 muffins (filled 3/4 full) and I baked them for about 30 minutes.

Notes:
  • WonderFlour is a combination of equal parts spelt, brown rice, and pearled barley ground into a flour mix.  You can order it online, but I grind my own.  I buy those items bulk at my local Whole Foods Market.  You can call ahead and they will order 25# bags, for example, and then you also get a 10% discount for ordering bulk.
  • The first time we made these muffins I used applesauce instead of the oil and the taste was fine as was the texture.  
  • I normally use stoneware pans and find that I have to bake my items a bit longer than the recommended baking times.  Usually an additional 10-15 minutes on loaves.  Maybe 5 more minutes on the muffins.
________________________

The original recipe had additionally:
1 tsp. lemon peel
reduced cinnamon to 1/2 tsp.
1/4 tsp. orange extract (optional)
1 cup chopped walnuts (optional--which I am usually the only one at my house that wants nuts in the bread)
and then obviously no Xanthum gum and regular AP flour

Monday, August 26, 2013

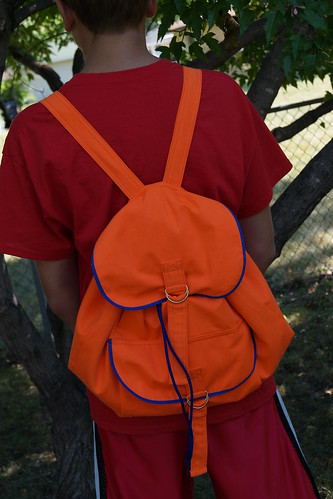
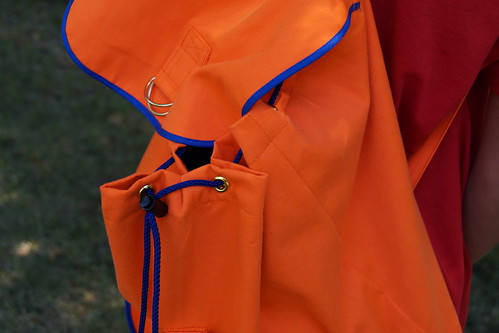
Drawstring Backpack

The other day my oldest son showed me this backpack that he had found on Pinterest.  Then he proceeded to ask me if I could make one for him.  Well.... first of all he may need to be banned from Pinterest as I don't need any more inspirational pins to add to my to do list.  Second, the pin site and instructions are in German.  And thirdly, I'd rather not make the pattern if I already have one that is close enough to satisfy me or my kids.

So he picked out some neon orange lightweight denim-ish fabric from my stash.
I found a pattern from my stash that is very similar to the pin and I got to work.
We edged it, and lined it with royal blue broadcloth--also from the stash.
It took longer than both he and I would've liked, but that was due to other things occurring at our house that took precedent over the backpack that he doesn't really need, but just wants.


Straps are not adjustable, per his request.


Details:
  • Butterick 6678, view A (discontinued)
  • 1/4 inch double fold bias tape (from the stash) for outside edging of pockets.
  • Bought D-ring buckles for the closures on the pockets and made the straps.
  • Bought 12 ct. gold eyelet (grommet) kit using Jo-Ann's 50% coupon.  

Basic dimensions:
  • Cut front and back pieces 19 1/2 inches wide by 18 1/2 inches tall.
  • Fold over top hem 1 3/4 inches to form drawstring band.
  • To make the bottom oval piece cut 14 7/8 inches by 7 7/8 inches and round the corners.
  • I made the straps to fit the D-rings that I bought--about 1 1/4 inches wide finished.  
  • Pocket and flap you can adjust sizing as desired.

LinkWithin

Related Posts Plugin for WordPress, Blogger...