Tuesday, November 19, 2013

Starting class quilts again

This is my year again for class quilts.  I try and do them every other year, as doing them every year would probably put me over the edge. And I just don't want to do it every year either.  Plain and simple.

My youngest daughter is a 5th grader this year, last yr. of elementary school, so she was begging me to do this with her class.

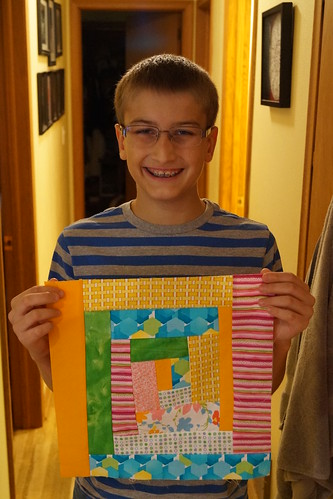
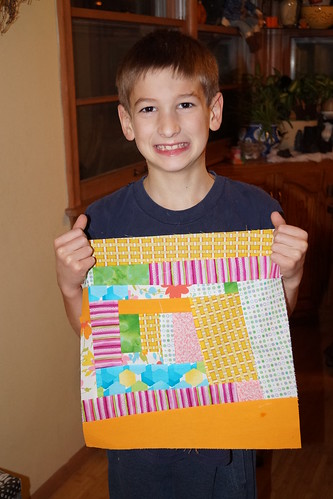
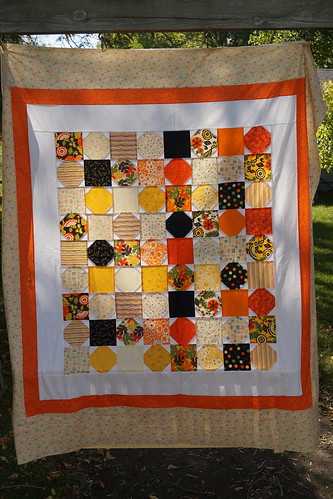
I picked a little different block design than I've done in the past.  I felt the need to change it up a bit even though I am still trying to use my scraps. (I swear that they just don't end)  I really like how it worked out. Below are a couple sample designs that I made and took with me to show the kids what they might do.
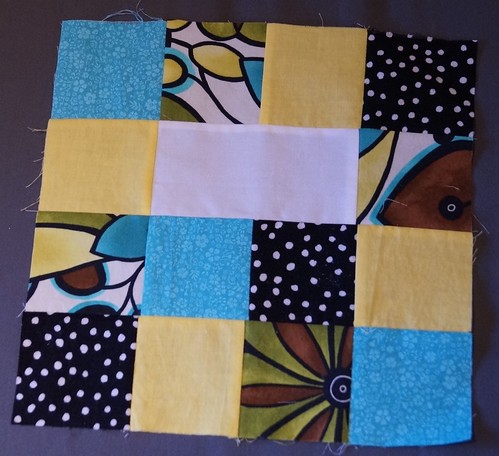
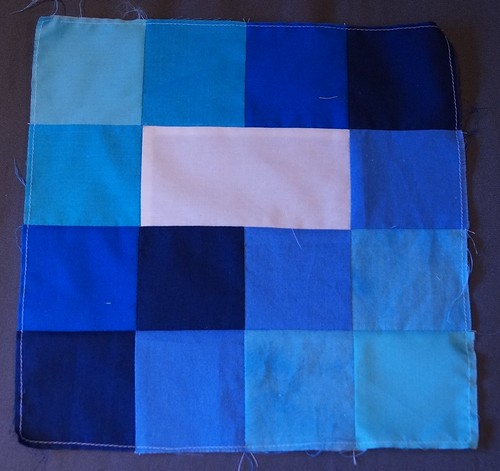


Cut 3 inch squares placed in a 4 by 4 design.
White piece for their name is 5 1/2 by 3

Yesterday I went and set up the station and then had the kids rotate through.  As usual some of the boys were a little more obnoxious than others.  Typical for 10 yr. olds.  We survived, made a mess in the foyer outside their classroom, and now onto sewing the blocks together.

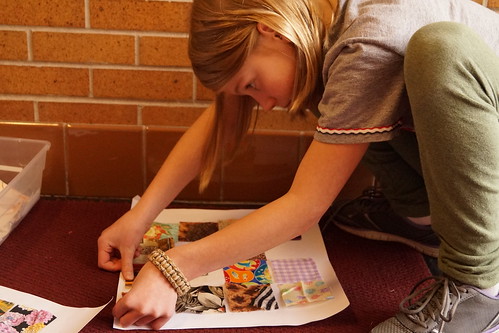
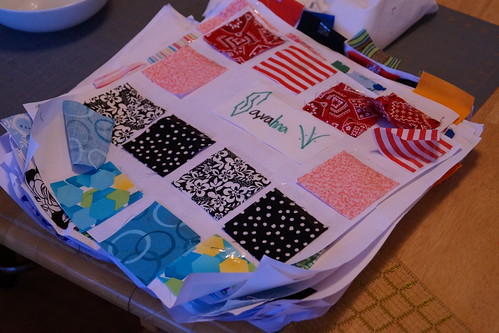


I had already visited my son's second grade class back in October and their blocks are complete.  I am in the process of putting those all into a quilt top.
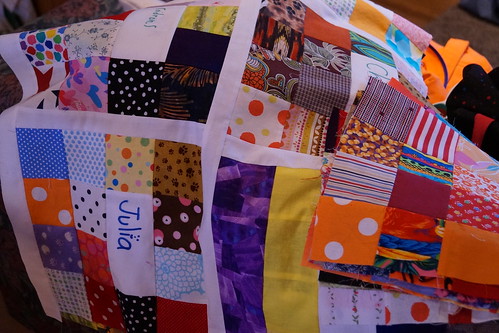


Since I don't have to actually have these 2 quilts completed until February I am doing well.  My goal is to complete them by the time that school starts up again after Winter/Christmas break.  Because I know that I will want to be doing something else by then.

Note:
Put your kids to work.
My kids love helping do the layout part.
We spread the blocks all out on the floor and then they move and arrange them to how they think looks good.  Even the bigger kids give their 2 cents worth to the layout.

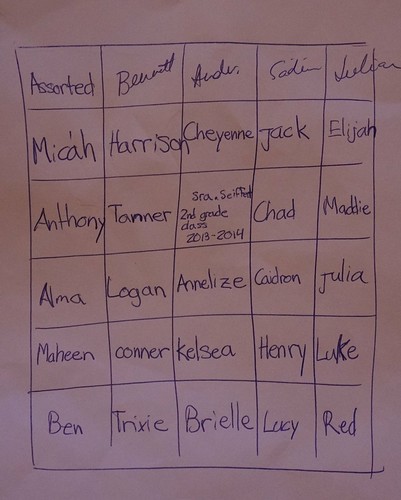
This is my daughter's note for the 2nd grade quilt once the layout was in place.
27 kids' blocks
One block for the teacher's name, class and year
2 blocks for opposing corners with all assorted squares--no name block.
5 x 6 configuration.
Friday, November 15, 2013

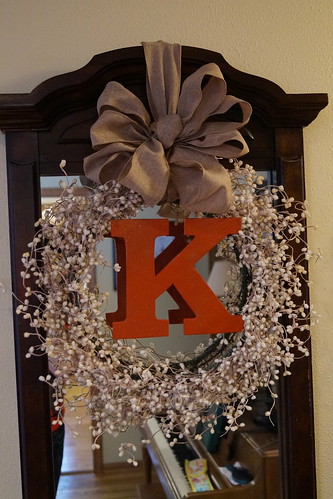
Thrifted Fall Wreath

I have this large mirror hanging just inside my front entry and I try to change it up with the seasons so that it has a little more character.  I found it on the curb for free and have had plans to paint it, but so far haven't done it.  Maybe I don't want it painted that bad.

Anyway, last year I just kept my Halloween wreath up thru Thanksgiving, before putting up the Christmas decorations.

However, I found this pretty wreath on Pinterest early this year and wanted to do something similar for my house.
Pretty initial fall wreath

I lucked out at my thrift store and found a cream-ish version of those berries for about $2.
Bought burlap ribbon from Jo-Ann's. $2.50/roll after 50% coupon.
Cut out and painted my own initial from hubby's scrap wood and this is what I ended up with.


I may change to a cream/gold/sparkly "K" for Christmas and New Year's....because I can.

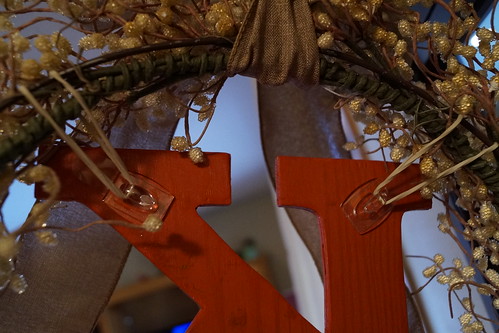
This is how I attached the letter.
3M reusable hooks and a couple rubber bands.


It was a small moment of genius for me.
My kids were thoroughly intrigued as to how that letter was just hanging there so perfectly.

I am enjoying the pretty wreath and the pop of color.
Rustoleum 2X Ultra Color Paint and Primer -- Satin finish in Fire Orange

Wednesday, November 13, 2013

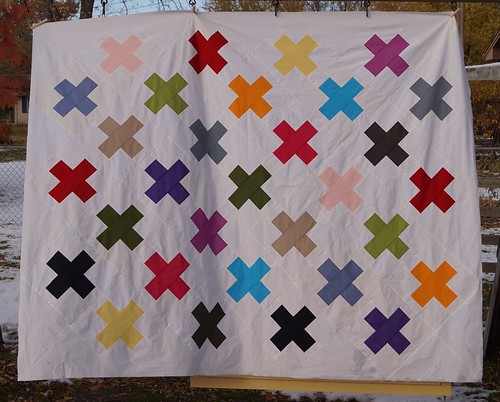
Modern Cross Stitch Quilt Top

This quilt top makes me happy.
Love the solids.
Love the size.
Easy to put together.
I think it would also be great using a bunch of prints too.
May have to make a second version.

Modern Cross Stitch Pattern

Martingale - Modern Basics II (Print version + eBook bundle)
Amy's quilt pic from book

I like that the +  is set on point and not straight up and down.


My version

I had to hang this quilt sideways as it was literally dragging the ground.
I had also originally planned to give this away, but hubby changed those plans.  The intended person is going to receive something different now and this one will stay with us.

I've decided that with all the quilts we have at home that once my kids start leaving for college (which is in less than a year) they can pick a quilt or two to go with them.  I think daughter #2 might have already put her dibs on this one.

Monday, November 11, 2013

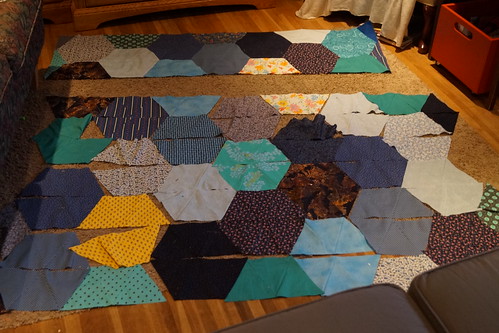
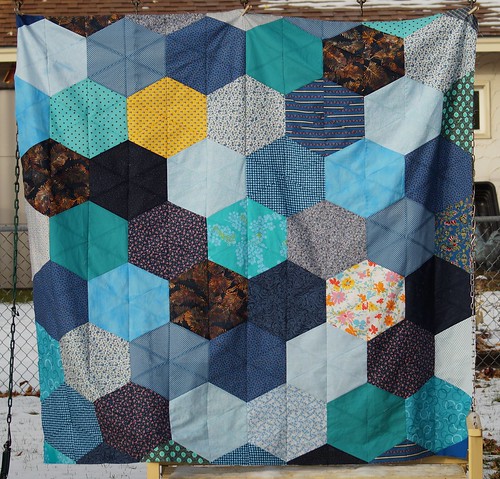
Scrappy Hexagons

This quilt came about sort of by accident.  I had planned out a different quilt based on the cover quilt of Urban Views by Cherri House but the scrappy prints weren't working for me in that configuration.  Even my kids thought it was meh!

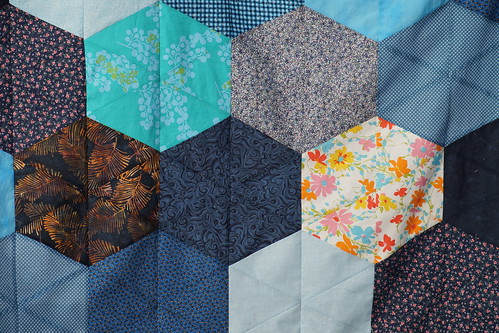
So then I shifted to scrappy hexagons since I had all these pieces cut out.


This was coming together better than the original plan.


Here we are completed....and hanging sideways because of the size.
I like it better.


I think once Lynn gets it all quilted for me I'll like it even better.
My blue loving oldest daughter thought it was awesome.
Sorry, this one isn't for you.

Thursday, November 7, 2013

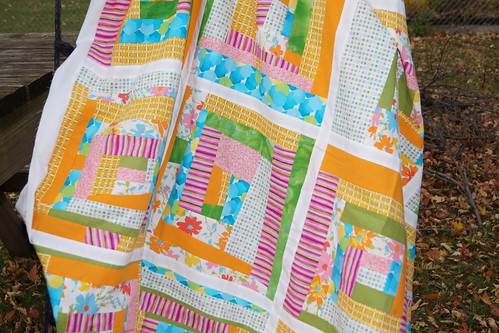
Wonky Log Cabin blocks from the kiddos

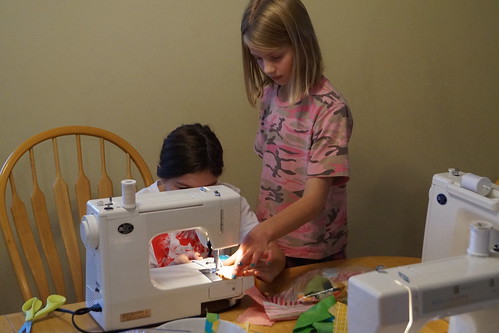
After sewing with the ladies, I still didn't have enough blocks for what I wanted to do for the quilt top.  The next day two of my kids wanted to make a block and so I set them up and showed them the basic concept. They got to work while I was doing other things there near them.

During their sewing the neighbor girls showed up to play with daughter #3.  She invited them in to watch her sew.  How fun for them.....Not!  Eventually I set up ANOTHER machine and got them going on a block each too.


I have to say that helping four newbie kid sewers at the same time is a bit much.  I'd recommend only 2 at a time.

But we all survived, or I should say I did...with my sanity still intact at the end.  However, I was so ready to take a shower and move on to something else.

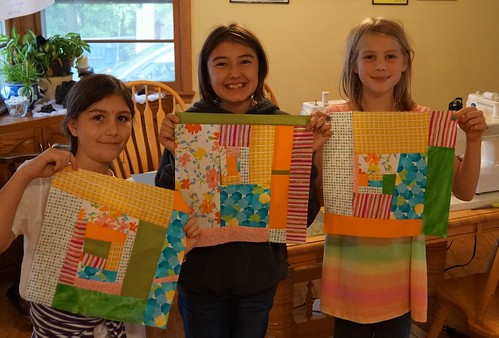
Here are their creations which I did put into the quilt top AFTER they ran down to their house and showed their mom what they had made.


Ages 9, 11, and 10 (#3 daughter on the right)


My #1 son, age 12

Then on a different day my youngest wanted to create a block too.  I did the sewing, but he directed me as to the colors and sizes.


Littlest guy age 7

On a side note: the fake smiles my boys are giving are just killing me.  They look like they are in pain or something.  Why do they do that?

Wednesday, November 6, 2013

Sewing Group Project--Quilt #2

I finally was able to put together the quilt top from our second collaborative sewing night.


It felt like it went more smoothly than last time.  Not sure if it was my planning, fabric choice, block choice, etc. or the ladies that were involved.  Either way, I felt like everyone had a good time.


Thanks to Cindy, Cassie, Ann, Tana, Sue and Marci for their help.
Great job ladies!

Details:

Wednesday, October 30, 2013

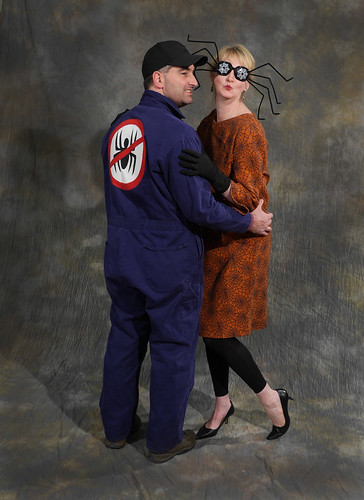
Opposites Attract Costume for Couples

My husband and I haven't always done a couples costumes for Halloween.  Most times, in the past, we've just done our own thing.  Which usually translates into I have a costume of some sort and he just shows up in his hunting gear to the party, having just come straight from actually hunting.

Last year we did this and now it seems we have set a precedent for ourselves and an expectation from everyone else to come up with something again this year.  Our original plan A fell through, or at least we weren't able to get it all together in a timely manner, so we'll save it for next year.  (I'm already thinking through it some and will probably hit the thrift store post Halloween to round up the things we need).

Anyway, plan B came about in a long way.  I had the fabric for my dress in my Halloween stash.  I had bought it last year and was going to make some pillows or use it as a tablecloth or something.  I just never did anything with it.  So this year, when I found it again I decided I would see if there was enough to make a dress.  Then I could be a witch or a spider lady of some sort.

I started getting excited about my costume and then hubby was like "well, what am I going to be?"
Hmmm, not sure.  I hadn't really thought about it.
He decided he would be my pet spider at first and then he had a brainstorm.
Be very careful when someone else comes up with a "brilliant" idea that you then have to execute.

When we first met he was selling pest control door-to-door for the summer.
So the new plan B for him was to be an exterminator.
We'd be "opposites attract"--the Spider Lady and the Exterminator.

After all the drama surrounding the costume situation I couldn't say no.


Details:
  • Dress based on pattern Butterick 5522.  Just cut the sleeves one piece instead of 2-tone.  Added a back zipper since the pattern is for stretch knits and this fabric is not.
  • Glasses from this idea.  I am LOVING these!  They were a hit at the party (although really hard to see out of at night)
  • Bought black leggings and gloves.
  • You could also make your own and use pattern Butterick 5695
  • Coveralls $7.99 thrift store purchase
  • "No spiders" sign inspiration from here.  
  • Used WonderUnder and fabric to assemble and then topstitched it onto the back of the coveralls.

Tuesday, October 29, 2013

Halloween Costume Ideas for couples or groups

Last weekend we attended our Church's Halloween party.
Always fun and always great to see creative costumes.

Here are some costumes that might spark your creativity.


Jenny and Patrick and their son.  
He was the firefighter that rescued them from a "house fire" in the middle of the night

Natalie with her son and his friend.
Medusa, Jason Grace and Percy Jackson


Cindy, Larry and kids
Minions from "Despicable Me."


One more minion for good measure.
Go B.!


Cutie siblings
Burglar and S.W.A.T. team members


Our cousin Nancy & hubby John
Lovely garden gnomes


Shelby, Kerry and kids plus one friend.
Eowyn and Aragon plus assorted other costumes

Happy Halloween Everyone!

Monday, October 28, 2013

Pride and Prejudice--Group Costumes

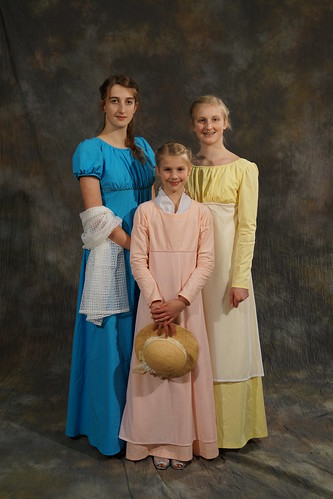
All 3 of my girls decided they wanted to dress up like the ladies from "Pride and Prejudice".  We found a good pattern and off we went doing some sewing.  We took advantage of our 3 days break earlier in October and got most of it done then.  Our Church party was over the weekend and then Halloween upcoming.  At least 2 times to wear it--that's what we like.

Details:
  • Simplicity 4055 was the best choice for us.  Thanks to Jo-Ann's for their little 5 for $5 sale.
  • You could also use Butterick 6630.  We just didn't like the lower cut neckline on this pattern, though the jacket/coat is gorgeous.
  • Yellow twill-ish fabric 60 inches wide -- 5 1/2 yds. for $7.50.
  • Peachy fabric 60 inches wide -- 4 yds. for $4.50.
  • Bought drapery lining at $2/yd. for the overlay and found another piece at the thrift store for about $3
  • We found our pretty braided hair ideas online, after watching the movie again...and maybe again.

Friday, October 25, 2013

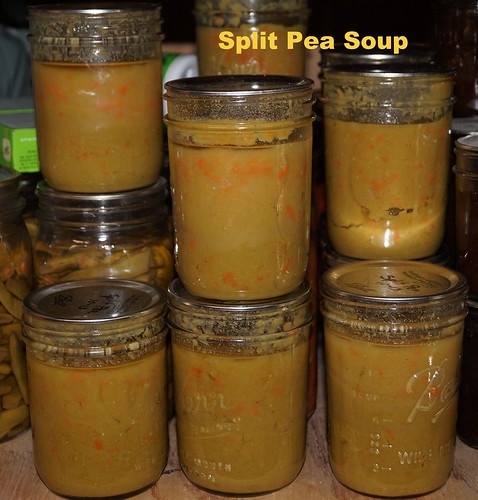
Canning Split Pea Soup

Two weekends ago it decided to cool down here in Minnesota.  We had been enjoying unseasonably warmer weather for Fall, which was fine with me.  But now that we are cooling down it is time to can some soups.

I am pretty much the only one in my family who will eat split pea soup.
I don't care.
I like it.
Even if it does look "gross" per the kids.
I'll give them that much
But when I can it in pint jars it is just about the perfect amount for one serving--ME, for lunch.


I just canned some more Chili this week too.
Stocking up for the cold months ahead.
Now we just need a deer or two from our hunters and I'll can some venison chunks for stews.

Notes:
  • I used the recipe from the Ball Blue Book, pg. 65, "Split Pea Soup".  I doubled the recipe and got 11 pints.
  • I don't thicken mine any more than the recipe indicates when cooking it before canning because it thickens up quite a bit once it is all pressure canned.
  • This recipe has split peas, ham chunks, carrots and allspice.
  • Canning Homemade also has a recipe for a slightly different version of split pea soup.
  • 1 - 1 pound bag of dried split peas is equal to 2 cups dry uncooked for those of you who prefer to buy in bulk (which is usually cheaper).
  • If you need some good soup recipes to can--those you can dump and heat up--try The Amish Canning Cookbook.  I checked it out from my local library and found some yummy recipes.

Wednesday, October 23, 2013

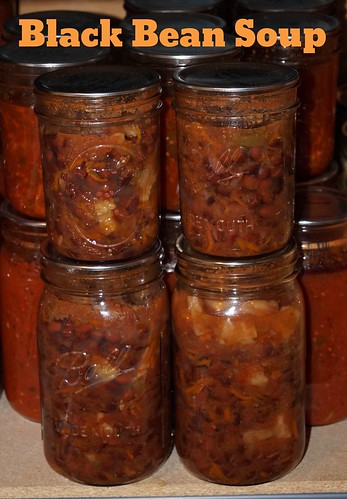
Home Canned Black Bean Soup

I canned a batch of soup over the weekend. Part of my crew was pheasant hunting and it was rainy. So it turned out to be a great time to do some canning.

This is the first time I have tried Black Bean Soup, pg. 177 from The Amish Canning Cookbook.  (It looks like this link will give you a good sampling of the recipes from this book.)


This soup recipe includes black beans, carrots, sweet potatoes, tomatoes, onions.  Looking forward to eating this with some tortilla chips and sour cream.

Notes:
  • I was able to get 10 quarts worth of soup instead of 6 as indicated by the recipe.  And I followed it exactly.
  • Instead of putting the beans in the jars first and separate from the other ingredients I combined everything and then put them in the jars.
  • I canned some in pints so that I would have smaller portions for lunch, and in case the rest of my family doesn't like it.
  • Check your local library to see if they have the book.  I was mostly interested in their soup recipes although there was lots of different recipes.

Friday, October 18, 2013

Fall Snowball blocks

Here's the last one of those WIP quilt tops that I sent out to Lynn for quilting.


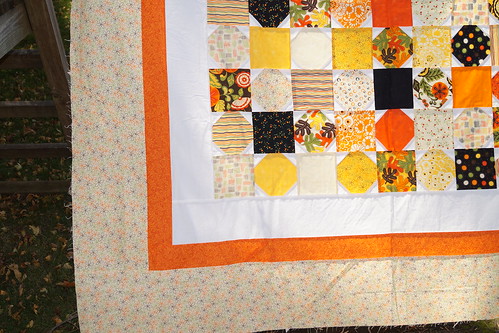
Got these charm blocks at the thrift store along with the border fabric too.


I decided to try a couple snowball style blocks instead of only straight blocks.  Mixing it up just a little.


On the 3 sets of yellow/cream blocks right next to each other I am hoping that Lynn will quilt the words Happy
Fall
Ya'll.

I won't get the quilt back before Thanksgiving, but that's alright.  It'll be done and I can put it away and pull it out next season for a nice surprise for everyone.

Linked up to Finish it Up Friday over at Crazy Mom Quilts

Wednesday, October 16, 2013

Leftovers Quilt

This is the second WIP quilt I sent to Lynn.

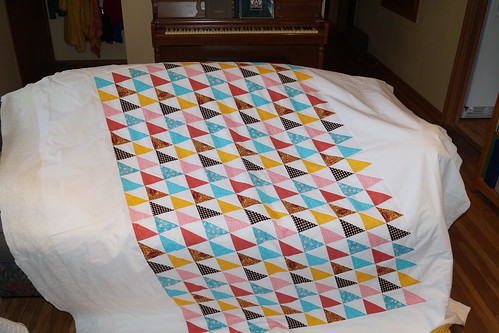
During the time that I was making this quilt for our SIL Tonya I saved the little HST pieces that I was cutting off as I was making the big stars for hers.  I did it as I went along and ended up with 160 HST.

This would've been a nice amount for a baby quilt.  However, no new babies in my circle right now. Besides, one of my girls really liked the colors and said she thought we should keep it, even though we really don't need any more quilts.  I cut and made another 68 more HST out of the remainder of the fabric scraps, even piecing a couple of the main fabrics to get what I needed.


I'm pleased with how it turned out.
I didn't take a pic before sending, but it has a bright yellow print on back with a few of the scraps intersecting the piece.


So off to Lynn it goes.
Bye-bye!  See you later this year when you're all gussied up.

Details:
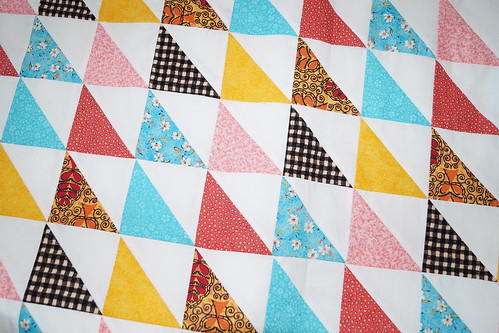
  • 12 HST blocks across by 19 down = 228 total HST
  • HST Cut to 3 3/4 inch 
  • Thrifted white sheet (brand new) for the sashing--cut 6 inches, 9 inches, 18 inches and 24 inches for an off center placement.

Monday, October 14, 2013

Decisions, decisions....

Later this week I am going to do another sewing group/class with some friends next Friday night.  (Finished quilt from the first round shown here.)  I knew I had some people interested, but the timing wasn't quite right for me to pull it all together. But lately I've been feeling the need to clean out some fabric and scraps that I am tired of seeing, but are still useful.  It took me some time to decide what block pattern to use and which fabrics (mainly because I wanted to make sure I had enough to put together 12 packets), but I finally got it.


All but the turquoise hexagonal print came from my stash.  Apparently I didn't have the right blue or enough blue and so I went and bought one yard to cut up and share.

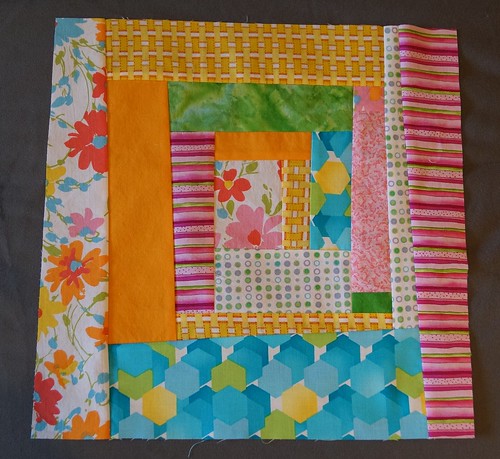
We're going to make Wonky Log Cabin Blocks, pg. 12-19, from Block Party--The Modern Quilting Bee. 


Sample 1


Sample 2

I have a couple repeat seamstresses signed up to join and a couple different ladies who haven't ever sewn with me before so it should be a fun evening.  I told my 2 older girls, too, that if I didn't have all 12 spots filled that they could join too.  They are hoping that only the ones I have now will be it.

The plan is to donate the top to Margaret's Hope Chest when we are all finished.  She always has great charitable projects going on where she can use fun, pretty quilts.

Thursday, October 10, 2013

Love is in the Air Quilt

From one OCD week (or two) of canning to another OCD week of putting quilt tops together.

Our parents are heading to Utah towards the end of the month and then will be visiting us the end of November.  So in thinking about that I am hustling to put together as many WIP quilt tops that I can to be sent to Lynn for quilting so that our parents can drive them back with them and then on up to us.  Save me some shipping costs.

This is the first one.
Super easy design.
5" charm pack squares put randomly into 9 patch blocks.


Details:
  • Thrifted charm packs--Love is in the Air from Moda
  • "Vintage-ish" sheet for backing fabric
  • Sashing also thrifted white sheet
  • Used 108 - 5 inch squares
  • Made 12 - 9 patch blocks
  • Cut sashing 3 1/2" wide
  • Border cut 6" wide

Tuesday, October 1, 2013

'Tis the Season to be Canning

Two weeks ago a gentleman from hubby's work asked if we'd like some tomatoes.  Earlier in the season he had brought a bunch of zucchinis to give away.  Apparently he is involved in a community garden and was "done" with the tomatoes.  They were also not the variety he thought he had planted and so he didn't want them.  I told hubby I'd take whatever he wanted to get rid of.  I'd figure something out based on whatever he wanted to give.

Be very careful of what you say.

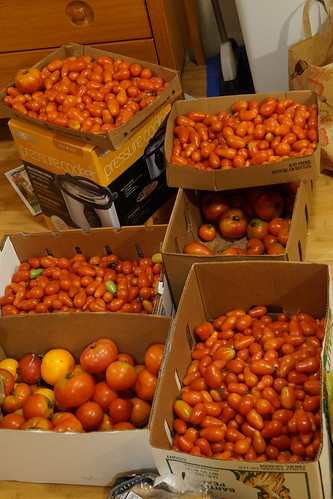
The next day hubby brought home boxes, yes, boxes of tomatoes.
This is what I still had left after canning 35 pints of salsa on that first Friday and Saturday.


It didn't feel like I even made a dent in the boxes, but that's O.K.
I'm not one to look a gift horse in the mouth--or in this case boxes of free tomatoes.
So I got to work and did more canning, almost every day last week.

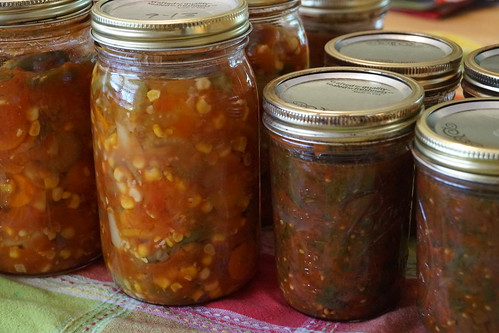
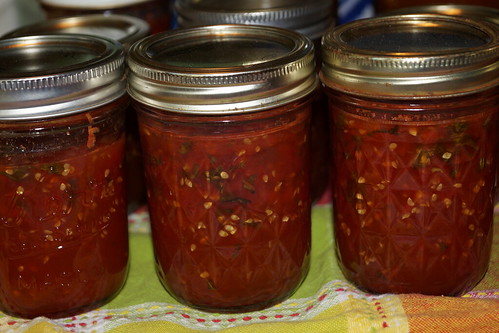
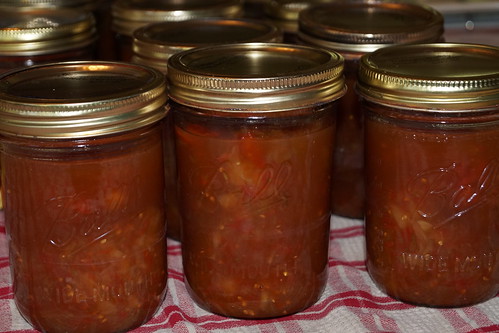
Vegetable soup (left) and Spicy Tomato Salsa (right)

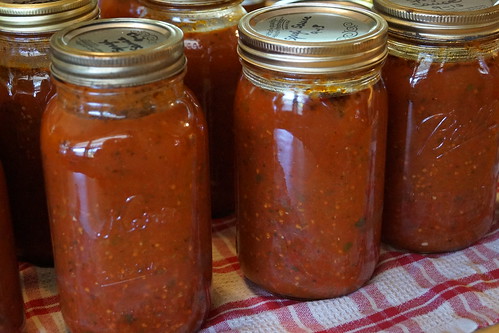
Spaghetti Sauce

Tomato-Basil Jam


Mandarin Sauce

I added quarts of Vegetable Soup, pints of Spicy Tomato Salsa, quarts of Spaghetti Sauce, Sweet & Sour sauce, Tomato-Basil jam..  After all that I STILL had tomatoes. So I did more Vegetable Soup, more salsas and more Spaghetti Sauce.  The boxes are finally empty, after days of working on them.  I'm tired, but it also feels so good to see all that food on my storage shelves.  I am actually to the point where I don't have much extra shelving space.  That hasn't ever happened to us before.  I also had to go out and buy more jars. Also, can't remember the last time I had to do that.

Now on to something else...anything else.  
I really don't want to see any more tomatoes for quite some time.
That was a LOT.

Free Boxes of Tomatoes Yield:
Total Jars:  115 jars of tomato goodness.

Then on top of those I also canned 28 quarts of soup starter (not involving tomatoes).
And 11 pints of Tomatillo Green Salsa with some free green tomatoes from my friend Jenny's garden.  Her pregnant body doesn't want anything to do with tomatoes right now.

That bumps it up to 154 Jars.

Yeah, no wonder I'm tired.
Redbox is looking good today.

Thursday, September 26, 2013

White Stars Quilt

I have been canning like crazy last week and this week.  I plan on posting my tomato madness here tomorrow or Monday, but today I need a break from it all---and some of the tomatoes need to ripen a bit more.  Anyway, I thought I'd post a little progress on a project that came together rather quickly a week ago.

So a little over a year ago we made a quilt for our brother for his 40th birthday.

This past summer while heading out to Utah on vacation, we stopped at their house in Nebraska and his wife Tonya mentioned that she needs a quilt because he loves his AND he doesn't share.  Not even with her. Travis, rude!

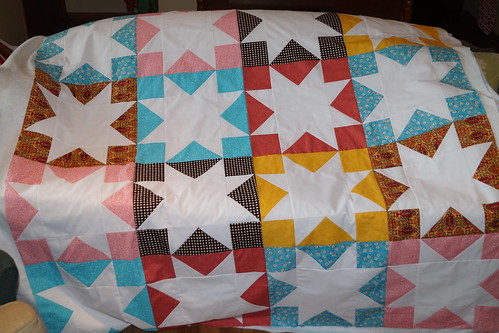
Anyway, we missed her 40th birthday this year due to all sorts of craziness for all involved, but we're making up for it now.  Here is the quilt top I put together for her.  She doesn't know it is coming her way, so it will still be a nice surprise.


The only thing Travis said was to make it "girly" as his is definitely not.
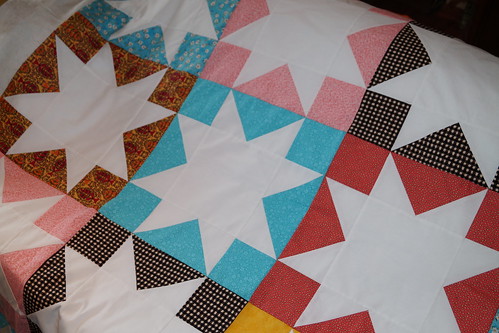
I like how the top turned out.  These blocks come together rather quickly (16" square)
Now it is ready to send to Lynn to work her quilty magic on it.

Details:
  • Pattern "White Stars" from Skip The Borders by Julie Herman, pg.26-28.
  • Used 7 different fabrics for 20 blocks.  Need a fat quarter worth of fabric per block.

A couple other versions of this pattern if you want to check them out.

LinkWithin

Related Posts Plugin for WordPress, Blogger...