This is the fabric she chose for the contrasting band.
M. was able to make the pillowcase all by herself--only straight seams necessary--and I walked her through it easy enough. Total cost for the fabric: $5.49


Below are the measurements that I have been using since I got them from a Hancock Fabrics Holiday Craft Show in 2000.
Basic Pillowcase
Approximate pillowcase sizes—
21” x 31 ½” Standard
21” x 35 ½” Queen
21” x 41 ½” King
Materials needed:
¾ yd. fabric (standard) OR 7/8 yd. (queen) OR 1 ½ yd. (king)
1/8 yd. coordinating fabric A (narrow band)
1/3 yd. coordinating fabric B (wide band)
Thread
Cut:
27” x 43” piece (standard) OR 31” x 43” (queen) OR 37” x 43” (king) of main color (MC)
2 ½” x 43” piece of fabric color A
9” x 43” piece of fabric color B
Directions:
1. With right sides together (RST) stitch both the narrow band (A) and wide band (B) each along their short edge. You'll be making a circle of sorts.
2. Press open seams and then fold each band in half wrong sides together (WST). Still maintaining a circle.
3. With RST, fold pillowcase (MC) in half, stitching one end and the side piece. Finish seam allowance. Press.
4. Align both the narrow and wide bands with raw edges matching. If you need to baste the raw edges together. Still maintaining a circle.
5. With RST match the narrow band side to the pillowcase and stitch. Finish seam allowance. Press seam towards pillowcase.
6. Topstitch along band seam, if desired.
This is the other part to her present--matching tees that she ironed on some cat and dog decals.

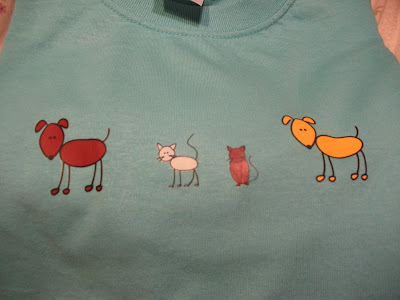
The two shirts and all the iron-ons cost us less than $10--barely, but still less.


.jpg)


 The story of this quilt, as best as we can all remember, is that Grandma Cooper (she is our dad's grandmother) asked our mom if she would want it and finish it, as her eyes weren't good anymore. So our mom took it, and then she decided that she wouldn't ever finish it either. I don't know how long our mom had it before it came to me. Great-Grandma Cooper died in 1979. So the quilt top is OLD! And we think that I've had it since then as the first little alphabet patchwork quilt I had done I made in 1979 (

 This may be my favorite lady on the quilt, with her feather print dress. We talked about splitting the quilt up into 4 smaller quilts, or pillows, as there are 16 ladies, but our mom didn't really think we should do that.

 Version #2--for Fall

 16" long ties view on both my daugher and me---Too Short!!
 I also decided to cut 4 of the ties so that there wasn't a wrong or right side to them. You probably don't need to do this if your fabric is printed decent enough. I just laid out 2 per tie, wrong sides together, and then bound them together with the bias tape.
 I did a topstitch on the pocket on both the inner and outer edges of the bias tape. The book suggested just topstitching on the inner edge, which is where it encases the pocket. You can decide which look you like best.


