Showing posts with label Recycled. Show all posts

Friday, June 9, 2017

T-shirt Quilt for Daughter #2

 Daughter #2 with her t-shirt quilt for graduation.


 Some close-ups of the quilting.

 Backing chevron flannel and binding.

 Little sisters are so helpful!

 This is probably her favorite tee.


 I had Lynn quilt her graduation year onto the quilt because she didn't have any with her year on it.


Details:
  • For this quilt I used about 25 shirts, including 2 sweatshirts.  A couple had both a back and a front that we used. 
  • 5 columns of t-shirts
  • 6 yds. of Grey Chevron Flannel for backing that I bought at JoAnn's.
  • Quilted by Lynn Peterson
  • Finished Dimensions 76 inches by 88 inches

Thursday, May 18, 2017

Graduation Quilt Top

Our second child will be graduating from high school in a couple of weeks.
I completed her t-shirt quilt top this week and got it sent off to the quilter today.
 Hers looks a little more crazy than what I've done in the past.
However, that is probably because she has attended 2 different high school during her time.
 This is also the first time I've made a t-shirt quilt without any sashing or borders.
It is definitely a bit more random than others I've done.
This is the backing: gray chevron flannel.
So happy that I got the pattern lined up perfectly!

Linked up to CrazyMomQuilts

Wednesday, April 26, 2017

Scrappy Rectangles #2 Completed


Details:
And yes, crazy me, I've started the next round of blocks for version #3. 

If interested in purchasing this quilt you can find it in my Etsy shop.

Monday, April 3, 2017

Wide Stripes T-shirt Quilt

As many of you know we like to make t-shirt memory quilts around here.  What you may not know is that also leaves us with quite a bit of t-shirt scraps--some pieces are smaller than others, but sometimes we have entire blank backs that go unused.

So after finishing my last t-shirt quilt I decided to challenge myself and use up the "leftovers" of the t-shirts and turn them into a quilt of some sort. I've been holding onto these for quite some time.

What I came up with was a brick like pattern using 6 inch and 3 inch strips.  Basically getting the stripes as wide as I could based on what I had. 
 This baby is LARGE!  And crazy, but I am pleased with the final result.
My 6'5" son and I are holding this up--widthwise--because it was too big to hold up lengthwise.

The backing was made from a chambray sheet and then added some additional stripes
so that it would be long enough.


Close-up of the quilting.  I asked Lynn for some simple lines to hold it all in place and then some random pebbling on a couple of the smaller stripes.   I love the pebbling!  If I ever do one of these again I would have her do every other or every 3rd row with the pebbling.

And here is my dad enjoying his new quilt.
He likes them HUGE so he can tuck it under everywhere.
And he also likes the added weight of the t-shirt fabric.

Details:
  • Don't forget to interface all the t-shirt pieces so there is no stretching, especially for the quilter.
  • Finished size 82 inches by 105 inches.  Yes, it is HUMONGOUS!!  Just the way this Arizona boy likes it so that he doesn't freeze to death.
  • Quilted by Lynn Peterson.

Links to some other t-shirt quilts we've made or featured here on our blog.

Next up for me in another random improve t-shirt quilt.  It is done and needs a backing and to be quilted.  And I'm almost finished with daughter #2's t-shirt graduation quilt.  Hers will be interesting as it is a combo of 2 different high schools and other random shirts thrown in.  Can't wait to show them off when they are finished.

Friday, August 26, 2016

Alexander's T-shirt Quilt

Alexander is the son of my good friend Cindy.  I've known him since he was born. 


This Spring he graduated from high school.  I told him that if they wanted to pay for the materials I would put the time in and make him a t-shirt quilt for his graduation gift. 

Alexander was all over that. 

He is a funny kid.  He has Asperger's and is very OCD about some things.  It was difficult for him at first to go thru all his shirts and "give" them away, even though the majority of them didn't even fit him anymore. However, having them in a quilt will make both him and his mom happy (i.e. less shirts in his dresser drawers sitting there doing nothing).

I had him go thru his t-shirt stash with me and he showed me the ones that for SURE had to go in the quilt and then depending on how the size and design ended up we had another pile of shirts to add to as needed.  I didn't use up all the shirts he gave me, but we did use 24 of them.  Not everyone will have that many shirts but Alexander NEVER wears a solid t-shirt....NEVER.  It has to have some logo or something on it.

This is the first time I have put together a t-shirt quilt that didn't involve the majority to be school or sports themed shirts.  In fact, he only had one shirt that represents his school.  Instead, Alexander likes video games, goofy sayings, Star Wars, Pokémon, etc.  So I had to pull that all together in this quilt.

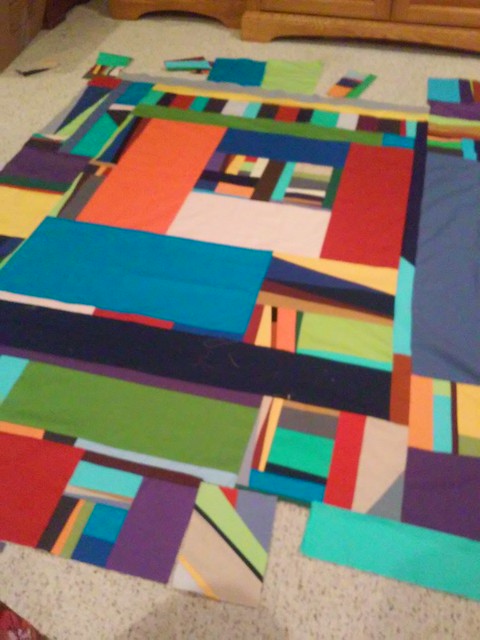
Here is the top all put together before sending it off for quilting.


He picked out his sashing/border fabric as well as the backing fabric.  He wanted to choose and not have me pick out something for him.  Fine with me.

I just heard back that the quilting is done and I should get it back next week.  I asked Lynn to quilt his name and graduation year on a blank block that I included in the quilt since he didn't have any shirts with his name.  I guess I need to go find some binding fabric to go with now that I know the quilt is coming back.

Details:
  • Zelda and Gang fabric from JoAnn's.  Needed 6 yds. for the backing and it couldn't be matched perfectly.  I tried.  From a distance it will hardly be noticeable.

The other t-shirt quilts that we've put together.

Thursday, July 7, 2016

Samuel's T-shirt Quilt Top

Our nephew Samuel, in Nebraska, just graduated from Hastings High School this past May
(as well as received his Eagle Scout Award). 


Post graduation he gathered up the t-shirts he felt he could part with and sent them to me so I could put together this t-shirt quilt.

He is a tall guy (goes without saying for our family)--about 6'3"
and so I had to make sure this quilt was long enough to cover his frame.
That was a trick as he didn't have as many shirts as his sister did.
His older sister is the blondie middle one of this trio of cousins. 
I had to be a bit more creative in how I put his quilt all together.

The finished top.
I am really loving the gray/black keyboard look.


A little close-up of some of the t-shirt piecing I did for the borders.

Now to pick out the back, binding and send it off to the quilter.


Details:
  • Front and back (where possible) of about 7 t-shirts plus a sleeve logo.  He had an EXACT duplicate of the white shirt front and back so I only cut the paw print off the second shirt and placed it in the quilt.
  • For this quilt I pieced much more of the solid color portion of the t-shirts to add to it, including the sashing. I might have even pulled some solids from other t-shirt quilt extras I had.
  • Post about his sister's t-shirt quilt. You can see how different they ended up being even though they attended the same high school and both ran cross country.
  • Finished quilt top dimensions: 69 x 89 inches

Monday, June 27, 2016

Open Wide Zipper Pouch

Daughter #2 has been out in Idaho for a couple weeks working for her aunt and uncle with their fireworks business.  She'll be home after the 4th of July sometime but this has been a good little trial run for her of living away from home.  AND it was the first time ever that she flew in a plane.  For a girl who has some anxiety issues, she did great.  She texted and sent pics along the way, and at one point said she "was tempting fate by flying in 2 planes on the same day."  Silly girl! 

Thanks to Ms. Devyn who helped her from Minneapolis to Salt Lake City.  She sort of adopted our daughter at the airport check-in kiosk when she found out they were both flying to SLC.  It was nice that she didn't have to worry so much.  I love it when we find good people along our roads in life.

She needed some storage items to keep everything corralled since she'll be gone for 5-6 weeks.  So I made her this zipper pouch so that she can keep her AP summer homework all in the same place.


Once you make one of these you'll see how quick they sew up.
And how easy it is to make whatever size you need.
It might become slightly addicting too.


Details:

Friday, June 24, 2016

Magnetic Chalkboard Frame

This project took way more time and effort than I think it needed.
But I guess that is what happens when you are just winging it.

Finished up

 Frame and paint detail

Hanging in my entry with the real life shoes lying everywhere.

 Close-up of metal glued onto the board.
I cut the metal to shape with a pair of tin snips.
Used a jigsaw to cut the board.

 The crease on the board is what occurs when you use contact cement--don't quite get it
lined up correctly and quickly try and pull it off to reposition.
You just get a bend in your metal because it IS NOT coming off.

At this point we are calling it "character".  I didn't want to start all over.
It would have been too frustrating.


Hints:
  • Originally tried to glue the metal to the board with Liquid Nails.  Ughh, thumbs down!!  As soon as I took the clamps off the pieces the metal just popped right off.  Maybe I wasn't doing it correctly, but I felt it should've been easier to use.
  • Contact cement is PERMANENT! You cannot remove it and replace like other products.  Once it is down, that is where it is going.  In hindsight we should have put the metal into the frame and then laid the glued board down on top of it to get it lined up correctly.  Since we didn't I had to go back and trim off metal or wood here and there in order to get the piece to line back up in the frame.  And we also have a little crease in the metal after trying to pull it off quickly once we realized it wasn't lined up perfectly.
  • Once I got all the coats of paint on and then seasoned the chalkboard it wasn't nearly as noticeable.  And I can always strategically place things I am hanging up.

Oh well!

Details:

You can buy sheets of chalkboard at Home Depot. They are about $10 and measure 2 x 4 feet.  That would've worked great for the size I needed except I wanted chalkboard AND magnet board combined.

Wednesday, June 22, 2016

Recycled drawstring backpack

Our youngest daughter headed off to girls camp this week.
She said she needed a backpack to carry stuff around in so she wouldn't have to put it in her pocket of carry it by hand.
This is what we came up with using no pattern and fabric that we already had in the stash.
\
You can get an idea of how big it is based on my wingback chair.
I forget to measure it before my daughter left.


A little topstitching detail

 I opted to just tie the end off into a knot and add some fray check to the ends.
I also sewed the straps down near the loop so that they would stay in place more.
I also did this at the top of the strap, when the bag was completely open to stabilize again.

It held a good amount once she loaded it up for camp.
Not sure what all she put in there, but it was full.


Peace out people!
See you at the end of the week.

She commented to me, "I'm going to have the cutest backpack at camp!"

I think I would have to agree.

Details:
  • Denim base used from cut off jean legs (that we bought to turn into shorts) and squared off.
  • Red fabric is from my stash.
  • I did line this completely, but forgot a picture.
  • Pinterest has all sorts of tutorials if you need some help making one.


Monday, June 20, 2016

Chalkboard Frame

We've been working on daughter #2's bedroom and here is one of the accessories we added to her room.


She wanted a chalkboard frame to write herself notes.

And yes this is her handwriting--freehand.
She can print in font--it is amazing!

I love the details on this frame.
It's plastic, but after spray painting it I don't think anyone would know it.


Details:

This is the window side of her basement bedroom.  We FINALLY got the orange-ish walls (check the first pic to see the previous color--sort of) painted a nice white which makes a huge difference.  I still need to get rid of the dark brown wood blinds, but I haven't figured out what other window treatment to do.  So for the moment we've added the tissue paper flowers to try and "disguise" the window a little.  It was cheap and easy until we know what we are going to do permanently.

Monday, June 13, 2016

Modern Improv Solids #2


The second modern improv solids quilt top in progress above.

Can I just say, once again, that I always think scrappy quilts will use up more fabric than they actually do?  Even after finishing this one I still have MORE solids I could do another top.  Not sure that will actually happen, but seriously, it is hard to purge when you know that you could get another quilt top out of those scraps.

And here it is completed--well at least the top.


Here you can get a little bit of the scale of some of the sections.

I have a pile of quilts to send out to be quilted, this being #4 now I think.  However, I need to save my pennies to get them quilted. So for now I'll just hang onto this until I sell a child (kidding) or someone I don't really know dies and leaves me all their money (completely unrealistic). 

As Leslie says, "The struggle is real." 
Too much creativity floating around in my head and not enough money to fulfill it all.

I think I know what I am going to do with some of the rest of my solids scraps--black, grays, yellows, white and red.  Equilateral triangles scattered about something like this pin.

Details:

LinkWithin

Related Posts Plugin for WordPress, Blogger...