Showing posts with label Cooking. Show all posts

Tuesday, June 10, 2014

Breaking out of our jam rut

At our house the preferred jam of choice is Raspberry.
Homemade.
Hands down!
I think there are a few kids who won't even try anything else.
Sad day for them this year as my raspberry patch is no more.
Dead from a Japanese Beetle attack.
It really is a sad day for all of us, but not much I can do now.

So I am trying a couple different jam recipes than we haven't had in the past.

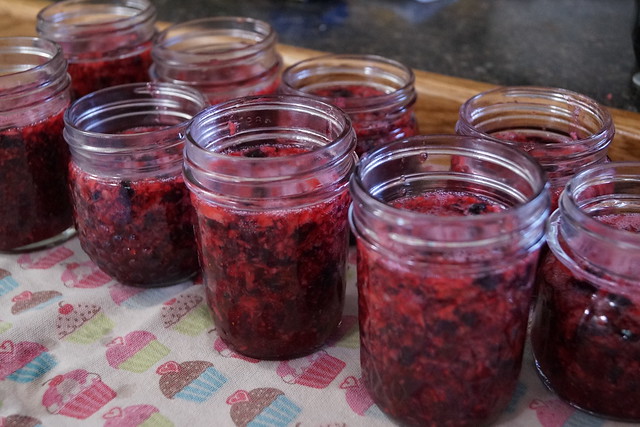
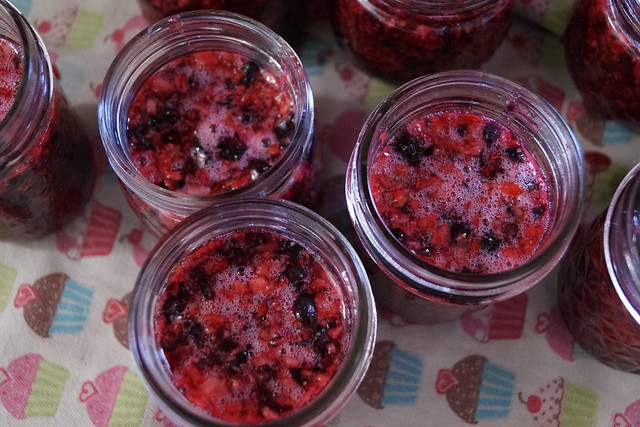
Last week I made Strawberry-Blueberry Freezer Jam.


I made homemade bread the next day to give with a jar of jam to the teachers as a thank you.
It is always a hit with people.
I also gave one to my stylist.
I've brought her bread and/or jam before.
She told me she hides her jar in the back of the fridge so she doesn't have to share with her family.

Details:
  • Recipe here.  
  • I used frozen blueberries that I bought at Sam's.  I just measured out the amount and then let them thaw in the fridge overnight.  I drained off the melted liquid before chopping them up.
  • We prefer freezer jams normally, but the Sure-Jell packages come with cooked jam recipes too.
  • I was able to get 9 - 1/2 pints out of this recipe.

Wednesday, August 28, 2013

Wheat Free Zucchini Bread

I happened upon this version by accident.
Hubby has been bringing home LARGE zucchinis from work.  Apparently a few people are bringing their extras (you know how zucchini can overtake everything in your garden) and then leaving them out for others to enjoy.  We have been enjoying them, for sure.

I made some zucchini bread for us and then needed to make a loaf for our #2 daughter who needs a wheat free diet.  The recipe I normally use makes 2 loaves and since I was messing around with a recipe I didn't want to possibly waste 2 loaves if it didn't turn out, so I used another recipe I had but had never made before.

Here it is:
Sorry no pictures but I forgot and they all got eaten.

Wheat Free Zucchini Bread
Mix together:
  • 2 beaten eggs
  • 1 1/4 cup sugar
  • 1/2 cup oil
Add:
  • 2 1/2 cups WonderFlour (this is not a GF flour, but you could substitute your AP GF flour instead)
  • 2 tsp. baking powder
  • 3/4 tsp. salt
  • 1 tsp. cinnamon
  • 1/4 tsp. ground ginger
  • 1 tsp. Xantham gum
  • 2 cups peeled, seeded, shredded zucchini
Mix well.  Spoon batter into greased loaf pan.  Bake at 350 for 50-60 minutes.  Makes 1 loaf.

I turned these into zucchini muffins for my daughter instead of a loaf since she is the only one eating this version.  That way we can freeze them and she can grab one when she wants. It makes about 21 muffins (filled 3/4 full) and I baked them for about 30 minutes.

Notes:
  • WonderFlour is a combination of equal parts spelt, brown rice, and pearled barley ground into a flour mix.  You can order it online, but I grind my own.  I buy those items bulk at my local Whole Foods Market.  You can call ahead and they will order 25# bags, for example, and then you also get a 10% discount for ordering bulk.
  • The first time we made these muffins I used applesauce instead of the oil and the taste was fine as was the texture.  
  • I normally use stoneware pans and find that I have to bake my items a bit longer than the recommended baking times.  Usually an additional 10-15 minutes on loaves.  Maybe 5 more minutes on the muffins.
________________________

The original recipe had additionally:
1 tsp. lemon peel
reduced cinnamon to 1/2 tsp.
1/4 tsp. orange extract (optional)
1 cup chopped walnuts (optional--which I am usually the only one at my house that wants nuts in the bread)
and then obviously no Xanthum gum and regular AP flour

Monday, August 12, 2013

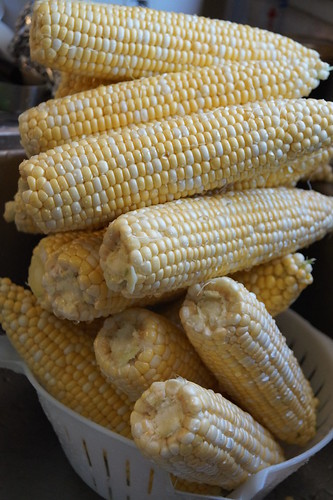
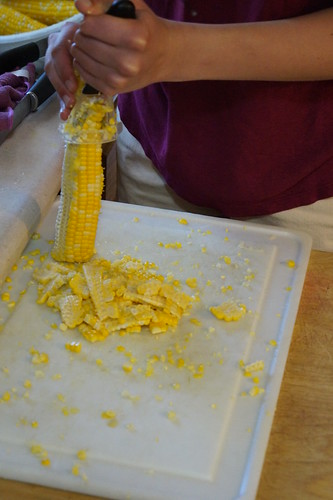
How to Freeze Corn

....otherwise known as stocking up when fresh corn on the cob is in season and on sale.


This past week or two I've noticed that most of the grocery stores here locally are running sales on corn on the cob.  $.10-.17 per ear.  Most have a limit per purchase too, which I find annoying when there are huge bins of corn just sitting there.  There are 7 people at my house...limit 10 or 12 doesn't even give us 2 ears each.

I work around that though and bring my kids or hubby with to each purchase their limit, OR I go thru the self check-out lanes and do a number of separate transactions.  I think that my kids think I am being dishonest this way.  Maybe.....anyway, I do it regardless.  If I didn't do it that way I'd just come back every day and buy my limit.

In anticipation of canning more vegetable soup in the upcoming weeks, I froze some corn to have it ready to go once I am.


Notes:


Thursday, June 6, 2013

Hot Fudge Cake Recipe--GF and dairy free version

This is one of our most favorite dessert recipes and it is so easy.  We've had to tweak it some with our daughter's food intolerances, but since this has few items we have to alter it makes a good dessert recipe for all of us to enjoy.

Hot Fudge Cake
from Taste of Home magazine.


Ingredients

  • 1 cup all-purpose flour  (we have used GF All-purpose flour, WonderFlour***, brown rice flour, and Sweet Sorghum Flour all with good results)
  • 3/4 cup sugar
  • 6 tablespoons baking cocoa, divided
  • 2 teaspoons baking powder
  • 1/4 teaspoon salt
  • 1/2 cup 2% milk (have substituted with both soy and coconut milk)
  • 2 tablespoons canola oil
  • 1 teaspoon vanilla extract
  • 1 cup packed brown sugar
  • 1-3/4 cups hot water
  • Ice cream or whipped cream, optional (Don't use for those with dairy issues, or use dairy free substitute)

Directions

  • Preheat oven to 350°. In a large bowl, whisk flour, sugar, 2 tablespoons cocoa, baking powder and salt. In another bowl, whisk milk, oil and vanilla until blended. Add to flour mixture; stir just until moistened.
  • Transfer to an ungreased 9-in.-square baking pan. In a small bowl, mix brown sugar and remaining cocoa; sprinkle over batter. Pour hot water over all; do not stir.
  • Bake 35-40 minutes. Serve warm. If desired, top with ice cream. 
  • Yield: 9 servings.
Nutritional Facts1 piece (calculatd without whipped cream and ice cream) equals 253 calories, 4 g fat (1 g saturated fat), 2 mg cholesterol, 171 mg sodium, 54 g carbohydrate, 1 g fiber, 3 g protein.

Originally published as Hot Fudge Cake in Taste of Home April/May 1994, p37

NOTE:
***WonderFlour is not GF, only wheat free, but it can be made on your own by combining equal parts spelt, brown rice, and barley.  I mix it all up together in a large bowl and then run it thru my electric grinder.  You can order the flour online, but it is super easy to do by yourself.

Tuesday, March 8, 2011

Chicken Pot Pie Soup

Every couple weeks or so I get together with a couple friends and we do lunch.  Sometimes we go out, but most times we do a potluck at one of our homes (some of us still have little people at home).  Last time we got together Natalie made us this delicious soup--based on one we love from a local restaurant, Eddingtons. (We actually know the founder/owner.)  She found a number of different recipes online, but this is the one (or the compilation of several) that she used.  It was great!  I made it the other night for my family.  A couple children proclaimed it "yucky" just by looking at it, but everyone ate it and only one didn't want to eat anymore after their initial serving.
________________________________________

Chicken Pot Pie Soup

2 cups cubed, cooked chicken
1/4 cup chopped onion
2 cups frozen mixed veggies, thawed
2 cups cubed, cooked potatoes
6-8 TBSP butter or margarine
1/3 cup flour (or slightly more if you like it thicker)
2 TBSP chicken bouillon granules
4 cups milk
1/4 tsp pepper
1/8 tsp garlic powder
1/8 tsp poultry seasoning

Melt butter in pot; cook onions until tender.
(**Note from Natalie: I actually left my butter on too long, and it browned, but I think this actually improved the flavor. I love browned butter, and I make it often and serve it over broccoli, a la The Spaghetti Factory)

Blend in flour, chicken bouillon, garlic, pepper and poultry seasoning.
Cook until mixture is smooth and bubbly; gradually add milk.
Cook and stir over medium heat until mixture boils.
Simmer one minute, stirring constantly.
Add chicken and vegetables slowly, stirring constantly.

Lower heat and cook until chicken and veggies are warmed through, about 5 to 10 minutes. 

Optional:  Top with pie crust crumbs.
____________________________________
My Notes:
  • I doubled the recipe for my family of 7 so we could have a little bit leftover for 2 lunches.
  • That meant I used 1 whole chicken, cooked earlier in the day in the crockpot--it was a little more than 4 cups worth of chicken.  I used it all.
  • I made it slightly thicker as suggested.  I think I was the only one who thought it would be better not so thick.
  • I did make a 1/2 recipe of pie crust and rolled it out on a cookie sheet to bake and then crumbled that on top of the soup.  AWESOME!  The kids would've used more on their soup had their been more.  Next time for us I'll make the entire recipe--double crust worth of the recipe.
  • I didn't have any poultry seasoning so I just sprinkled in some of the spices that are usually found in a poultry seasoning spice mix.
  • When Natalie made it for us she said she used an herbed whole chicken that she bought at the store and felt that gave it some of its good flavor too.
  • And sorry I didn't take pics--forgot until it was too late.

Sunday, January 9, 2011

Potato Soup


I've been trying to expand my dinner repertoire lately. 
In honor of the cold and snow that we are currently enjoying dealing with 
here is a new recipe we tried (and liked!) for potato soup.

Baked Potato Soup
6 large baked potatoes--diced (uncooked, peeled or unpeeled)
1/2 c. instant mashed potatoes
4 c. chicken broth
1 c. butter
1 c. flour
6 c. milk
2 tsp. salt
1/2 tsp. garlic powder
1/2 tsp. pepper
1/2 tsp. sugar

Combine boiling water with instant potatoes.
Make white sauce with butter, flour, milk, and salt.
Add sauce to broth with a whisk.
Bring to a simmer, add seasonings and diced potatoes.
Stir occasionally.

When potatoes are soft, serve with you choice of toppings:
chives
bacon
cheese
sour cream

Variations:  I like my soup thick and chunky, so I HALVED the butter, flour, milk, and salt mixture to get the consistency that you see above.  
My husband said the only thing that would have made it better would've been CLAMS. 

Friday, December 24, 2010

Santa Cookies

The first Saturday of December my friend Sarah hosted her annual cookie exchange. I love these, as I really am not a huge fan of making cookies. So the idea of making one kind and then coming home with 8-10 kinds really works for me. Sarah has everyone bring a dozen cookies for each person invited--already packaged up. We all go around and grab our selections, taking them home in a laundry basket or similar. And then she hosts a brunch for us all. It is so much fun.

This year I made one of my kids favs--the Santa Cookie.

We found this idea a number of years ago in the book Cookies! A Cookie Lover's Collection, pg. 204, and have tweaked it just a bit for more of our liking.


(photo courtesy of recipe book)

All you need is a basic round sugar cookie. I used our Mom's basic sugar cookie recipe below. But you could also just buy them--even easier. Try this recipe if you need a scrumptious thick sugar cookie.


  • Add some white frosting.
  • Red sugar sprinkles for the hat.
  • Mini chocolate chips for eyes.
  • 1/2 of a Mini marshmallow for the pom-pom on the hat.
  • Cinnamon red hot for the nose, or a little dab of red frosting.
  • Coconut (if you like it) for the beard. You could also use white sugar sprinkles.
There you have it.


Mom's Basic Sugar Cookie Recipe

Cream together:
1 c. shortening
1 1/2 c. sugar

Add:
2 eggs

Add:
1 tsp. vanilla
1/2 tsp. salt
1 tsp. baking powder
1 tsp. baking soda
1/3 c. milk

Add:
4 c. flour (I usually add 2, mix, then add the other 2 c.)
Bake at 350º for 8 minutes. (I find I need to bake mine 10-12 minutes on my stoneware)


NOTE: Double this recipe made 8 dozen cookies using a 2 - 3/4" diameter biscuit cutter.

Monday, November 15, 2010

Meatball Minestrone Soup

This recipe is based on our mom's minestrone soup. I just tweaked it a bit here today based on what I had and how quickly I could throw it together. Mondays are crazy afternoons/evenings for us with 2 different kids at 2 different schools, during exactly the same time, for orchestra practices. And between the drop-off and pick-up the others get home from school.


Minestrone is basically a name for a variety of thick Italian soups made with veggies, and added pasta or rice. Common ingredients include beans, onions, carrots, stock, and tomatoes. There is no set recipe for minestrone, since it is usually made out of whatever vegetables are in season. So just use this recipe as a basis and play around with any combination that you or your family like.
__________________________
Combine together:
  • 1 lb. browned ground hamburger (or diced ham or stew meat chunked, or even vegetarian) (Tonight I used a 24 oz. bag of meatballs.)
  • 1 onion, chopped (1/4 c. rehydrated diced onion)
  • 1 - 28 oz. can diced tomatoes, undrained (2 pints home canned stewed tomatoes)
  • 3 c. water
  • 2 - 8 oz. cans tomato sauce (Oops! forgot to add this. It still tasted delicious, but I think the added liquid would've helped.)
  • 1 Tbs. parsley flakes
  • 1/2 tsp. dried basil
  • 1 tsp. garlic salt
  • 1 tsp. dried oregano
  • 1/4 tsp. pepper
Simmer all above for 15 minutes. Then add:
  • 1 - 16 oz. can diced carrots, undrained (1 pint home canned carrots)
  • 1 - 16 oz. can green beans, undrained
  • 1 - 16 oz. can kidney beans, undrained (1 pint home canned--any kind bean--I used great northerns tonight)
  • 1 1/2 c. uncooked pasta (I used elbow macaroni)
Simmer for 10-15 minutes more or until pasta is cooked. Serves 12. (This easily fed my family of 7, with seconds for some, and leftovers for tomorrow too.)
__________________________
NOTE: To Pressure Can this recipe
3x this recipe will yield 15 qts. of soup
I would not add the pasta until opening to heat and serve--otherwise it ends ups being really mushy when you reheat. Yuck!
You could easily use fresh carrots and green beans, along with soaked beans overnight, instead of already canned veggies. Just add a bit more water to your soup. Heat it all up a bit before putting in the jars.
Can at 10 lbs. pressure for 90 minutes (because of the meat and beans). Adjust pressure for your altitude.

Friday, November 5, 2010

Squash {Part 2}

So in Squash {Part 1} we gave you some info on winter squashes and how to can them, along with a couple recipes for Squash soup. It seems that Tiffany and I are not the only squash obsessed people around based on some of the responses we received.

Here are a few more ways to use your squash once you've got it canned (or cooked and pureed).
______________________
Mayan Hot Chocolate
1 sm. Butternut squash or (1 pint bottled squash, drained)
2 ½ C. milk divided
6 oz. semi-sweet chocolate
½ tsp.Cinnamon
Large pinch of Nutmeg
Large pinch of Cardamon

If using bottled squash, puree squash with ½ C. milk until smooth.
If using fresh, cook squash 'til soft.
In large sauce pan mix remaining 2 C. milk, chocolate & spices.
Stir 'til melted and creamy, add squash.

Heat through.
Serves 4
______________________
Pumpkin Smoothie
from Better Homes & Gardens Nov. 2010

In a blender combine:
1/4 c. canned pumpkin
Low-fat vanilla yogurt
1 Banana
A spoonful of peanut butter
Handful of ice cubes
Milk to thin as desired
Top with a little whip cream and cinnamon.

**Update Nov. 11, 2010
Tried the above recipe and it tasted like a peanut butter smoothie---eh, so-so.
Therefore, if you are looking for a pumpkin pie smoothie this won't be it. To adjust it and get that flavor, don't add the peanut butter (but maybe add more pumpkin) and instead add either pumpkin pie spice to taste, or a combo of nutmeg, cinnamon and ginger to taste to get that pumpkin pie flavor.
_______________________________________

I also went to my local library and found a couple books that had some recipes that I would actually try. I am not a fancy cook. So recipes with things like goat cheese, or other things that I don't even know what they are or where to even look for them, I don't make. It's not that I wouldn't be game to try, because really I'll try anything. It's just that my family is not as daring as I am, AND I don't want to be stuck with ingredients I can't use again.

These books had some good basic recipes that you could make using almost any kind of winter squash. Some I've tried and others are on my list to try. But I feel these are realistic recipes for my family. Both books have summer and winter squash recipes, but I just listed some of the winter squash recipes.

Zucchini, Pumpkins & Squash by Kathleen Desmond Stang

  • Pumpkin Ice Cream Sundaes pg. 59
  • Spaghetti Squash Hashbrowns pg. 22 (My kids love spaghetti squash and normally just eat it cooked with Parmesan cheese over it--like noodles--but I think they would love this recipe)
  • Creamy Winter Squash Soup with Spices pg. 28
  • Golden Pumpkin-Orange Pancakes with Orange Butter pg. 23
  • Two-Way Pumpkin Yeast Dough pg. 18

So I just have to make a comment about making pancakes and adding squash. I experimented on my family recently and added cooked Acorn squash to our waffle recipe (Krusteaz--you know the bag of mix you can pick up at Sam's club). I doubled the waffle recipe and added about 1/2 c. cooked, smashed butternut squash. Not one person noticed or said anything. I couldn't tell, and I knew. You don't necessarily need a recipe for this. Make up pancakes as you always do and add about 1/2 c. of squash puree.

James McNair's Squash Cookbook

  • Golden Yeast Rolls pg. 79--these were delicious!! And once again nobody knew I had added anything.
  • Creamy Winter Squash Soup pg. 63
  • Fried Winter Squash Chips pg. 60
  • Squash Pancakes pg. 81
  • Winter Squash Ice Cream pg. 88
  • Spiced Squash Cake with Caramel Icing pg. 91

I'm seriously thinking that Squash Ice Cream needs to be added to the Thanksgiving menu this year.

I have not yet tried a Squash soup recipe. My kids caught wind of that and declared it "disgusting" already. However, I made a crockpot Cheesy Potato Soup the other night and did about 1/3 of the potatoes as butternut squash. They didn't know otherwise. (insert evil laugh) My food science friend Kevin said that any recipe that calls for mashed potatoes in it can be substituted with smashed squash, i.e. potato rolls.

So go ahead and experiment and enjoy. If we come up with anything else fabulously squash we'll let you know.

Note: This site has good info about picking squash, squash equivalents, and pics of all varieties of squashes along with a list of squash recipes.

Thursday, October 28, 2010

Squash {Part 1}

Our cousin Tiffany and I have been slightly obsessed recently with all things squash. Winter squashes, unlike summer squashes, can be stored almost indefinitely in a cool, dry spot, like your basement. This is just fine, unless you have a squash like the one in the picture below.
This is Tiffany with one of TWELVE 3-4' long banana squashes that were grown in her parents' garden. Where are you going to store 12 of those babies?!

Cutting one into workable pieces requires a hubby with strong muscles and a machete or chain saw....seriously. And unless you want to eat banana squash for about a week straight for every meal (and that is just 1 banana squash), or feed your entire neighborhood for a couple days, you have to figure out something to do with once you cut into it.
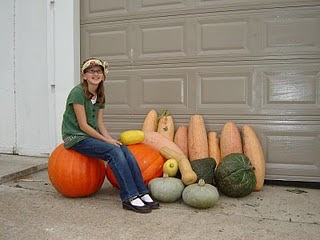
Here are more of the famous banana squash along with the other varieties they grew (and Tiff's cute daughter).

My husband brought home about 10 butternut squash for us, from work, that someone had just left in a bin outside the back door hoping people would take them. I told him to bring as many as he could.

So, if you don't have lots of freezer space to store cooked puree, you could can it. However, you MUST use a pressure canner. I canned half of my squash for now.

Per the Ball Blue Book:
Basically, remove peel and seeds, and then chunk up the squash into 1" pieces. Add to clean jars, plus 1/2 tsp. salt for pints and 1 tsp. salt for quarts. Fill with hot water. Adjust 2 piece lids.

Can pints for 55 minutes at 10 lbs. of pressure.
Quarts for 90 minutes at 10 lbs. of pressure.
(adjust as needed for your altitude)


So then the question is: What do you do with canned winter squash?

Well...for starters just about any winter squash can be interchanged with each other in any recipe that you have. Any recipe that calls for pumpkin (including pumpkin pie) can be substituted with winter squash. We've used butternut squash for pumpkin pies for years. The "pumpkin pie" flavor is all in the spices.

Here's a couple soup recipes to try:
Simplest Butternut Squash Soup from Parade Magazine
Butternut Squash Soup from Woman's Day Magazine
____________________________

Tiff's Pumpkin/Squash Soup Recipe:

  • 1 Butternut squash- peeled, seeded and cubed (I think you could use acorn, pumpkin or banana squash and be just fine)
  • 1 apple--peeled and cubed (any variety--though a lot of recipes say use a tart one)
  • 1/2 onion (large) quartered ( I used white, you could use yellow or purple)

Put these 3 ingredients in stock pot, cover with chicken or turkey broth bring to a boil and cook until tender.

  • Add salt and pepper to taste
  • 1 C. heavy cream (I used plain yogurt cause that's what I had)

Using an immersion blender, regular blender or food processor, blend everything to a smooth texture. Top with parmesan cheese for savory flavor or brown sugar for a sweeter flavor.

Some variations to this:
heavy cream--you may use plain yogurt, sour cream, or coconut milk
additional seasonings--I love curry, so I dumped 1/2 tsp. in mine
If you want a cheesier soup add a few Tbs. of cream cheese, very rich and makes the soup thicker.

____________________________

Tiffany and I have been experimenting with some other ideas and recipes. We'll post more in a couple days. (see Squash {Part 2})
Monday, October 11, 2010

Pumpkin Chocolate Chip Muffins


Super Delicious recipe from allrecipes.com

My variations: I quadrupled the recipe so I could use the entire (Libby's large) can of pumpkin. I also used mini chocolate chips (highly recommend) so they don't all fall to the bottom of the batter when you bake them.

After having breakfast dinner on Friday night I still ended up putting 2 1/2 dozen in the freezer, which means I can enjoy them all month long! Yum!

Friday, August 13, 2010

Marinated Cucumbers

I don't like pickles, but I do like marinated cucumbers. Go figure!


This is one of my all-time favorite recipes for cucumbers--if they are homegrown, even better.

It comes from the Better Homes and Gardens Cookbook (the red and white checked one) which is my personal favorite basic cookbook.

Marinated Cucumbers
For marinade combine in a covered container:
1/4 c. vinegar or lemon juice (I use white vinegar)
1 - 2 Tbs. sugar
1/4 tsp. celery seed

Add:
1 large cucumber, peeled and thinly sliced (3 c. worth)
1 small onion, thinly sliced and separted into rings

Toss to coat with marinade.
Cover and chill for 2 hrs. or up to 5 days.
You can also add a little diced tomato to it, which is quite delicious also.

Thursday, July 8, 2010

Homemade Bisquick® Substitute

You all know about Bisquick® from Betty Crocker--pancakes, strawberry shortcake cakes, easy cooking, etc.

Here is a recipe for homemade Bisquick®.

Our mom gave me this recipe I don't know how long ago--probably when I first got married and then I've come across it again in this really OLD (published 1978) book called "Make-a-Mix Cookery" by Karine Eliason, which I happened to find and purchase at some thrift store a couple years ago.

In the book they call it Quick Mix

8 1/2 c. All-purpose flour
1 Tbs. Baking powder
1 Tbs. Salt
2 tsp. Cream of Tartar
1 tsp. Baking soda
1 1/2 c. Instant nonfat dry milk
2 1/4 c. Vegetable shortening

In a large bowl, sift together all dry ingredients. Blend well. With pastry blender, cut in shortening until evenly distributed. Mixture will resemble cornmeal in texture. Put in a large airtight container. Label. Store in a cool, dry place. Use within 10-12 weeks. Makes about 13 cups of Quick Mix.

Note: I don't use this amount in 10-12 weeks, so I store mine in a 5 qt. ice cream bucket in the freezer so that it will last longer.

A slightly different version of Bisquick® substitute called Master Mix found HERE.

One more HERE. There are apparently a number of different versions out there online. You can find the one that works best for you.

Here is a family recipe we use for an easy bacon and cheese quiche that uses Bisquick®. I'm sure it is based off of this recipe from Bisquick®. You can easily substitute the bacon for browned sausage, or cooked ham chunks. It is one of my kids' favs.

Tuesday, May 18, 2010

The Best Refried Beans EVER (according to me!)

My family has been in panic mode since we ran out of refried beans in the pantry a couple of weeks ago. To say that my family likes beans would be the understatement of a century. They eat burritos like anyone else would eat PB and J. Thankfully beans are darn cheap! And when you can them yourself, they become even cheaper...and yummier!

Recipe:
I use the basic Dry Bean Recipe from the Ball Blue Book (aka the canning bible) but instead of leaving them plain, I add one (or more depending on how hot you like them!) whole seeded jalapenos. Delish! They are comparable (or better if you ask my husband!) to a particular popular brand of Spicy Refried Beans.

Refried:
Here is what they look like in the jar after pressure cooking them. See the jalapenos? Pretty, huh? So to get them to refried stage, just dump the entire contents of the jar in a pan, heat them up, and mash them to the desired consistency with a potato masher or fork. It literally takes me 5 minutes to do this. I also add a small amount of salsa when I'm heating them up for even more kick.


Gas:
You can't mention beans without mentioning gas. As far as that goes, we all know that the more beans you eat the less gas you have. So, I pretty much have the most regular family on the planet! :) But, one trick I do is this: one of the steps when canning any dry beans is to soak them overnight. To lessen the gas, I dump out my overnight water and refill with fresh water before canning.

Yield:
Dry beans are super easy to can, they just take a long time to process. It takes me about 4 hours for an entire batch -- heating them up, put them in the bottles, processing them, and the cool down. The other day I canned 2 eight pound bags of dry pinto beans, which yielded me 56 pints. For the rest of you that is WAY more than you'd need in a lifetime, but for my family that is about a 6 month supply. (I told you we eat a lot of beans!) For one days work I now have a HUGE supply in my food storage. Can't beat that!


For those of you that are afraid of the pressure cooker, I'm here to say Don't Be!! Just read the directions, follow them, and everything will work out just fine. Here are great instructions from the Ball Website.

Wednesday, May 12, 2010

Tropical Breeze Freezer Jam

Every year I like to try some new canning recipe to #1 see if my family will like and then #2 to expand the variety of items in my food storage. I received this recipe recently from the Ball® e-newsletter and thought it sounded delicious: pineapple, banana, mandarin orange, & a touch of coconut.


Quick Tip from Ball®: Add one or two tablespoons to smoothies and milkshakes or stir into warm Maple syrup for a special topping over pancakes and waffles. (***I tried this with syrup on Popeye Pancakes the other morning and it was Scrumptious!!! )

Recipe for Tropical Breeze Freezer Jam. Makes 5 half-pints.

Sign up HERE to receive the Ball® monthly e-newsletter.

I also want to try Pineapple Chili Salsa this year.

Tuesday, February 9, 2010

Valentine's Cookies

Gotta get prepared for the Valentine's Day weekend coming up. Last night we decorated some sugar cookies, ate some, and delivered some to our neighbors. We tried a new sugar cookie recipe from my friend Carrie. We like them rolled out a bit thick--so delicious.

Alecia's Famous Sugar Cookies
2 c. margarine (DO NOT use butter) softened
2 c. sugar
6 XL eggs
6 tsp. baking powder
1 tsp. vanilla
7 c. flour

Cream together margarine & sugar.

Add baking powder, eggs & vanilla, mix thoroughly.

Add flour, chill overnight. (Must chill overnight!)

You might need to knead in a little more flour to make it a nice pliable dough once you get ready to roll them out. (I definitely had to do this with my dough)

Bake at 350 degrees until they rise up then barely start to fall...they will be a tiny bit gold on bottom (between 10 and 12 minutes).

Cream Cheese Frosting
1 cube butter
2 pkg. cream cheese
powdered sugar (1/4-1/2 pkg. ...depending on taste)
1 tsp. vanilla
(**I did not make this frosting recipe as my kids don't really like cream cheese frosting. Too bad, because I sure do.)

Monday, October 5, 2009

Apple Pie Filling

One of the beautiful things about Fall are all the fresh apples. You can't beat homemade applesauce, cider, or the creme de la creme: apple pie filling. I love being able to just dump all the ingredients for an apple pie right into the crust and in the oven it goes. This is probably the best canned apple pie filling that we've found. Originally we got this recipe from the Sweet Celebrations company--they are a candy and cake decorating supply co.

Canned Apple Pie Filling
Sauce for 7 qts.

Mix:

4 1/2 c. sugar
1 c. cornstarch or Clearjel
2 tsp. cinnamon
1/4 tsp. nutmeg
1 tsp. salt

Add:
10 c. cold water
Mix well. Heat and bring to a boil and cook until slightly thickened.

Add:
3 Tbs. lemon juice and mix thoroughly.

You need a little over 1# of apples per quart jar for the filling.

You can either peel, core, and cut apples and then add them to the sauce and fill the jars, or just add the apples to the jars, and then pour the sauce over top. I usually do the latter.

Hot water bath for 25 minutes.

Last year I canned 23 quarts, which was 3x the above recipe, and I used 25# of apples. **I have to say that I am not too terribly picky about which apples I use for this recipe. If I can get them free or really cheap somewhere those are the apples I am going to use.**

To make the pie:
Make a double pie crust. Lay down bottom layer. Dump in 1 qt. jar of pie filling, spreading evenly. Top with 2nd layer of crust. Bake at 400 degrees for about 45 minutes or until browned slightly.

The Ball Blue Book or Ball Complete Book to Home Preserving (pg. 170) also have an apple pie filling recipe. Either recipe you use are great tasting. I also quickly checked online at my local library and they have a couple copies of the second book listed. So if you think you might be interested, check with your local library to see if they too have copies. Or they may have copies of other canning books. The second book also has recipes for Blueberry, Peach, Raspberry, Rhubarb Strawberry and Cherry pie fillings. YUMMY!!

Friday, September 18, 2009

Soup Starter

I don't know if you are like me, but there are days (some days more than others) that I really don't want to cook dinner. However, I do like food, and I love soups during the winter months. This recipe is a pressure canned soup starter. I believe I got this from either our Grandma J. or Aunt Gayle--either way, same side of the family.

Soup Starter

Layer in 1 qt. jar

1/2 tsp. Salt
1 tsp. Beef bouillon (or 1 cube)
2 Tbs. Pearled barley **See note below
Handful of chopped celery
Handful of peeled, diced carrots (I just cut mine into 1/4" thick disks)Peeled, cubed potatoes (fill to w/in 1 inch of rim of jar)

Pour hot water over top of all ingredients to w/in 1" of rim of jar.
Remove air bubbles.
Clean lip of jar.
Adjust 2 piece lid and canning ring.
Pressure can (not hot water bath!) for 75 minutes at 11# pressure.
THIS IS AN UPDATED time from the latest info at the National Center for Home Preservation: http://www.uga.edu/nchfp/how/can_04/soups.html. Originally this recipe was for 40 minutes at 10# pressure.

You can get 7 quart jars in a pressure canner at once. I usually do 2 batches of soup starter (14 total quarts) and this is what I buy for the veggies.
  • 10# of potatoes (it all gets used up)
  • 5# bag of carrots (mostly use all the bag)
  • 2 bunches of celery (I use about 1 1/2)
Once canned and sitting pretty in your pantry, the only thing you need to do to eat it is warm it up. We usually add chunked stew meat (also pressure canned so I just dump that in too), but you could brown a pound of hamburger and add to it, or some cooked chicken chunks. If you like, add some diced tomatoes to it. My family loves this soup and it is great to eat with yummy homemade bread. It tastes like I've been slaving away all day long....just genius! That then leaves me more time to play in my sewing room!

UPDATE:  Barley is not a recommended item to be canned.  Eliminate this and just add already cooked when opening the soup to reheat.

Saturday, July 18, 2009

Cowboy Salsa


I was introduced to this salsa by my cousin Tricia on the 4th of July. I could've eaten an entire bowl full of the stuff all by myself. Instead I just embarrassed myself by going back for a second helping, then a third, and a fourth...before the chips finally ran out! Good stuff, I tell you!! And it must be sorta healthy since the only "bad" ingredient is Italian Dressing. (Never mind the bag of chips you eat along with it!)

Enjoy!


Cowboy Salsa

1 can Black Beans, rinsed & drained
2 cans Whole Kernel Corn, drained
2-3 Tomatoes, chopped
2 large Avocados, chopped
1/2 a Red Onion, diced
1 c. Cilantro, chopped
1 pkg. Good Seasons Italian Dressing Mix

Prepare Italian Dressing as instructed on package. Set aside. Combine remaining ingredients in large mixing bowl. Pour dressing over top and gently stir until mixed through. Chill and serve with tortilla chips or as a salad.


There's also a version of this recipe that adds: (I added these to mine!)
1 t. Season Salt
1 t. Garlic Powder
the juice from one lime (about 2-3 T.)
1 can Green Chilies

Thursday, June 25, 2009

No-Bake Oatmeal Cookies

This is one of our family favorites and one that our Mom made for lots of years. This is one of the easiest recipes you'll come across and it is great when you need a quick treat or a chocolate fix. And since they are "no-bake" it is also great when you don't want to heat up your kitchen.

NO-BAKE OATMEAL COOKIES

In 2 qt. bowl put in:
3 c. rolled oats
1/2 c. peanut butter (I prefer crunchy, cuz I'm a little nutty myself)
1/2 tsp. vanilla
Set aside.

Combine together in a small saucepan:
1. c. sugar
1/4 c. butter
1/2 c. milk
3 Tbs. cocoa

Boil above 4 ingredients for 1 minute and then pour over remaining ingredients. Combine all together and then drop by spoonfuls onto a cookie sheet. Let cool and eat. (We sometimes stick them in the freezer for a few minutes if we can't wait that long to eat them.)

Makes about 2 dozen cookies.

LinkWithin

Related Posts Plugin for WordPress, Blogger...