Showing posts with label Accessories. Show all posts

Friday, July 14, 2017

End Table Makeovers

I've been working on some side tables in my living room to get them looking more updated.
The rectangular one I bought at the thrift store for about $5 and the hexagon one I picked up off the curb from someone who was giving it away.  They definitely weren't what I wanted, but free and/or cheap and functional is what I needed at the time.

Both had glass tops.  The Hexagon was missing the glass on the bottom too.

Nothing too fancy or noteworthy about either of these tables.

First I pulled off both tables tops.  Each of them were just screwed into the base from the bottom.

Then I used 1 x 4 and 1 x 6 scraps to form the top.
I like the different grain and knots in the pine.


On this you can see how I attached the individual pieces underneath with a little scrap piece.

The bases were painted separately.
All I really did was clean them up a bit and sand some of the flat parts to remove a little of the finish before painting.  I use a paint and primer mix and have good luck with that.

After sanding the tops I stained them and sealed them with a clear matte finish.

My local Home Depot was out of the piece and size wood that I want for the bottom of this table.
I will eventually cut, paint and attach that. 
Since it attaches from the bottom I can do it later and it won't mess things up.
I am also debating on doing a little distressing on the painted bases.
For now I am going to leave it and see what I think.


Next up a revamp of my coffee table.

Details:

  • 1 x 4 and 1 x 6 pieces cut to size.
  • 60 degree angles cut on table saw. I used the old hexagon top to trace out the size and then lined it up on the table saw to cut.  It was cut while the support pieces underneath were attached.
  • Minwax Stains Wood Finish in Jacobean and Pickled Oak mixed to a 1:1 ratio.  I probably could have got a different stain to achieve this color but I already had a large can of Jacobean and didn't want to waste it so I bought a small Pickled Oak to mix it with.
  • Rustoleum 2X Primer and Paint in Heirloom White.  I used 2 cans for each table.

Friday, June 24, 2016

Magnetic Chalkboard Frame

This project took way more time and effort than I think it needed.
But I guess that is what happens when you are just winging it.

Finished up

 Frame and paint detail

Hanging in my entry with the real life shoes lying everywhere.

 Close-up of metal glued onto the board.
I cut the metal to shape with a pair of tin snips.
Used a jigsaw to cut the board.

 The crease on the board is what occurs when you use contact cement--don't quite get it
lined up correctly and quickly try and pull it off to reposition.
You just get a bend in your metal because it IS NOT coming off.

At this point we are calling it "character".  I didn't want to start all over.
It would have been too frustrating.


Hints:
  • Originally tried to glue the metal to the board with Liquid Nails.  Ughh, thumbs down!!  As soon as I took the clamps off the pieces the metal just popped right off.  Maybe I wasn't doing it correctly, but I felt it should've been easier to use.
  • Contact cement is PERMANENT! You cannot remove it and replace like other products.  Once it is down, that is where it is going.  In hindsight we should have put the metal into the frame and then laid the glued board down on top of it to get it lined up correctly.  Since we didn't I had to go back and trim off metal or wood here and there in order to get the piece to line back up in the frame.  And we also have a little crease in the metal after trying to pull it off quickly once we realized it wasn't lined up perfectly.
  • Once I got all the coats of paint on and then seasoned the chalkboard it wasn't nearly as noticeable.  And I can always strategically place things I am hanging up.
Oh well!

Details:

You can buy sheets of chalkboard at Home Depot. They are about $10 and measure 2 x 4 feet.  That would've worked great for the size I needed except I wanted chalkboard AND magnet board combined.

Monday, June 20, 2016

Chalkboard Frame

We've been working on daughter #2's bedroom and here is one of the accessories we added to her room.


She wanted a chalkboard frame to write herself notes.

And yes this is her handwriting--freehand.
She can print in font--it is amazing!

I love the details on this frame.
It's plastic, but after spray painting it I don't think anyone would know it.


Details:

This is the window side of her basement bedroom.  We FINALLY got the orange-ish walls (check the first pic to see the previous color--sort of) painted a nice white which makes a huge difference.  I still need to get rid of the dark brown wood blinds, but I haven't figured out what other window treatment to do.  So for the moment we've added the tissue paper flowers to try and "disguise" the window a little.  It was cheap and easy until we know what we are going to do permanently.
Friday, April 1, 2016

Makeover for Grover

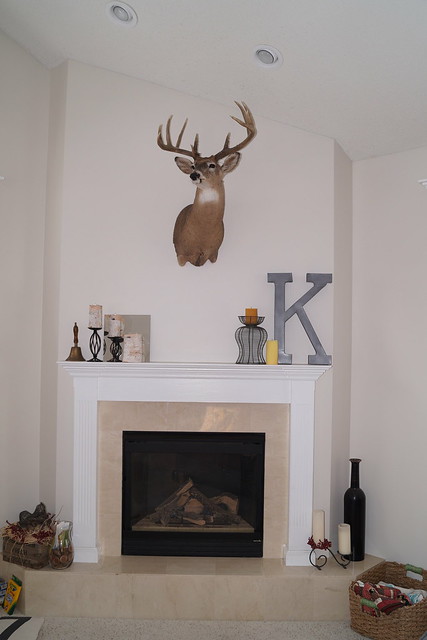
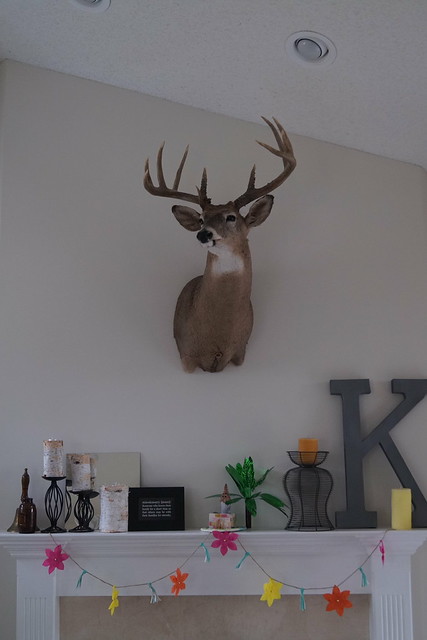
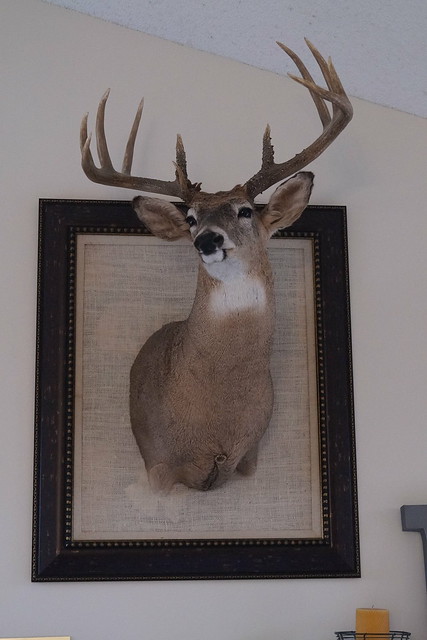
Meet Grover.

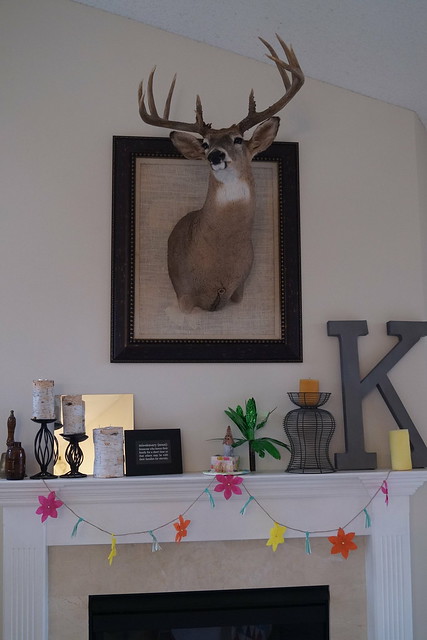
He resides over our fireplace mantel.
Unfortunately he had a fatal accident with an automobile in the Fall of 2014 in the city of Maple Grove, MN (hence his name).  Hubby was on a call list for road kill, yes, I know it's a bit Redneck, but once we saw him we decided to give him a second chance to strut his stuff.


This is how he has been displayed for the past year or so in our living room.
I hadn't completely figured out what I wanted to do with this room, but I do like Grover right there greeting us as we come in the front door.


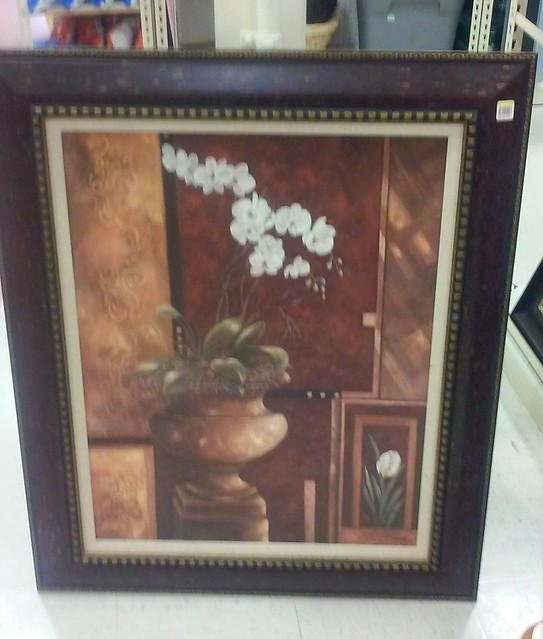
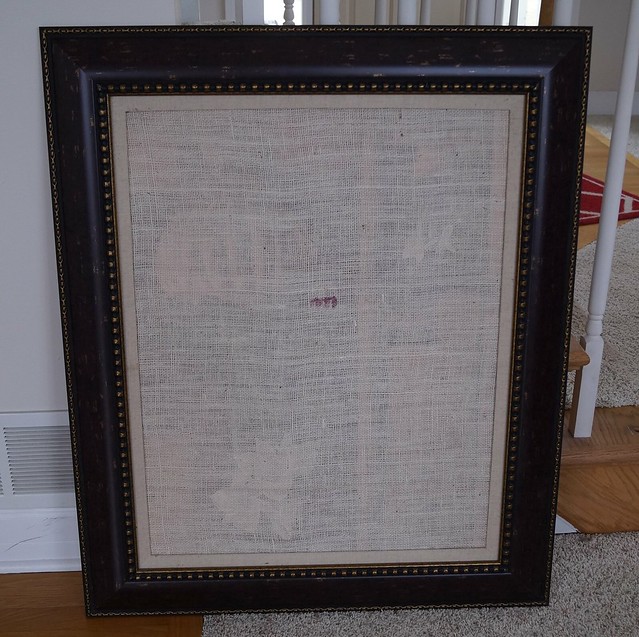
I finally decided that I wanted to frame Grover out and give him a more substantial place over the mantel.  I found this frame below that I felt would work.


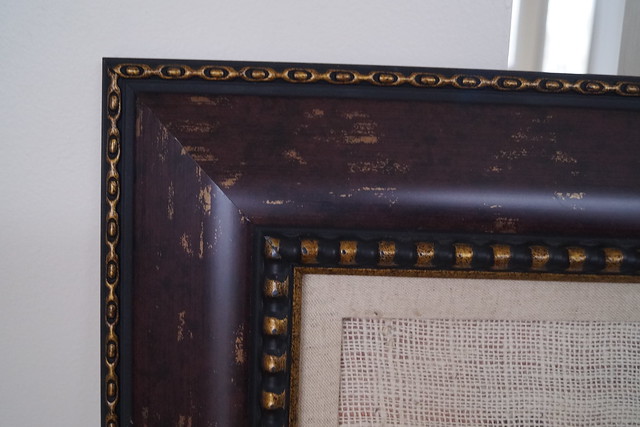
I bought a piece of burlap fabric the width I needed and then cut it down to size and used spray adhesive to put it right over top of the picture that was in this frame.  (A somewhat ugly floral print)


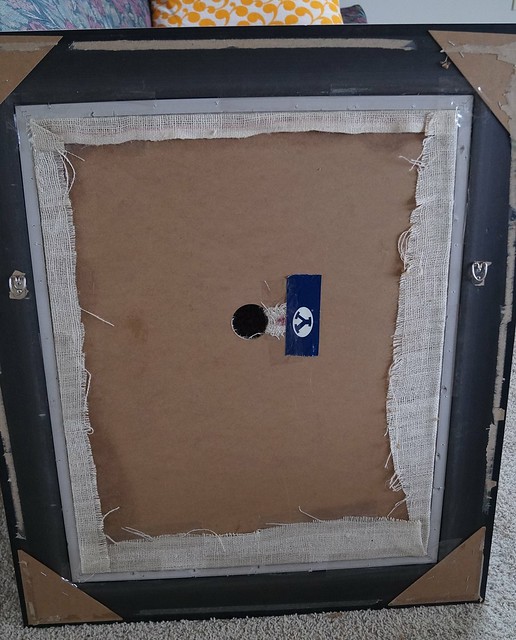
With lipstick on the back hook of Grover I positioned him on the frame so that I would know where I wanted him to sit.

Then I took a large Forstner bit from my hubby's shop and attached it to the drill and drilled out a hole for the spot where Grove already hung from the wall.


Positioning the frame over the hook I found the spots to hang the frame and attached it then placed Grover over top of the frame on his previous spot.


As you can see the picture underneath sort of shows through.  I need to take it all down, and either flip the picture of spray paint over it so that the lighter flower outlines don't show through.  It's not super annoying....just slightly.  UPDATE: I did just that and now you can't tell there is anything underneath.  Just flipped the picture to the back.


Details:

Monday, February 1, 2016

Small bench redo


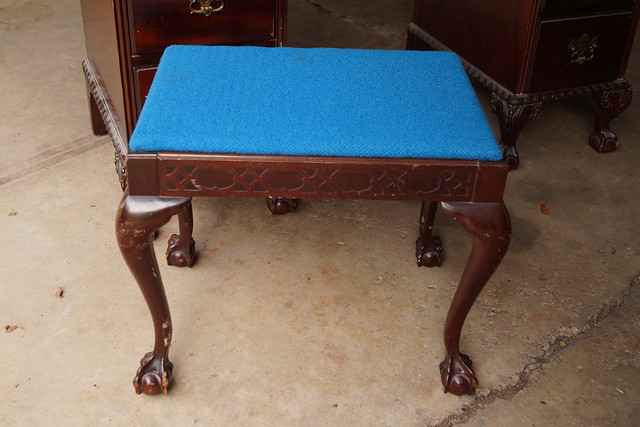
If you'll remember, WAAAY back, I found this little bench along with it's pretty desk at the thrift store. Daughter #2 was going to have the desk in her room, changed her mind once we moved, and so now the desk is in the office room and the bench became an orphan.


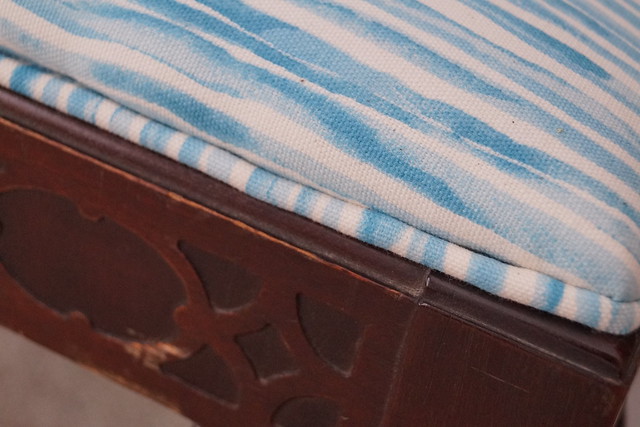
Hubby and I needed a little seat or something in our bedroom and so I recovered the bench, once I finally found my staple gun. Love that tool!  I also had to order another staple puller (below) because I have yet been able to find that tool since our move.  Though I have seen it once in this house, I just can't remember where I put it.  Oh well.....Taking off old upholstery is an absolute pain in the backside without this tool. FYI.


I made some piping too and stapled that on once I had the new batting and fabric attached.


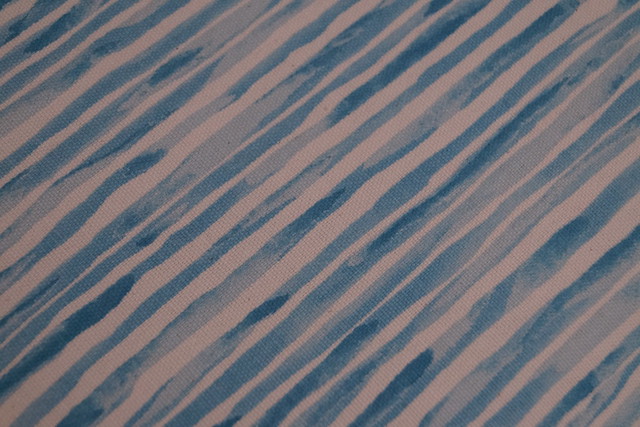
I think I found this fabric piece at the thrift store.  I love the watercolor looking stripes.

Thursday, January 28, 2016

Massive Framed Mirror

Before we moved last year, some friends of ours were also in the process of moving and in so doing were gutting their master bath.  They had this 3 ft. by 7 ft. mirror that they were giving away to anyone who wanted it.

Although I didn't know what house I would be moving to, and if I would even have a place for this big 'ole beast, I went and got it from them.  Big mirrors aren't cheap!  So a free one, PLEASE! I had to take it.

We stored it in our pod while we were trying to sell, and have been storing it down in the basement since we moved last March.

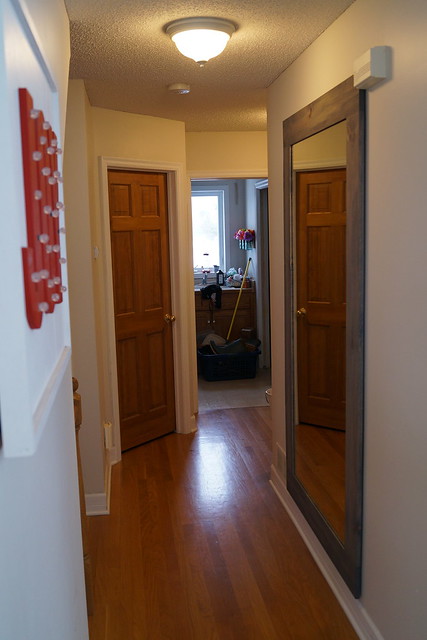
FINALLY...it is done and hung up. (it took me some time to figure out exactly where I wanted it to go)

The first thing we had to do was to cut off about a foot of the length.

Where it is hanging is only an 8 ft. ceiling and since I wanted it framed it wasn't going to work at that length. I bought a glass cutting kit at Home Depot for about $13.  I practiced a couple times on some scrap mirror until I figured out how best to do it for myself.  And then hubby helped me on this big piece. It was a thicker mirror than my practice pieces.

Hubby cut the 1 x's so that the mirror would inset a little.
We then attached a backing to keep the mirror in place.
Sorry, but I didn't take any pics of that.

We made two wood cleats to hang the mirror. One piece goes on the wall and the other on the mirror. We did this on both the top and bottom of the mirror since it was so large and heavy.  We also didn't want it to bang back and forth if someone touched. Check out this video to get the idea of how to make the cleats.


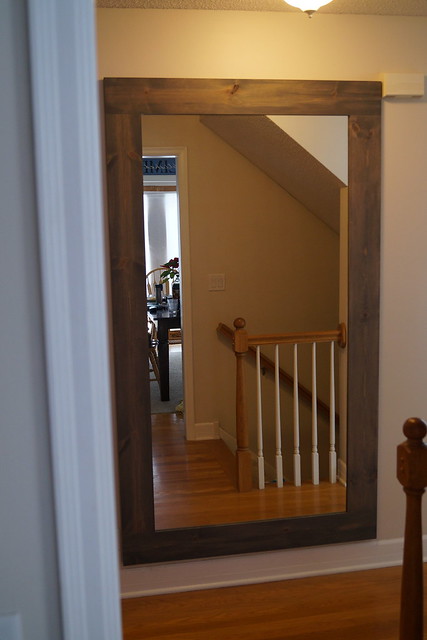
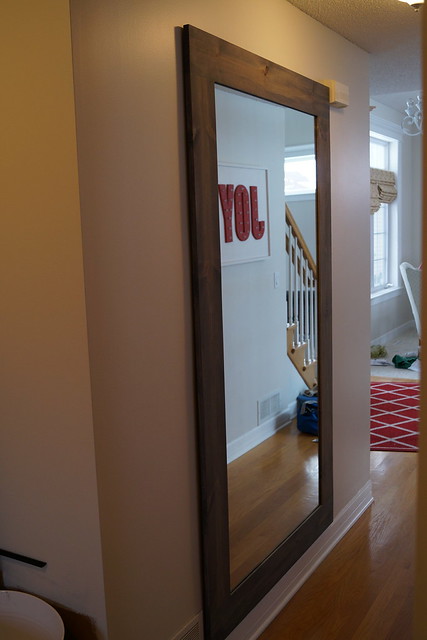
It now hangs in our foyer by the front door.


I really like it here.
Though it definitely is massive.
Easy way to check your present-ability on the way out the door.


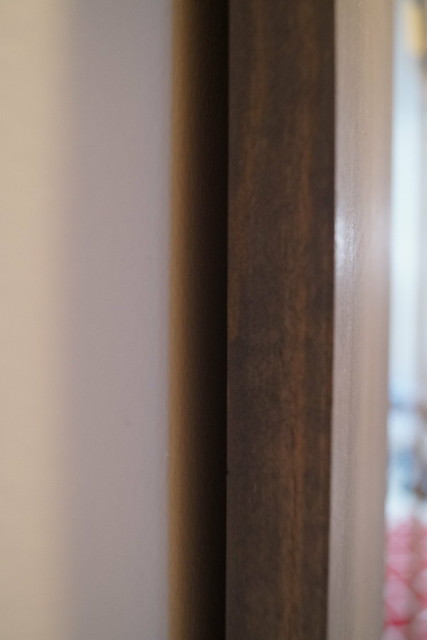
This is to show how far it is off the wall.  The wood is only 7/8 inch thick.


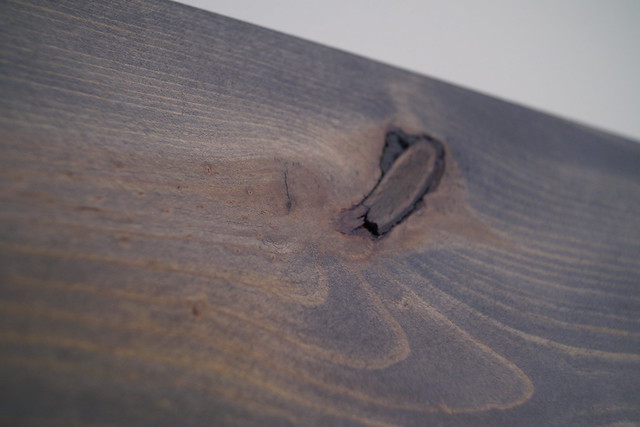
I used pine boards and a gray stain because I like the knotty look and this makes it appear somewhat distressed without having to actually do anything to get it that way.

Details:
  • RF Supply Glass Cutting Tool Kit at Home Depot
  • 2 - 1 x 6 boards 10 ft length. (or enough for your needed size)
  • OSB 3/8" board for backing--cut to size
  • Scrap board to make the hanging cleat
  • Minwax Wood Stain in Classic Gray.  Same stain I used for the boys' headboards.

Monday, December 8, 2014

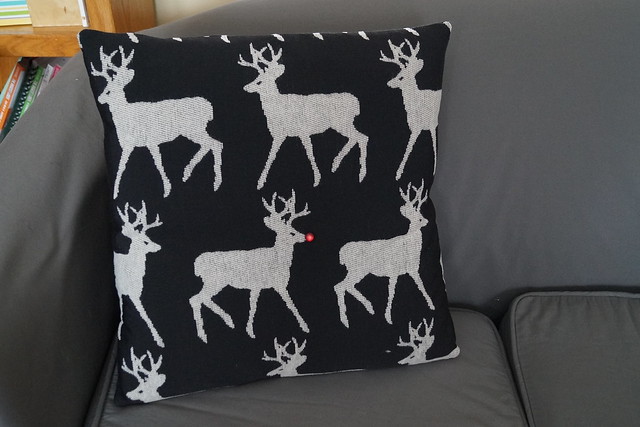
"Reindeer" Pillows

While rummaging around at SR Harris a few weeks ago looking for something else, which at the moment I can't remember what, I found this fun deer fabric.

It was a total impulse buy, I admit it.  However, I knew I could have fun with it.

I wanted to change it up and make some pillows for Fall.
Hubby and kids hunt quite a bit, so why not have some deer pillows.


They didn't get done in time for that season, so instead they are now "reindeer" pillows.
Technically they are Mule deer--per hubby--and he would know.
But for my purposes it will work for the season.

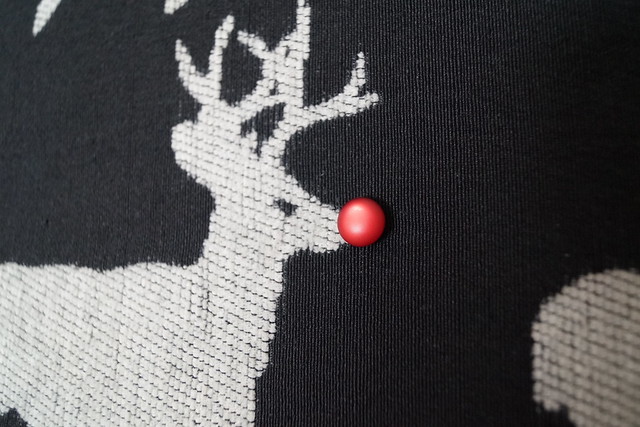
I added a red button on one "reindeer" and voila! we have Rudolph and the gang.

Wednesday, December 3, 2014

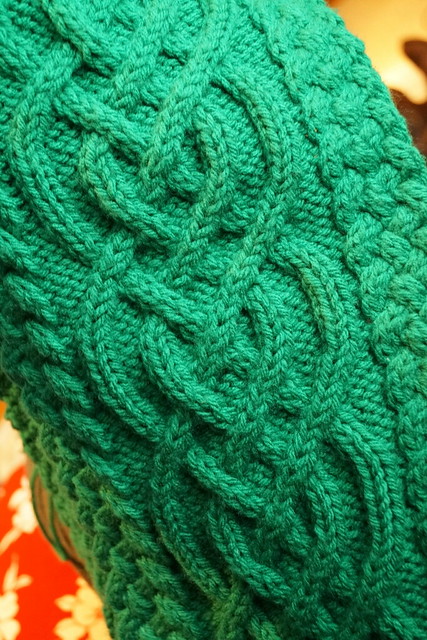
Celtic Cable Scarf

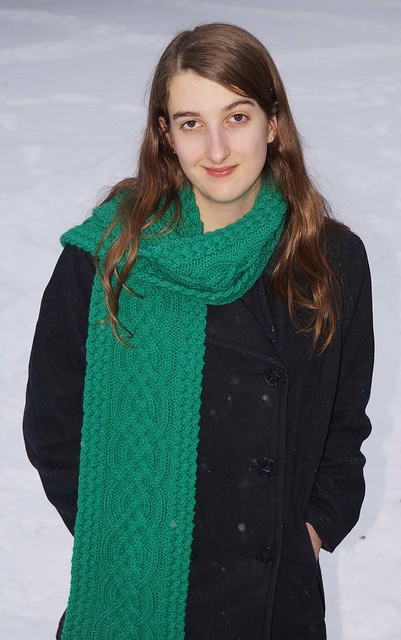
This beautiful scarf is only the second cable project that my oldest daughter has tackled.
The SECOND!
And usually she prefers crochet over knitting.
She may just have a gift for yarn arts.


I LOVE the braided side edge.

I was having problems getting the color right because this is what you would think of as traditional kelly green.  It sure doesn't appear that way in any of these photos.


She really did a great job.
There were a couple times she and I had to unravel and fix a couple spots.
Fortunately that only happened about 3 times, which is pretty good considering how complicated this cable scarf was.

Details:
Side note: She happily wore this to the Celtic Thunder concert last Friday in keeping with the theme of the night.

Monday, December 1, 2014

Zebra Beanbag

I hope you all enjoyed your Thanksgiving break here this past week.  Ours was eventful starting out with a slight concussion (daughter #2), snow delay for my parents coming to visit, chocolate birthday cupcakes on Thanksgiving along with vegan and gluten-free pumpkin pie which was actually quite good.  Can't vouch for the cupcakes because I didn't get one.  We also saw the Celtic Thunder Christmas concert, took our house off the market and went and looked at the house we still want to buy and inexplicably it is still empty and still for sale.  That pains me a lot.  We'll take a break for a couple months and then put our house back on the market and hope to high heaven it sells this next round.  Because really I'm not sure that we can take much more in that department.

Anyway, enough of all of that business.
There are times as a mother I feel I am constantly telling my children "no".
This is not one of them.

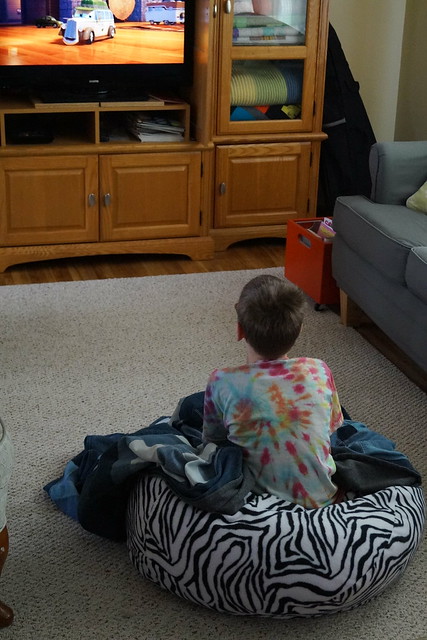
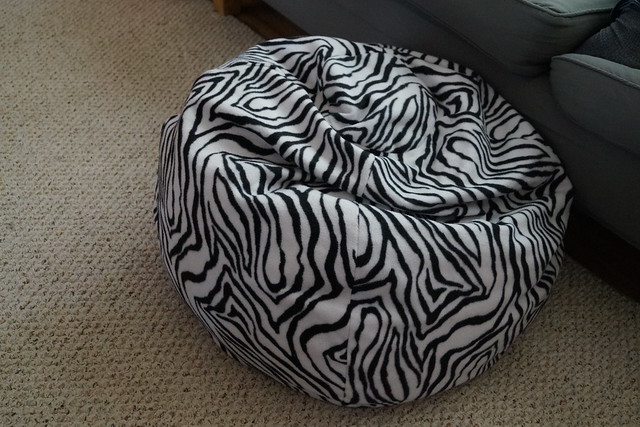
My youngest son wanted a zebra beanbag for his birthday (Thanksgiving Day last week) or Christmas.
Kinda random, but O.K.

I found 2 pieces of zebra print fleece (about a yard each for less than $2 apiece) at the thrift store along with a beat up beanbag ($3) that I cut up and used for a pattern as well as the inside "beans".

Here is the end result.


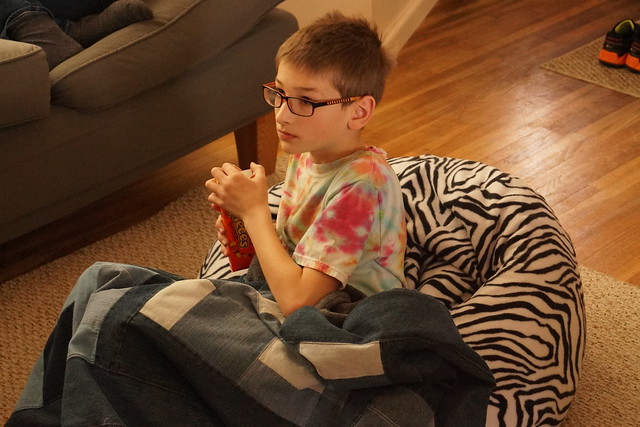
He was super happy with it and won't really let anyone else use it.
That's fine.
As the youngest he should be able to tell his siblings all "no" at times.

Here he is enjoying a treat and a good movie.


This was probably one of my better thrift store/recycle projects to date, if only for the mere fact that this boy is happy.

Notes:
  • I first made a muslin beanbag and filled it with the beans and sewed it shut.
  • The outer fleece panels are lined with a thrifted sheet so that it wouldn't stretch out too much.  I made this so I could pull it off and wash it if need be and not have the beans going every where.
  • Zipper opening on the side panels.

Wednesday, November 12, 2014

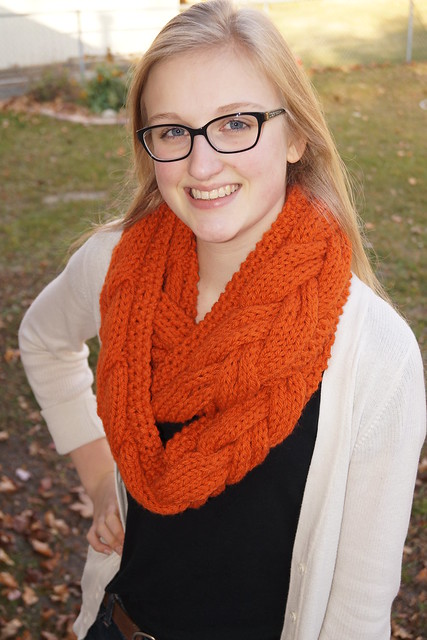
Braided Cable Scarf

Winter has come to Minnesota.
We received 6 inches of snow on Monday and we are in the 20's for the next 2 weeks for sure.
That means we need to break out all the winter gear, including the scarves, or maybe especially the scarves.

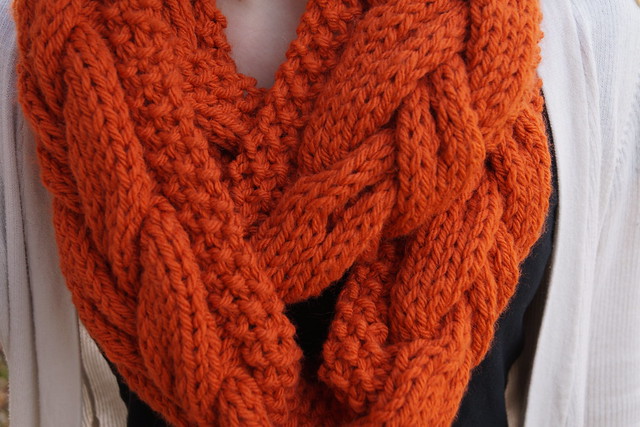
I like knitting with chunky yarns.
Your project comes together so much quicker.
And as one of my teenage daughters said, "Chunky is in."
Thank you, I'll take that as a compliment.


CO 28 stitches with size US 13 needles.
RS: K1, p1, K1, p2 then follow the 18 stitches on the chart as row number indicates (even rows 1-12), p2, k1, p1, k1.
On every WS (odd row) pattern is as follows: K1, p1, k3, p18, k3, p1, k1.

Details:
  • Finished dimensions: 6 1/2 inches wide by 68 inches long. (Don't forget to block the scarf)
  • 2 skeins Lion Brand Wool-Ease Chunky in Pumpkin (bought on clearance somewhere).
  • Pattern inspiration found here.  The pattern is in Russian but there is a chart to use also.
  • Knitted 20 repeats for the infinity scarf.
  • Size 13 needles

Thursday, September 25, 2014

Double Knotted Lattice Cabled Scarf

I made this scarf for one of my nieces for college.
This is the last one for the 3 that just graduated this year.


She is currently attending BYU-Idaho, where it gets awfully chilly.
Last week I happened to see that they already had had their first FREEZE advisory for the overnight.


Details:
  • Pattern found here.
  • 2 skeins Red Heart Soft in Navy. (The color is a little off in the pictures she sent me.)
Beautiful free knitting pattern from Ravelry. Double Knotted Cable Scarf

LinkWithin

Related Posts Plugin for WordPress, Blogger...