Showing posts with label Renae. Show all posts

Friday, September 16, 2016

So this is what have I been doing with my life lately.....

So our favorite youngest daughter has been bugging us about a dog for awhile.  We had a chocolate lab for a number of years that we had to put to down about 4 years ago.  For about a year none of the kids were ready for another dog.  And then we were getting ready to make a move and I wasn't going to do that with a new dog at the house.  It has just been this Summer that I was willing to consider the possibility.

We decided to first start out by fostering some dogs to see what kind we would like next.  Said favorite youngest daughter lasted 3 days before she was "done".  Puppies are a pain and annoying she found out.

This was our first foster, Hawkeye, at 8 weeks.
He's one of 10 St. Bernard American Bulldog mix puppies.
He was so soft and fluffy and chewed on everything he wasn't supposed to.
We had him about a week and he got adopted. 

Everyone asks how we can foster and then give them to someone else.
Well, in Hawkeye's case I wasn't sure I wanted a dog that would end up being 100-150 lbs. when it was fully grown. I don't mind large dogs, but that is a little much.  I already have "big" kids.

But hey, we like them when they sleep, for sure.

After Hawkeye we got these 3 North Dakota rescue puppies.
Piper, the little brown one and her two sisters Xena and Gabby (red collar).
Piper went to another foster family after 2 days with us and they ended up keeping her.
In the foster world that is called a "foster failure", but a win for adoption. 


We had these two together for 2 weeks. We affectionately called them Thelma and Louise.
At times they were a little crazy together.

Last week our Gabby girl got adopted by a nice family.
She was quite happy to go with them and they were thrilled to add her to their family.


 And now we are down to Miss Xena the Warrior Princess.
She's definitely more princess than warrior.

 The kids have all liked her the best from the beginning.
We had a couple close adoption calls, then they changed their mind or picked a different puppy.
I keep telling the foster team leader that we are getting "out cuted" by the younger fluffier puppies.
(And with about 18 more puppies available in the next month or two that might continue happening.)

However, at this point we don't mind.
Xena is a lovely puppy and seems quite happy with us.

This weekend there is another adoption event...so fingers crossed.
If she doesn't get adopted soon we might have to seriously consider keeping her for ourselves.

Note:
I am a foster volunteer thru the Carver Scott Humane Society.  If you are local in those MN counties go check out what's available for adoption.

Friday, April 19, 2013

My New Normal

My sewing life has changed over the course of the past couple months.
I've had to start wearing reading glasses in order to thread the needles on my machines.
Bummer!
It makes me feel like I am older than I actually am.
Well....maybe I am actually getting older.

Anyway, I'm not particularly happy about it as now I have to make sure I have a pair of "cheaters" by my serger, another pair in my purse so if I need to read something at the store, and another pair by my bed so I can read.  I find that especially at night I need them if I want to read.

But on the flip side, it sure is nice to be able to see clearly where that thread is going and what I am sewing.  My kids also think I look "distinguished" when I wear them.  I'm trying not to feel slightly put out by that comment because when I think of "distinguished" I think of a handsome gentleman with gray or graying hair (like my hubby).  I know they were giving me a compliment, so I guess that I'll just have to accept my new normal.


At least I'm blonde so you can't see all the gray that is coming in too.

Enjoy your weekend!
We are so praying for NO more SNOW!!

Friday, December 28, 2012

Scrappy Rectangle Finished

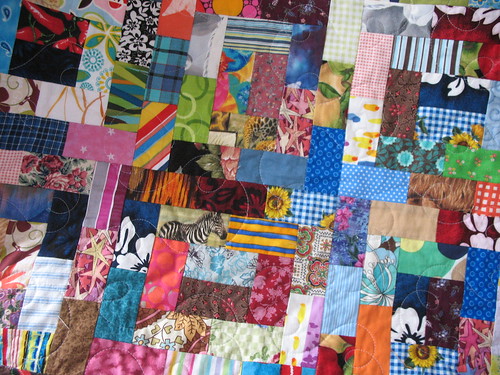
Well, it didn't quite take me a year like I predicted, but it did take some time.  I finished the top in mid-July and then debated on whether or not to quilt it myself or have Lynn do it.  Ultimately I decided that it was just too big for me to handle with my current machine, even if I just did straight line quilting.  So thus began it's journey to see Ms. Lynn in UT.

First a car ride to Nebraska in Aug. for our nephew's wedding reception.  From there our parents took it with them out to Utah in October for their big trip to visit everyone.  While they were there it was quilted and then they brought it back to NE in early November.  Then when hubby had a work trip to Iowa the end of November he took an evening jaunt over to see the folks, had some dinner, picked it up (and the Red Rail Fence, too) and eventually brought it back home to MN.

Phew!  So glad it is here.


Hubby's reaction to the quilt:  "Wow!....."   and a pause.
Me: "Yeah, it's crazy."
Hubby: "I know, but I like it."

Me too!

The kids have said it is their new favorite.


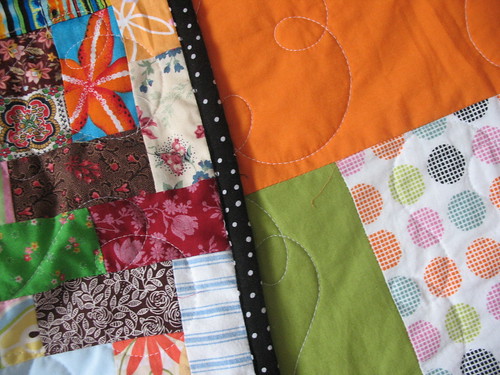
Back view--little modernness to it.


Love the b/w polka dot binding, and Lynn's loopy quilting.


Here's some of the scrappy loveliness that I used for this quilt--fabric from all sorts of projects and people.

Details:
  • Pattern from "More Favorite Traditional Quilts Made Easy" by Jo Parrott, Pg. 39-41
  • Cut 1620(!!!) - 2 x 3 1/2" rectangles = 90 blocks
  • 9 blocks across and 10 down.
  • Spent about $3 for a yd. of b/w polka dot binding fabric because nothing else I had worked for me.  The black seems to mellow it out some.
  • Backing--Dot thrifted sheet and other scrap fabric (or sheets).
  • Finished size: HUGE (Hubby is actually underneath the first pic of the quilt.  It's too big for one person to hold up alone--and it was cold outside the day I took the pics)
  • Actual dimensions: 81 1/2 inches by 90 1/2 inches

Tuesday, November 13, 2012

Splash Quilt Pattern

After checking out Amanda Jean's book, Sunday Morning Quiltstwice from my local library I decided I just needed to buy it.  I was able to attend one of her book signing / chats at one of the local quilt shops earlier this summer and it was so fun.  Those quilts are gorgeous! and even more so up close and in person.

I originally started making the Checkerboard quilt in blues (which I am still working on will be doing for daughter #1 for Christmas) and then decided to make the Splash quilt pattern in greens and orange (kids voted no pink).  Thanks to Cheryl for the green scraps giveaway to add to my supply.


I am really happy with the end result.  I did add another row or two on the length because we need it here at our house.  It'll be a fun quilt to "fight" over and use.

I'll be putting some orange polka-dot on the back and probably some green scrappy binding.
Now just need to decide how I'm going to quilt it--me and some straight lines or send it to Lynn for something "fancier"?

Wednesday, July 11, 2012

Another Amish Buggy Blocks Update

Just a quick update for those playing along:
The deadline for mailing blocks is fast approaching. (Please mail by MONDAY July 16th) Blocks have been arriving in my mailbox and they are beautiful!  I am pretty excited to start swapping.  Again, the flickr group is providing lots of eye candy in the form of finished blocks if you need some motivation.

Here are the blocks that Renae and I have made so far:

Blocks by Renae
Blocks by Emily
Also, I am trying to get my mailing address to a few participants (over yonder and krum family)
but can't seem to find your emails on your blogs or profile. If you email me I will give it to you right away so you can send your blocks.  Thanks!  emilylovesbaskets@msn.com

Monday, December 26, 2011

My own Grandma Quilt

Our family is heading south this week to Nebraska to visit family.  Can't wait to get out of town.  One of the things I am taking with me to show off is my Grandma quilt.  M.I.N.E.  After all the other quilts I've made using Grandma's shirts (#s 1-3 and # 4), I finally got mine completed and couldn't be happier. 


Based on this style, I put those HSTs to work and I L.O.V.E. how they turned out.

I sent it to Emily's quilter and she did a beautiful job.  Thank you, Lynn!
It really just makes me so happy. 
Merry Christmas to me.  I wrapped it up and put it under the tree, even though everyone in my family had already seen it.


Details:
  • Finished dimensions 57 inches by 67 inches.
  • Cut 1 1/2" strips of red/blue floral for inner border
  • Cut 2" strips of white for outer border
  • Thrifted striped chambray sheet for backing (about $3)
  • Binding made from the red/blue floral fabric Grandma had in her sewing room--the consensus is we think she had plans for it to make a new apron.

Thursday, October 13, 2011

Grandma Quilt #4

I should nickname this quilt the "Loaves and Fishes Quilt" because this is the result of making a 4th quilt after already using the fabric for 3 previous Grandma's Shirt Quilts.  What was left to choose from was scraps of already scrap fabric--literally scraping the bottom of the scrap bag barrel.

Also, I hesitate to share all of the story behind this quilt, but let me just suffice it to say that this quilt was not in the grand scheme of the plan when Emily and I divided everything up and figured out how to use Grandma's shirts for 5 different quilts (3 aunts and one each for us) back in February.  Fast forward a number of months and now we needed to come up with another one (#6), and this was after everything was pretty much cut apart, divided, and cut out.

Well, thank goodness for a minor miracle: there were enough scraps to cut 3" squares (albeit a few had to be pieced) and I found this quilt design from Oliver + S Moda that was perfect inspiration for less than ample amounts of fabric. 

Voila!! the "Loaves and Fishes" quilt.


Details:
  • Finished measurements approx. 48" by 66"
  • Cut 3" squares
  • Sashed between and outside edges with 3" strips.
  • Thrifted multi-striped sheet for the backing
  • Cross hatch machine quilting
  • Machine binding from thrifted stash
______________________________________
This quilt is going to our cousin Doug, therefore, it needed to be a bit more on the manly side--even though he has 3 girls.  So why is Doug getting it?  Well, for a couple reasons: first of all his mother was the one aunt who didn't want a quilt (but then said he could have it), also he lived with Grandma for a number of years before he was married, and he is the first born grandson.  So I guess that rank does have its privileges.
And really, there is no more fabric to be used....really....there isn't.  So don't ask. 

Tuesday, August 16, 2011

What I should be working on....

...finishing up a wedding dress alteration for Maggie.

Her dress is similar in style to the above picture.  Mostly it just needed to be taken in, which I've already done.  Now I just need to put it all back together again and add the bust shaping: i.e. some nice bra cups, since you can't wear one at all with this dress, not even strapless.

So here's what I've been doing instead:

Made baby swimsuits for a friend's shower coming up this weekend.  Out of necessity I made the 1T size a 2 tone style (first time I've done it on a baby suit) because I didn't have enough of the stripe piece.  Finished off the neon pink tie dye fabric too.  (I have a little girl tie dye suit on sale at my shop--currently 25% off entire purchase thru end of Aug.  Code 25OFFSALE)

Yoga pants for daughter #2, and to display at my fabric store.


Kwik Sew 3835
Easy easy to sew.
Comfiest pants ever according to M. 
I plan on making me a pair too--in the hopes I'll work out more if I have stylish workout wear.

Tee for #5 who is starting kindergarten this Fall.  (Woohoo!!) 
This is the leftover knit fabric from the yoga pants.

Simplicity 5976--raglan sleeve tees and bermuda shorts
His wardrobe needs some serious help for school. 
I really don't want him going to school looking like an orphan child.
It'll probably happen anyway, as he is a picky boy when it comes to clothes.

Bought some more fabric at the thrift store.
Grey/black suiting (4yds. 60" wide for $3) for slacks and maybe a new black dress.

Love this green sweater material (2 yds. for $3) which I was hoping would be enough to make a short sleeve easy sweater dress.  Not sure now.  After washing it it did shrink a bit (there seems to be a bit of wool in it), so I might just have to make myself a pretty sweater skirt, or a short sleeve turtleneck.  Can't decide just yet.  But I LOVE the color! so I'll figure it out.

This week my goal is to finish the wedding dress--no more excuses--and really they are paying me to fix it.  I should be more excited about getting it done than I actually am.  Can you tell that alterations, even though I can do them, are not my favorite?

Sunday, August 14, 2011

New Look Travel Dress

I think I bought this pattern a year ago Spring but just hadn't put it together yet.  I had sort of put myself on a no new fabric shopping diet.  I have this great store where I usually find all my awesome knits (it's where I get all my swimsuit fabric too) but I just hadn't gone much because I couldn't take the pressure of looking at all those pretty fabrics and then not buying anything.  Better to just avoid the "evil" all together.

But then earlier in the year I really needed a new dress. O.K. "need" is used loosely, but my wardrobe has been bugging me immensely.   I ended up using some cool navy fabric from my stash last minute.  Great textured knit fabric--the kind you can wad on the floor and leave for days and then there isn't a wrinkle in sight when you pick it up days later to wear it.  LOVE that!  Perfect dress to take when traveling--just shove it in the suitcase and go.  

(besides the texture of the fabric the picture above also shows the front detail at the bust)

New Look 6802


My changes:
View B sleeves with view C bodice.
Lengthened the pattern, as usual, about 9 inches to the hem. I wanted it a bit longer than just at the knee.
Adjusted the neckline to be higher and scooped  instead of V-neck.


This is a super easy dress with some nice details. No zipper, just pull it over your head.  I wore it first in January in Arizona for our Grandmother's funeral.  So comfy and easy to wear for long periods of time.   Paired it with my favorite red slingbacks and I love, love, love this dress!


Here is I am at the cemetery with our dad in January--photo courtesy of Leslie

Monday, August 8, 2011

Grandma's Shirts x 3

Somewhere in all the whirlwind of grandma's funeral and seeing all the relatives I volunteered to make whomever wanted a quilt out of grandma's shirts.  Three of our four aunts said they would like one.  So after I got back home and realized what I'd just committed myself to I begged recruited Renae to help me.  She is a crazy fast sewer so I knew she'd save my hiney help me big time. 

I deconstructed all the shirts and sent Renae a stack of fabric and some already cut squares.  We talked about designs and ideas, while keeping in mind that we needed them to be quick and simple.  HST's it was!  (For the record Renae made all three quilts, I just did the binding on one.)   So while all three quilts are made with the same fabrics they are all pretty different looking. 

Quilt #1
Pinwheels
For Aunt Elaine

Quilt #2 
Triangles
For Aunt Carol
Inspired by this quilt

Quilt #3
Crazy Pinwheels
For Aunt Sharon


Though it doesn't really show in these pictures each quilt is the same size, approx. 53" by 68".
Started with 6" squares, then cut into hst.

Now that these are done, Renae and I can start mulling over the making of our own "Grandma" quilts.  Again, we've been discussing different ideas, but I think we've both decided to hold off until after our kids go back to school.  Stay Tuned!

Linking up @ Quilt Story 

Saturday, May 21, 2011

A Picture of the Snoopy Tent -- Circa 1974

A few years ago we posted about the card table tent that our mom made back in the day.  It is legendary in our family, practically an heirloom.

While going thru a photo album I brought back from Grandma's house I came across this picture...

Renae (far right) and 2 of our other siblings
Old pictures are awesome!

Monday, April 11, 2011

Contrasting Binding on Swimsuits Tutorial

As promised, albeit a bit later than intended, I have finally put together a tutorial for attaching contrasting binding on the edges of your swimsuit. My #2 daughter has been bugging me for some time to do this suit. And it didn't hurt that she was starting swimming again this past week in her gym class. Last year's suits are getting a big ragged and saggy.

So here we go:
I'll show you how to attach it on this suit below.


NOTE:
When attaching contrasting binding on a tank style suit like this you will need to trim off about 1/4" of the fabric (seam allowance) on the armhole and neckline edge. You can either copy the pattern piece with that much already taken off, or just cut a bit off once you have the pieces already cut out. Or like I did, just trim it a bit once you have the main portion of the suit already sewn together, because I wasn't sure I was going to do this in the first place when I cut it out.

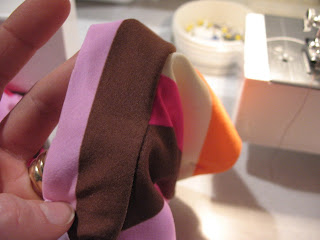
Cut yourself some strap pieces--at least 1 5/8" wide. I'd just go for 2" and make it easier on yourself. I didn't have a brown solid that matched well enough so I cut out strips from the leftover striped fabric. The stripes weren't quite wide enough so I cut a bit extra into the next color. The pink will end up being hidden inside the suit, or cut off completely.

Measure, cut and sew a circle of the binding piece so that it fits almost exactly the armhole opening. If you have to err, err on the side of slightly smaller, not larger, than the armhole opening.

Pin and sew with a stretch stitch, being careful NOT to stretch the fabric.

I used the stitch on my machine that is a basic straight stretch stitch (my manual calls it Straight Stretch--go figure). If you aren't sure what to use, check your machine manual, or do a little tester on some scraps. You want the fabric to be able to stretch some without snapping the stitching.


You can cut out some of the bulkiness at the seams if you'd like.
Next you will make a circle with your elastic--pinning it to the SEAM ALLOWANCE--on the side that would be the outside of the suit. Attach with a loose zigzag, stretching only as little as needed to fit within the armhole opening.
Then like we did on the separate Straps Tutorial, you will fold the fabric back over itself twice, so that the excess is now on the inside of the suit.

Pin and topstitch using a Stretch Twin Needle. (or any other decorative stretch stitch you prefer)


Cut off very carefully any excess fabric.
Repeat steps for remaining opening edges.
Attach the extra strap (optional) on the one shoulder design and you're ready to go.


Here we are all finished up. #2 was SO excited! I'm pretty excited myself on how this turned out.

***If you ask a question in the comments section please leave your email so we can answer you back***
_____________________________________

Kwik Sew's Swim & Actionwear book also has great directions and pics on how to do this. It also shows how to add contrasting binding to any style suit pattern. Which is basically what I did with the above one shoulder suit.
____________________________________
**You can head over to my shop if you are looking for already made suits, or would like to order a custom made one. I've been adding more here and there. I also have some swimsuit fabric for sale that might interest you.

LinkWithin

Related Posts Plugin for WordPress, Blogger...