Showing posts with label Christmas. Show all posts

Wednesday, December 24, 2014

Merry Christmas 2014

From our house to yours
We wish you a Merry Christmas!

Wednesday, November 26, 2014

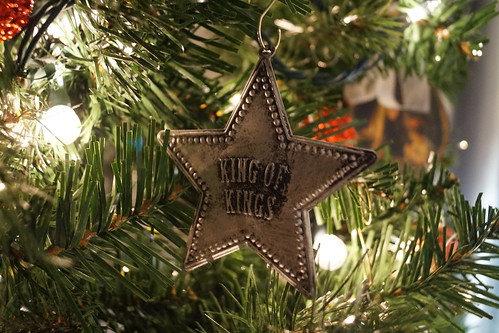
Names of Christ Ornaments

Last year I made ornaments for my Mom's "Christ"-mas tree which she loved.  I made a couple for me too, but I still need some more before I do a complete Christ centered theme tree.

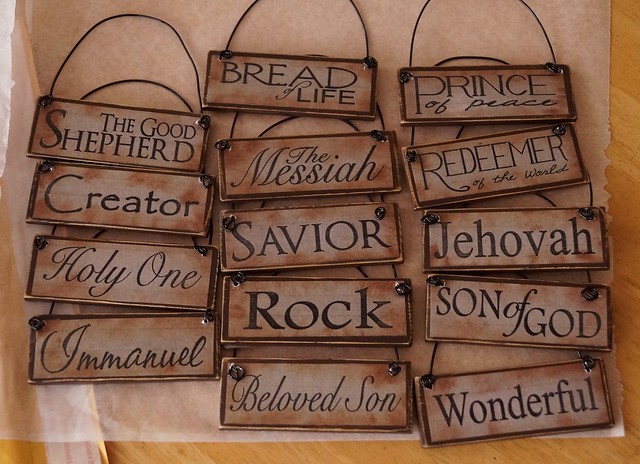
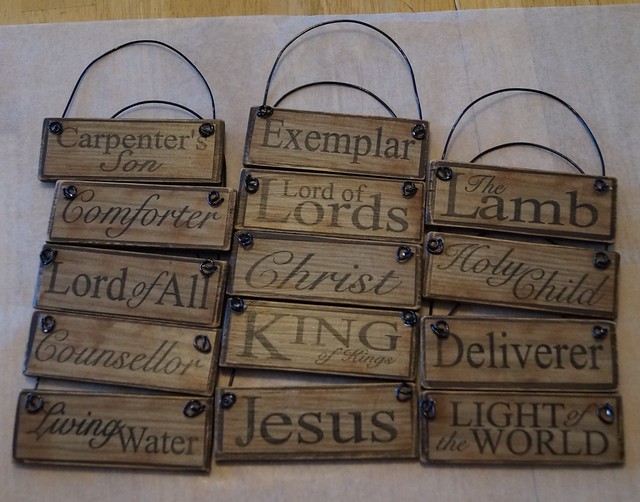
I had also made some wooden plaque ornaments of Christ's names that apparently I never posted about. Just recently I made another set (28 total) that will eventually be gifted out.


I "distressed" the edges a bit just by using some brown ink and a cottonball to smudge on the edges of the papers before I did the Mod Podge.  I really am happy with the wood grain paper I found in the scrapbook section at Michael's.

In the meantime I've also added some ornaments for my own Christ themed tree.
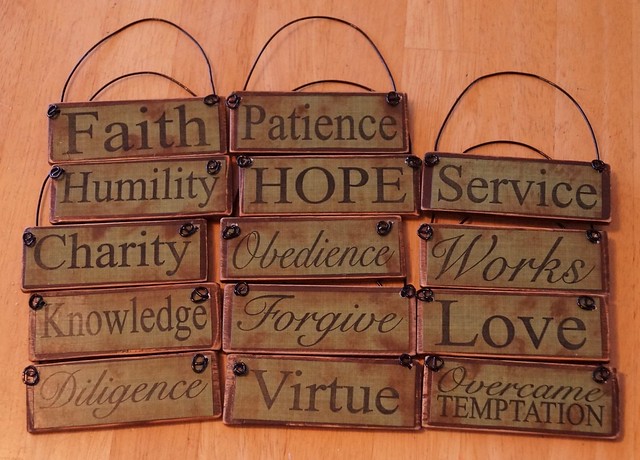
Besides the Names of Christ plaques I made this year attributes of Christ wooden plaque ornaments.


I added them to our tree this year.
I don't really have a theme going on this year, but felt that I could use the reminders myself of trying to be more Christ-like.


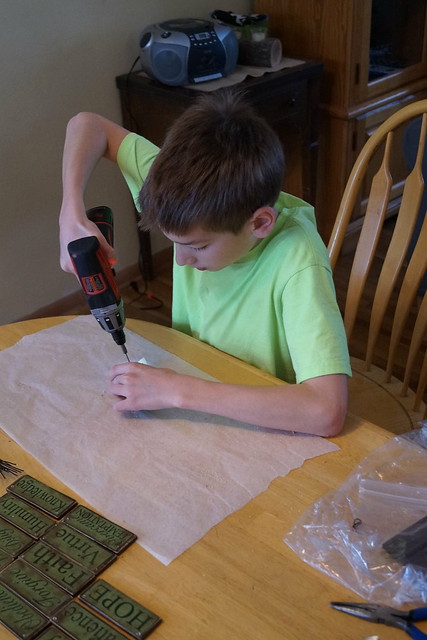
Here's my crafting helper re-drilling out the holes after the Mod Podge.


Details:
  • Original idea from HERE. Scroll way to the bottom of the link for the Names of Christ pdf.
  • Used 5/64 drill bit for the holes in the wood.
  • Darice Black Aluminum 14 gauge wire (or could use 16 gauge).  I bought mine at Jo-Ann's and one roll of  3 yds. allowed me to cut 14 - 9" lengths.  If you didn't want black wire you can find cheaper wire at any home improvement store.
  • I bought my 5 gallon paint sticks at Wal-Mart $.37/ea.  The freebie ones at Home Deport were too narrow for the printout.  You can get 4 plaques from each stick.
  • Matte finish Mod Podge--2 coats on the front only
  • Scrapbook paper in whatever color and style to you prefer.  I did copy some onto a bit more busy looking paper and I felt it distracted from the words and names.

Monday, November 24, 2014

Getting into the Holiday spirit

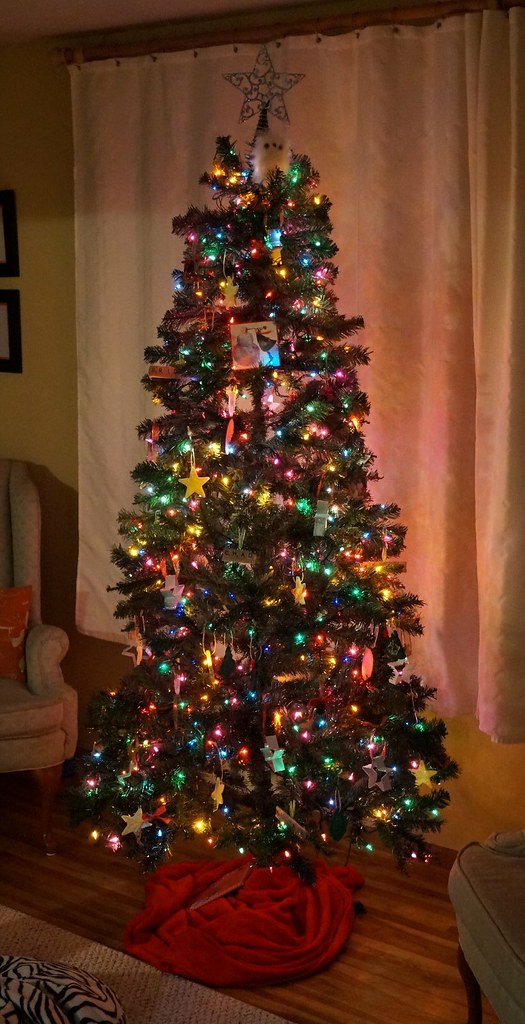
We put up our tree last week.
We needed it.
It was feeling drab and down in our house.

The theme of our tree this year is "hodge podge".
Whatever boxes of Christmas items we could easily find in the POD and whatever I could find at the Thrift store or dollar store is what we used to decorate.  The kids even made some cookie cutter ornaments to hang on the tree.


I want to go buy some more of those cute snowy owls to have for the future.

This tree was my great Friday Find of last week.
Since our tree is waaaaayy in the back of our POD I decided to find another one to avoid the couple hours of unloading, finding, and then reloading in order to get it.  No thank you.  We already did that one Saturday looking for Winter coats.

As luck would have it, I found this tree at the thrift store.  Brand new, still had the assembly tags on it and no price.  The store priced it for me at $12.99 and with it being their 25% off day it came to $9.74.  Woohoo!!  My kids were kind of hoping for a real tree this year, but honestly we do not have much space in our current living room and live trees are wide at the base.  And turns out they are more expensive than this tree.

The other change I made was to add this:


My lighted JOY marquee I made last week at a Home Depot Do-it-Herself Workshop. It is an Ana White design plan and we completed it all that night.  The kids thought it was TOTALLY  COOL when I brought it home, especially when I showed them that the lights have 3 different lighting modes.  I am so glad that I went--invited a couple friends to go with me too.  Home Depot does this the 3rd Tuesday of every month so check your local store for their projects.

The garland swag above the sign is made from the weeds I picked a number of weeks ago that had been sitting on the piano in a vase.  I just split them in half and then duct taped them in the middle and wrapped a pretty burlap ribbon around them.  It hangs from a little 3M hook placed above the marquee.  It gives the sign something a little extra.  Without it the marquee seemed a bit boring.

Once Thanksgiving is over I will adjust the vignette on the piano and add some nativities.  At least I hope that I can find some easily in my packed up life.

Thursday, January 23, 2014

Trip to Nebraska and Mom's "Christ"-mas tree

The kids and I road tripped down to Nebraska for a long weekend last weekend to visit my parents for my dad's 75th birthday.  The kids had both Monday and Tuesday off of school (and we're off AGAIN today for extreme windchill weather---please make it stop!)  It was a nice trip and good to get away.  We even enjoyed a 58 degree day one day while we were there.  Sure beats our -20 degree wake up this morning.

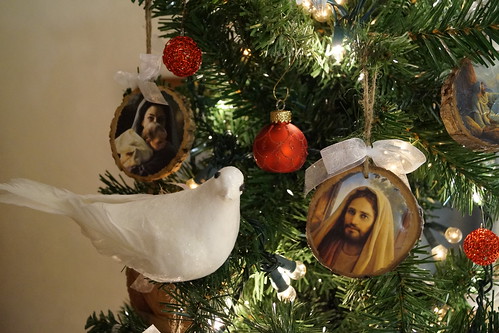
My mom left her Christmas tree up so that I could see how she put it together after I had sent her new Christ ornaments for her birthday last year.


One dove on the tree to represent the Holy Ghost at Jesus' baptism


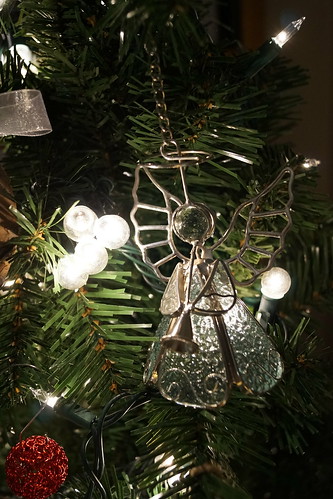
Angels bought at Michael's
Love her cluster lights that she's had for years
The white lights represent Christ being the light of the world


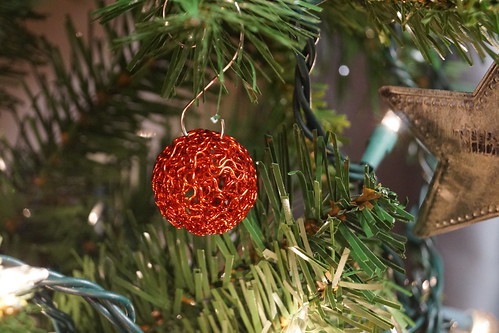
Two different red ball ornaments to represent the drops of blood shed by Jesus.
I think she found these filigree balls at Michael's too.


Biblical Names of Christ Ornament Set bought at Deseret Book

_____________________________________

We also discovered Baker's Candies in Greenwood, NE., famous for their chocolate meltaways.  Yep, they're good!  Thanks Mom for sending us home with a couple bags.

Monday, December 23, 2013

Christmas Card 2013


Enjoy the season!
Renae & Family


Sorry, changed the card slightly for blogging.

Thursday, December 5, 2013

Thoughts about Christmas Trees

So....here is the dilemma for many of us every year, especially once we are married and have kids that are old enough to voice their opinions (which is at about 2 years old):

Real vs. fake tree. 
White vs. green tree.  
Colored vs. white lights. 
Star or angel on top. 
Traditional decorations or not.
Same decorations every year or change of theme.
Stockings hung all season or just the night before.

The list probably goes on and on when you try and mesh two family traditions into one.

My hubby grew up in Idaho where every year they drove up into the hills and cut down a live tree and brought it home to decorate.  I grew up in Kansas.  No hills.  When we got a real tree it was at the tree lot down the road.  That was my normal.

I vividly remember our neighbors, the Sauers, had a white tree with pink decorations (early 70's decor).  I was in kindergarten or first grade then.  A white tree was not right to me at that age.  I just couldn't believe that they had this ugly fake white tree.

Then somewhere along the line we got a fake green tree.  Less mess, you know exactly what size it will be from year to year and you can wire on the decorations and leave them if you want.  I also went to college and apartment living requires fake trees.

Once I got married and finally got out of apartments and into a house we went back to real trees.  Then we had more kids and less room and those trees you buy at the tree lot become a lot bigger once you open them up.  I bought a fake SKINNY green tree on clearance one year.  It has made me really happy because it doesn't overwhelm my whole living room.

Then last year during the holiday season I found a skinny white tree at the thrift store and bought it.  I had visions of the Sauers' tree once again, in disbelief that I was seriously entertaining the idea of a white tree for my own home.  But it really made me excited to think about it.

I warned my family that the following Christmas (meaning this year) I'd be putting up a white tree and that there had better not be any complaining.  It didn't mean that we'd always have a white tree, but this year we would.  So basically....deal with it.

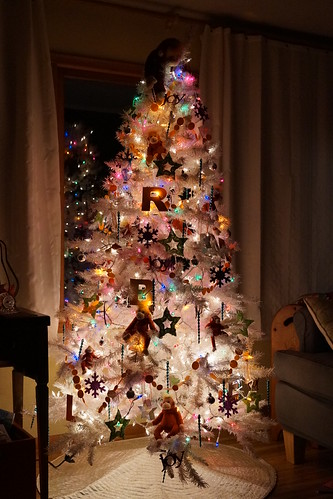
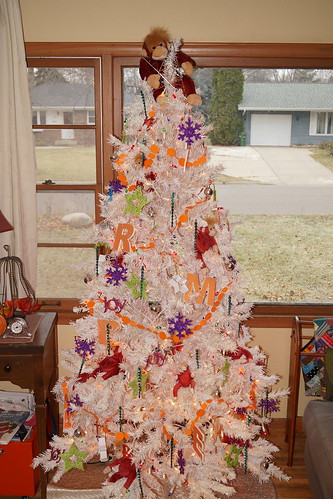
Here is how it all turned out.


A lit view at night.


And a daylight view (before our dumping of snow yesterday)

My oldest son told me that he prefers the white tree. (that is a bit shocking)

My oldest daughter said, "I don't get the monkeys."
The other kids replied, "It's just 'cuz they're fun."
Yep, that's about it.

Our neighbors across the street told me that they like to see our tree at night through the window too.  Thank you!  I hope you all take some time to sit by your tree, at night, with only the tree lights on and enjoy some time by yourself or with your family.

Details:
  • Silver wire star thrift store purchase for $2
  • Stuffed Beanie Babies orangutans acquired at the thrift store for $.75 each, except large one on top for about $2.
  • Initialornaments inspired by this pin.
  • Various clearance ornaments (purple snowflakes, green stars, joy, blue icicles and silver disco balls) last year from Target and Wal-Mart.
  • Made the orange dot garland from scrap paper and thread.
  • White star cookie cutters turned into ornaments.
  • Both colored AND white lights on the tree.  Oooh! Who knew you could actually do that.

Saturday, March 30, 2013

Christmas Ornaments of Christ

I know this is super early for the season but maybe not so inappropriate with Easter being tomorrow.

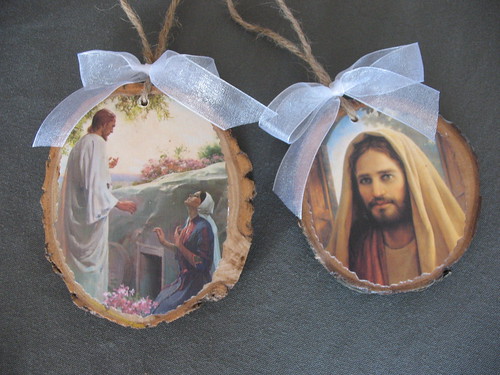
Some time last Christmas I was talking with my mom and I was telling her how excited I was to have bought a white Christmas tree and what new decorations I was going to do with it.  We then got talking about what she wanted to do to redo her tree.  A number of years ago she had some ornaments that depicted the life of Christ.  I remember these.  She is now down to one left.  She said that she wanted to have those again and I suggested that maybe over the summer we should do a Christmas in July project and make some.

Well, I'll be honest, I couldn't wait quite that long.
After we talked about it I just got too excited about the prospect of making these for her as a surprise gift.

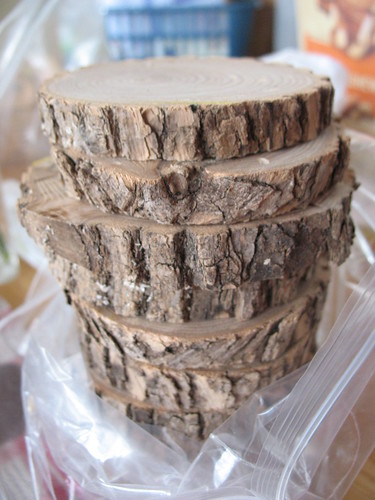
I roped in my hubby and got his advice and then raided our wood pile for good sized logs and cut them into slices using his miter saw.


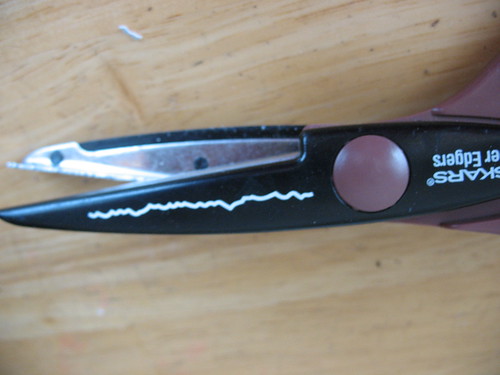
I cut the pics down using one of my scrapbook scissors that looks like torn paper.


Then I got busy Mod Podging them on.
Once they were all dry, I drilled a hole in the top for a loop of twine and then added a little ribbon for some contrast. She ended up with about 2 dozen ornaments.


In the drying stage


I gave these to my mom for her birthday earlier in March.
She was very surprised and very happy.
I was pleased with how they turned out.


Happy Birthday Mom!

Details:
Bought the picture packets from Deseret Book, but you can order them online.
  • If the Savior Stood Beside Me by Greg Olsen
  • Beautiful Savior by Greg Olsen
  • Wood slices 1/2" thick or less. ( I like less if you can do it)
  • Mod Podge at least 2 coats.
  • Make sure you don't have any air bubbles 'cuz that'll make you super mad.
  • Jute for hanging the ornaments
  • 20 yd. spool of 5/8" ribbon cut into about 12" lengths for the bow. ($3.99 per spool--but don't forget to use a 40% off coupon.)
I'll have to get a pic of her tree later this year.
I also gave her some red bead garland that I found at the Thrift store to use along with her white lights.
It'll be so fun to see it all done up.

Here is another way to do this same theme/idea.

Friday, January 11, 2013

Friday Finds and a White Christmas Tree

The kids are back in school this week and I'm relieved.
I took down all the Christmas stuff on Monday; however, the majority of my finds are Christmas related.
It is what it is....


Found this white Christmas tree a couple weeks ago in December at one of my local thrift stores for $12.46 on one of their 50% off day sales.  I checked on white trees at our local Menards store and they were selling one the same size for $99 or pre-lit for $149.  Woohoo!!  I'll take my $12.46 tree thank you very much.  It is a 6 footer and although I don't want to use it every year, I want to try it once in awhile--next year for sure--you know, change it up a bit at our house.  And for that price I can store 2 trees and decide what mood I'm in for that particular year.

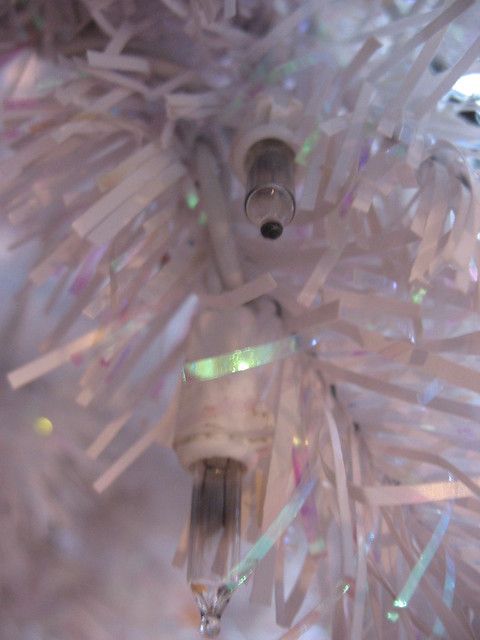
After bringing it home I discovered that the pre-lit lights we're all blown out.
I didn't really care, because I may be putting colored lights on it anyway.

White lights should not look black.  The entire strands over the entire tree were like this. I'm not opposed to buying replacement bulbs, but with ALL of them blown it was not cost effective.  They had to come off.  I have to say that pre-lit trees are great UNTIL something happens with the lights.  Then they are a royal pain in the backside.  This is the second pre-lit tree that I've taken off the lights and it is a not a quick job. Those workers who attach the lights to pre-lit trees do an A+  job of making sure they won't come off--practically E.V.E.R.


An hour and a half later, and after getting out the wire cutters five minutes into this project, this is what was left of the burnt out lights.  Bye-bye!  So glad that I took care of this now.  That way I can just pull it out and decorate for next season.

A couple other finds that I've scored over the past couple weeks.

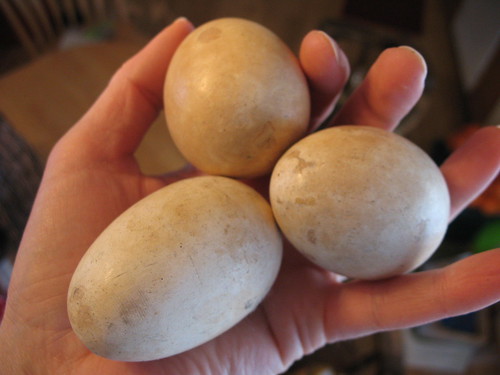
Wire chicken basket and wooden eggs for $4.50.
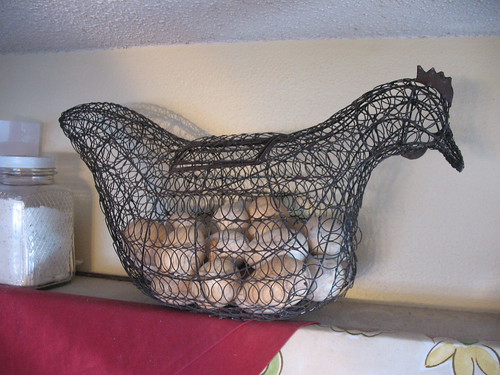

I actually bought this for the cool wooden eggs--thinking to Easter upcoming.  The poor chicken had a broken leg--one leg hanging loose by some wire.  I tried to fix it so she could stand up but couldn't get it quite right.  She still kept falling over, especially when I put the eggs inside her--a little bottom heavy.  So we did a little surgery and both legs came off and now she roosts up on my cornice in the dining room.  I still may just use the eggs come Easter, but for now I like her up there.


8 pack of star cookie cutters, still with tags on them, for 96 cents that I am going to use as ornaments for the white tree.  I may or may not spray paint them a different color.


Various strands of white corded lights for the white tree--all less than $2 each.  One in particular for 96 cents that has colored lights and 16 different lighting combos (i.e. slo-glow, chasers, etc.)  LOVE it!!  I might have to be on the hunt for another one of those somewhere.

PEACE brass stocking holders for $3.
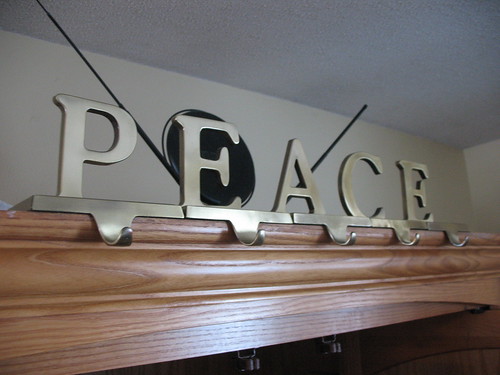
I just saw them before Christmas at Target retailing for $30 for the set of 5.  We've never had a place to hang stockings before, but with our new (Craigslist) entertainment unit (see first pic) we were able to use that this year and the kids were thrilled.  I now may have to make new stockings since the other ones were just whatever stockings that only came out on Christmas Eve.

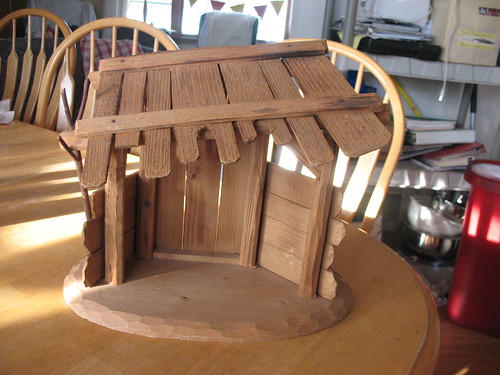
A wooden stable for one of my nativities for $4.45.


A cool tall (16 inches) wicker pumpkin for $2.47 to go with my other twiggy pumpkin.


And lest you think I'm becoming a hoarder, here's the pile that left my house last week to go to the DAV. (I just love charity/donation pick ups at your home).  And that is besides the couple things we've sold recently on Craigslist.

See, I do like change....along with a good dose of order among the chaos.

Thursday, December 13, 2012

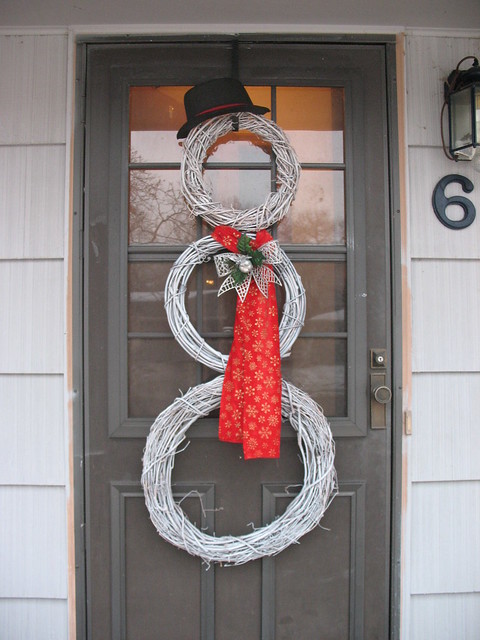
Snowman Wreath

While we're talking wreaths this week I'll show you one more that I put together this season.

This is a fairly easy project that I put together for our front door.
Wreaths bought at the thrift store and post ripping off all the ugly decorations.

I couldn't get all the hot glued Spanish moss off of this one.
I just sprayed over it and will use this as the back side.

 Hung up the wreaths on the swing set with some jute.
Sprayed and let dry some before bringing them in to completely dry.


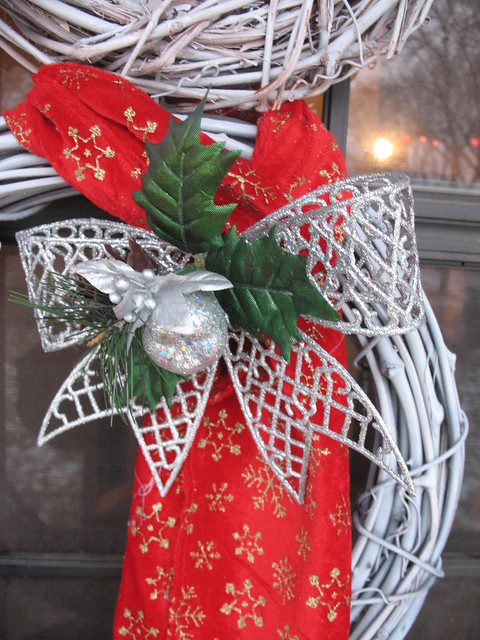
Detail of the glitter scarf fabric and embellishment

Details:
  • 3 wreaths from the thrift store for around $6 total
  • Attached the wreaths together using zip ties.
  • 1 can spray paint--white matte finish
  • Craft foam black hat found at Michael's--cut in half
  • Red glitter scarf fabric for about $3.
  • Scarf embellishment from the dollar store--safety pinned on.
  • Inspiration here on Pinterest.  I also liked the greenery versions I saw, but they wouldn't have looked as nice on my dark front door.  Much better if you have a white or light colored front door.

This is Emily's version that I sent her for her birthday.
Hers is a little smaller version, but still cute.
She says she'll probably change the hat once Christmas is over 
so that she can still leave it hanging through the remainder of the Winter months.

Wednesday, December 12, 2012

Winter Wreath Update

I need change...more than my family does, but I like a little bit of change every now and again.


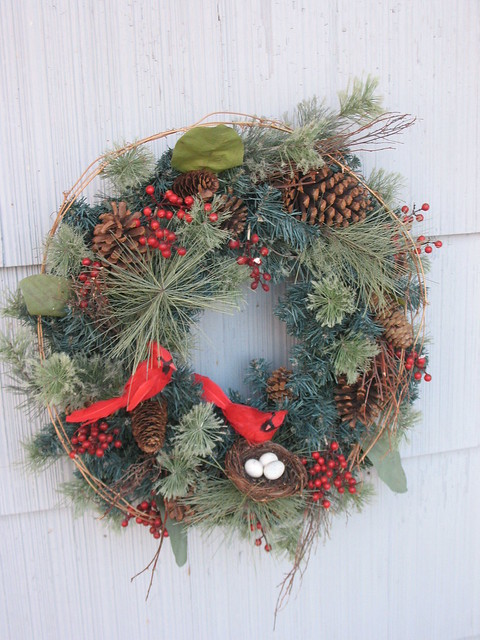
Last year at the thrift store I found this wreath for less than $3 and it worked great on the outside by my front door. As I was browsing the web the other day I found this pretty wreath.  Instead of making a completely new wreath we just added some birds, a nest that someone had given my daughter from something or other, and some eggs to last year's wreath.  Changed the look completely and daughter #3 is so happy.  She loves birds.
I'm happy I only spent less than $2 to change it up.

Details:
  • Pair of cardinals for $1 at the Dollar Store. (wired onto the wreath)
  • Sculpey clay from Michael's to make the eggs. (used a 50% off coupon = $.79). (Hot glued to the nest which is wired onto the wreath.)
  • Paint from the stash.
And one more little update to my home.
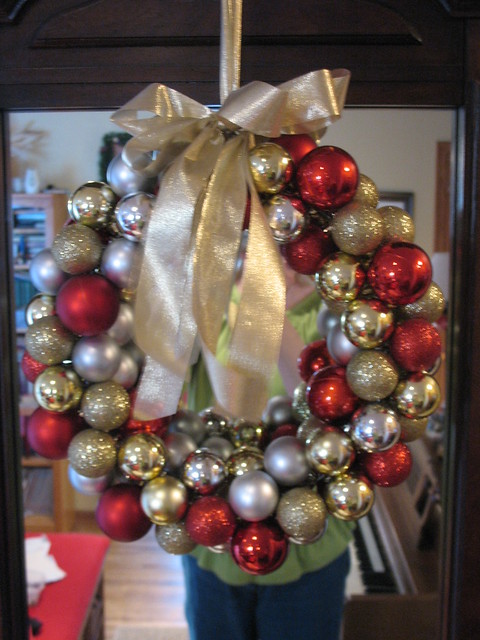
A little wreath I made for my front entry mirror for around $6.
Bought the "glass" balls from the dollar store and strung them onto a wire frame 
and then added a little gold lame ribbon for hanging.  So happy with this one too.

Wednesday, November 30, 2011

Tree Pants

After having the same green velvet Christmas tree skirt that I've had for I don't remember how many years, I decided I'd like a new one.  I found this pattern for tree "pants" (square not round) back in October, but didn't make it until a week or so ago sometime. (At this time of year time just all blends together with school activities and other projects.)

Very easy pattern and very fun.
I sort of did a combo of the Red/White version with some scrappy fabric that I already had. 


 I wish I had had more of this print.  I think I would've used it for all of the stars had there been enough.  Instead I did plain red solid, green on green print, and the multi-print for the stars.

My kids were very excited to put it around the Christmas tree when we got out all the decorations and got serious about the holidays.

Now on to pajama bottoms.....

Wednesday, February 9, 2011

Funky Christmas Stars Quilt

I've been trying my hardest to get all my in-progress quilts DONE once and for all.  I'm ashamed to say that this quilt top was started way back in the fall of 2009.  


I made it with the intention of using it at Christmas time.  I like that it doesn't scream Christmas.  

Here are some close-up's of the different fabrics I used.  I really have no idea what any of them are anymore as it was so long ago when I used them.  Some are designer, some are not. 

This was one of the quilts I sent out to have quilted last week.  Though not as satisfying as doing it myself, it is such a huge relief to have it finally done!!   


I think part of the reason it hung out in the unfinished pile for so long is because I wasn't sure I'd be able to find the right backing fabric.  When I came across this print (Mingle Circles in Leaf by Robert Kaufman) I knew I'd hit the jackpot.  It was pretty much perfect.

The binding...was exactly what I had envisioned as well!

Funny story:  I took a bunch of scraps from this quilt to my LQS when I was searching for a backing.  I immediately decided on the awesome Mingle Circles.  When I took it up to the front for cutting the ladies at the store were like "I'm not so sure that one even goes with your scraps.  Maybe you could find something a little more suitable to match."   I'm happy to report that I didn't let them sway me in the least.  Just goes to show that everyone's opinion /tastes can be different and still work!


Finished Measurements:  52" by 63"
The tutorial for the stars comes from here.
There are a million and one pictures of inspiration on flickr if you look under Wonky Stars and Maverick Stars.
I'm linking up at Freshly Pieced and Quilt Story.

Tuesday, December 22, 2009

Holiday Wishes

Merry Christmas
From all of us at Creative Chicks!

Carhenge, Alliance, NE.


We'll be back next week to share some of our Christmas projects with all of you. Hope you have an enjoyable holiday spending time with your family and friends.

LinkWithin

Related Posts Plugin for WordPress, Blogger...