Showing posts with label Canning. Show all posts

Wednesday, November 18, 2015

Some Fall Canning

With this new house I  have a new set-up for canning.


My kitchen stove has a flat glass top which is lovely most of the time, except for when you're doing canning.  I have used it for some pressure canning for short amounts of time--i.e. peaches (6 min. at 10# of pressure).  However, I have been nervous about using it for any meats or beans which take up to 90 minutes for quarts.  I've heard stories of broken glass tops with the canner heated for so long.


Plus, let's be honest, I need to do more than one canner at a time if possible.


Earlier, in late summer, I was looking for a camp stove at my local Fleet Farm store. Which for those of you in Minnesota, Wisconsin, or Iowa you know how much fun this store can be.


I was looking for a 2 burner stove which runs around $80-100.  My sister, a cousin, and one of my good friends all swear by their camp stove canning set-up.  However, instead of a 2 burner I found a 3 burner stove, on sale for $100.  Regular price $200!  Hubby thought I was a little nuts to get one this big.  However, he did help me set it all up and hook up the propane.
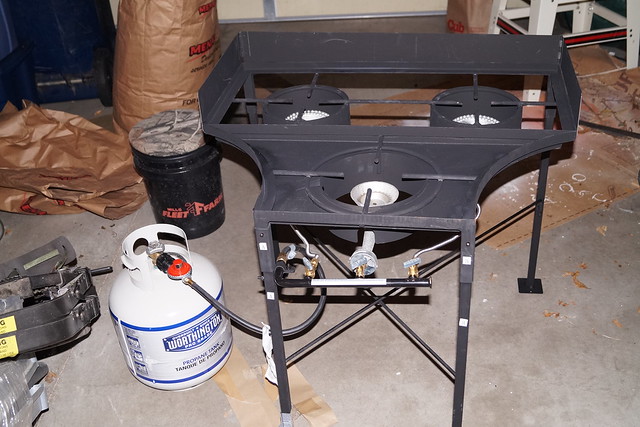


When you own 3 pressure canners like I do, a 3 burner camp stove is perfect.  The short story of the pressure canners is I bought one after we got married, inherited one when Hubby's grandmother passed away (that is the heavy double stacker), and then found another one at the thrift store for about $8 and I just had to replace the rubber ring and overflow plug (another $9). 
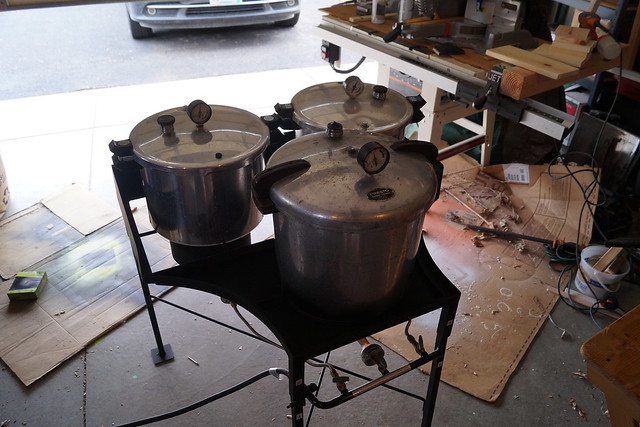


Here is the set-up all running out in my garage. 
With 3 canners I am able to can 32 pints in one sitting.  That beats 8 at a time, or even 16 with the double stacker.  This just worked out so slick.


Besides beans I have also recently canned Apple Pie Filling (recipe from the Ball Blue Book)
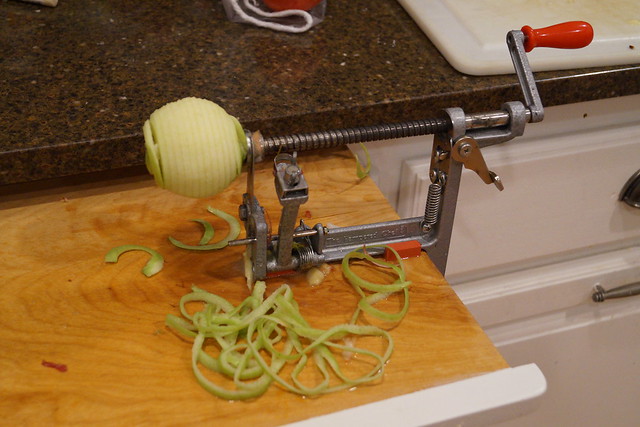


This is my favorite little contraption to help out with pie filling.
It peels, cuts and quarters all at the same time. 
This one is from Pampered Chef, but I've seen them at Target and other stores too.
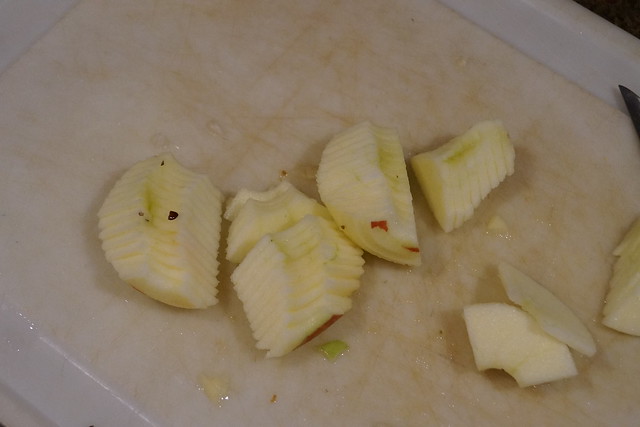


Just quarter cut the slices and add them to some salt water to keep from browning.
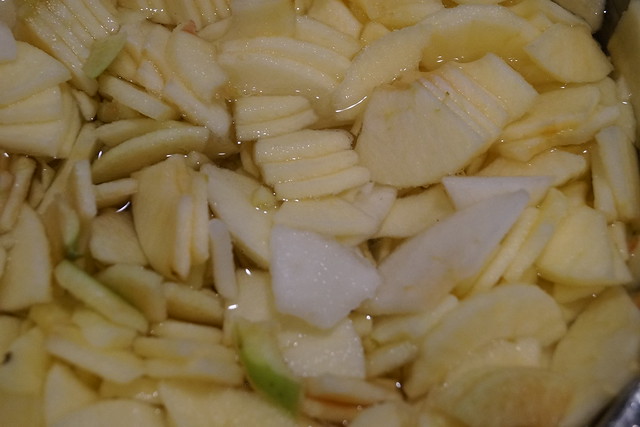


This year I got apples from Fall Harvest Orchard and tried their pie mix bags.
You can see that different apple varieties produce different colors of apples.  Some are more white inside than others.
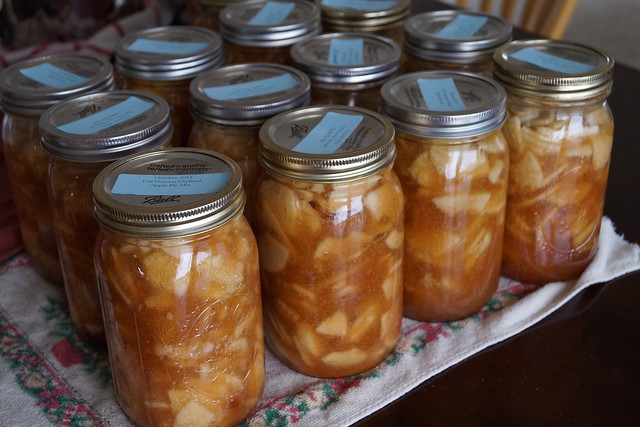


Delicious looking!
We made some crisp with the amount leftover that I didn't have room for and it was yummy!
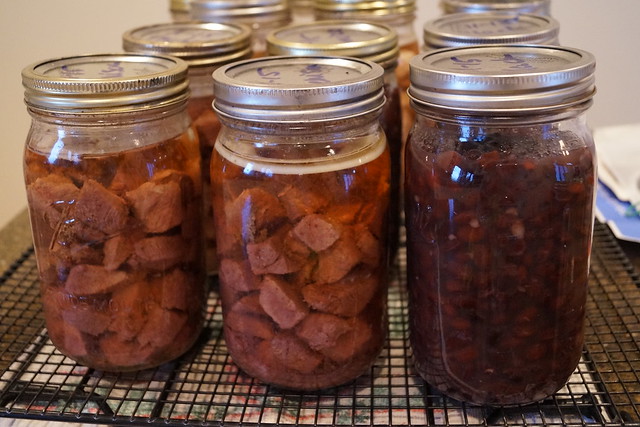


Just last week I canned meats.
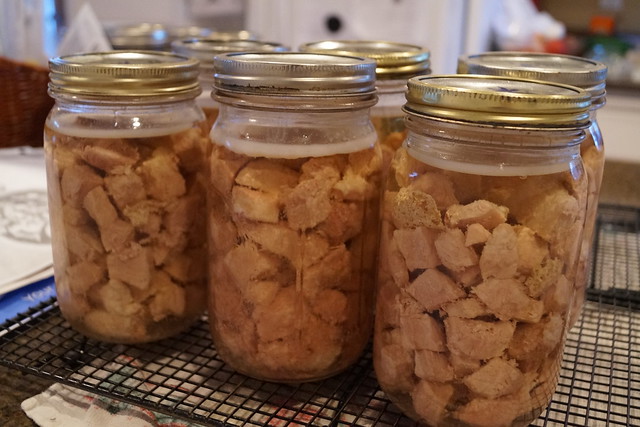
Above are jars of venison and black beans (they can the same amount of time) and below some pork chunks.  With beef as expensive as it is around here we've been eating a lot of pork.


I bought a pork loin at Sam's Club for $1.88/lb.  It was 10.21 lbs. for $19.19 and I was able to can 6 1/2 quarts worth of pork chunks.  I think I will go get another one and do it again.


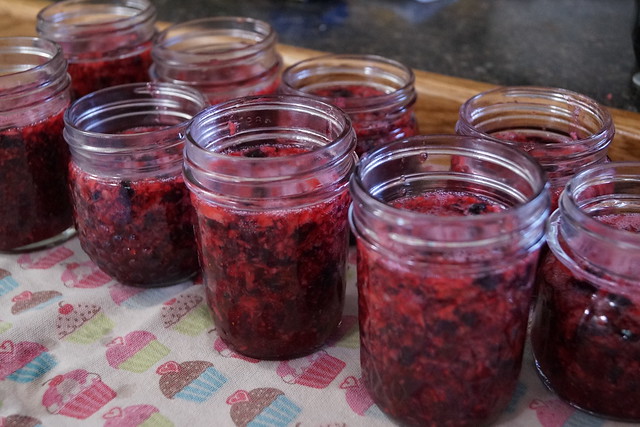
I'm so excited to get our food storage back up to speed.  Canning does take work, but I like being able to just open jars later in the winter and basically have dinners ready to go.
Tuesday, June 10, 2014

Breaking out of our jam rut

At our house the preferred jam of choice is Raspberry.
Homemade.
Hands down!
I think there are a few kids who won't even try anything else.
Sad day for them this year as my raspberry patch is no more.
Dead from a Japanese Beetle attack.
It really is a sad day for all of us, but not much I can do now.

So I am trying a couple different jam recipes than we haven't had in the past.

Last week I made Strawberry-Blueberry Freezer Jam.


I made homemade bread the next day to give with a jar of jam to the teachers as a thank you.
It is always a hit with people.
I also gave one to my stylist.
I've brought her bread and/or jam before.
She told me she hides her jar in the back of the fridge so she doesn't have to share with her family.

Details:
  • Recipe here.  
  • I used frozen blueberries that I bought at Sam's.  I just measured out the amount and then let them thaw in the fridge overnight.  I drained off the melted liquid before chopping them up.
  • We prefer freezer jams normally, but the Sure-Jell packages come with cooked jam recipes too.
  • I was able to get 9 - 1/2 pints out of this recipe.

Friday, October 25, 2013

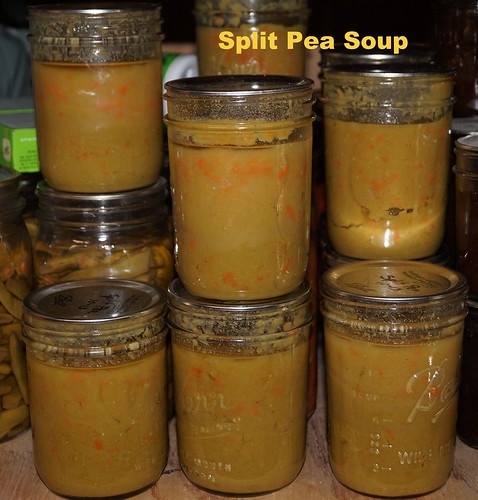
Canning Split Pea Soup

Two weekends ago it decided to cool down here in Minnesota.  We had been enjoying unseasonably warmer weather for Fall, which was fine with me.  But now that we are cooling down it is time to can some soups.

I am pretty much the only one in my family who will eat split pea soup.
I don't care.
I like it.
Even if it does look "gross" per the kids.
I'll give them that much
But when I can it in pint jars it is just about the perfect amount for one serving--ME, for lunch.


I just canned some more Chili this week too.
Stocking up for the cold months ahead.
Now we just need a deer or two from our hunters and I'll can some venison chunks for stews.

Notes:
  • I used the recipe from the Ball Blue Book, pg. 65, "Split Pea Soup".  I doubled the recipe and got 11 pints.
  • I don't thicken mine any more than the recipe indicates when cooking it before canning because it thickens up quite a bit once it is all pressure canned.
  • This recipe has split peas, ham chunks, carrots and allspice.
  • Canning Homemade also has a recipe for a slightly different version of split pea soup.
  • 1 - 1 pound bag of dried split peas is equal to 2 cups dry uncooked for those of you who prefer to buy in bulk (which is usually cheaper).
  • If you need some good soup recipes to can--those you can dump and heat up--try The Amish Canning Cookbook.  I checked it out from my local library and found some yummy recipes.

Wednesday, October 23, 2013

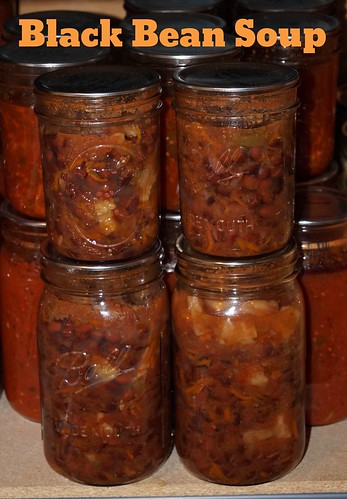
Home Canned Black Bean Soup

I canned a batch of soup over the weekend. Part of my crew was pheasant hunting and it was rainy. So it turned out to be a great time to do some canning.

This is the first time I have tried Black Bean Soup, pg. 177 from The Amish Canning Cookbook.  (It looks like this link will give you a good sampling of the recipes from this book.)


This soup recipe includes black beans, carrots, sweet potatoes, tomatoes, onions.  Looking forward to eating this with some tortilla chips and sour cream.

Notes:
  • I was able to get 10 quarts worth of soup instead of 6 as indicated by the recipe.  And I followed it exactly.
  • Instead of putting the beans in the jars first and separate from the other ingredients I combined everything and then put them in the jars.
  • I canned some in pints so that I would have smaller portions for lunch, and in case the rest of my family doesn't like it.
  • Check your local library to see if they have the book.  I was mostly interested in their soup recipes although there was lots of different recipes.

Tuesday, October 1, 2013

'Tis the Season to be Canning

Two weeks ago a gentleman from hubby's work asked if we'd like some tomatoes.  Earlier in the season he had brought a bunch of zucchinis to give away.  Apparently he is involved in a community garden and was "done" with the tomatoes.  They were also not the variety he thought he had planted and so he didn't want them.  I told hubby I'd take whatever he wanted to get rid of.  I'd figure something out based on whatever he wanted to give.

Be very careful of what you say.

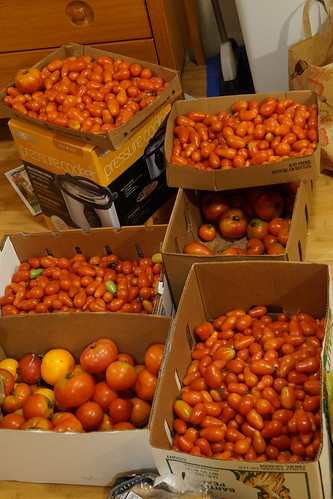
The next day hubby brought home boxes, yes, boxes of tomatoes.
This is what I still had left after canning 35 pints of salsa on that first Friday and Saturday.


It didn't feel like I even made a dent in the boxes, but that's O.K.
I'm not one to look a gift horse in the mouth--or in this case boxes of free tomatoes.
So I got to work and did more canning, almost every day last week.

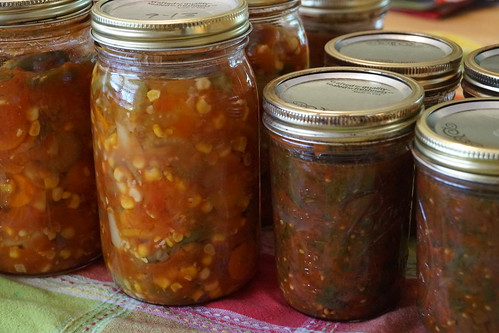
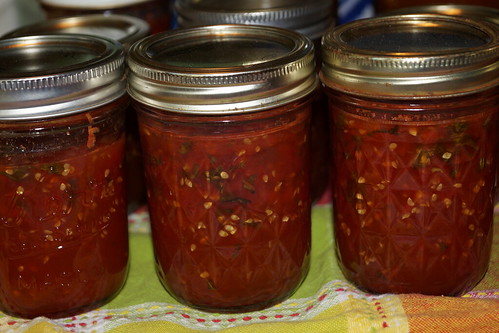
Vegetable soup (left) and Spicy Tomato Salsa (right)

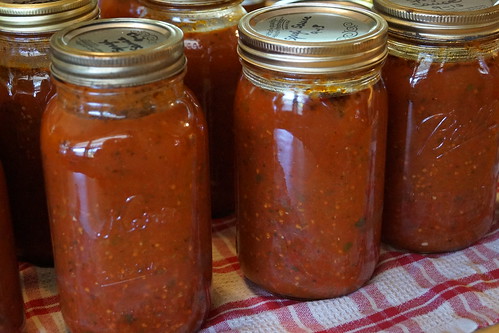
Spaghetti Sauce

Tomato-Basil Jam


Mandarin Sauce

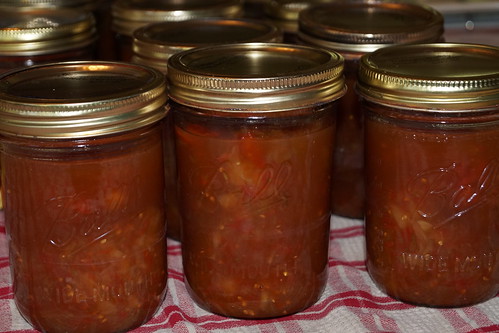
I added quarts of Vegetable Soup, pints of Spicy Tomato Salsa, quarts of Spaghetti Sauce, Sweet & Sour sauce, Tomato-Basil jam..  After all that I STILL had tomatoes. So I did more Vegetable Soup, more salsas and more Spaghetti Sauce.  The boxes are finally empty, after days of working on them.  I'm tired, but it also feels so good to see all that food on my storage shelves.  I am actually to the point where I don't have much extra shelving space.  That hasn't ever happened to us before.  I also had to go out and buy more jars. Also, can't remember the last time I had to do that.

Now on to something else...anything else.  
I really don't want to see any more tomatoes for quite some time.
That was a LOT.

Free Boxes of Tomatoes Yield:
Total Jars:  115 jars of tomato goodness.

Then on top of those I also canned 28 quarts of soup starter (not involving tomatoes).
And 11 pints of Tomatillo Green Salsa with some free green tomatoes from my friend Jenny's garden.  Her pregnant body doesn't want anything to do with tomatoes right now.

That bumps it up to 154 Jars.

Yeah, no wonder I'm tired.
Redbox is looking good today.

Friday, September 6, 2013

Juicing {The Smell of Fall}


One thing we haven't mentioned on the blog yet is juicing.  Apple season is just about here depending on where you live.  So in preparation for all those yummy apples here is a little insight today on juicing your own.

And just so you know we're not going to reinvent the process.  At the end of this post are a couple links that have good step-by-step instructions, along with pictures to get you going.  We'll just add some of our thoughts on making it as easy and painless as possible.  
_________________________________

First:
Mixing a couple different varieties of apples together tends to make a better juice, applesauce or pie filling. We don't use any specific types exclusively.  Honestly, whatever type of apple we can get free or very cheap is what we use.  Buying "seconds" from an orchard can help you reduce the cost.  These are apples that aren't perfect looking, but work great for juicing or making sauce. The color of the juice (or applesauce) will be slightly different depending on what varieties you use.  It could be a slightly pink or more yellow--we've even had "alien" applesauce as the kids call it because it was slightly more green in color.


Second:
We prefer any method of juicing that only requires you to chunk up your fruit.
No peeling or coring involved.  Just cut off any bad spots there may be.


Third:  
Our equipment of choice for juicing is an aluminum Steamer Juicer (shown below).  Emily owns two of them thanks to one of her quilter ladies who upgraded to stainless steel.

The thing about equipment is sometimes the price can be intimidating.  There is an initial investment, but we feel like the cost is quickly recovered.  The ease of use of some of these items are just so phenomenal that it can't be measured.  And certainly we have bought equipment slowly over the years. Once you know what you are looking for you can keep an eye out at thrift stores and estate sales.  And once people know you can you will more than likely be the first person they contact when cleaning out their relative's home.  Renae has scored items on both those accounts.


Four:  
When canning with a steamer juicer (per their instructions, pg. 4) there is no need to process the jars any further. Sweet!  Adding boiling juice into hot jars is enough to seal it.  If you are concerned, then per Ball® you would hot water bath for 10 minutes.


Five:
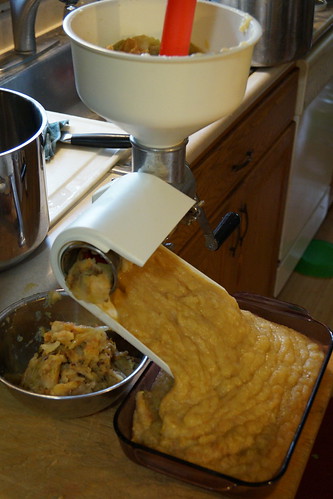
When we juice apples we also make our applesauce at the same time.  The applesauce is made from your leftover pulp.  So there is literally minimal waste.  We just throw the pulp into our food strainer and the sauce comes out one end and the little amount of gunk the other end.  


Super slick.  Once again, no peeling or coring involved.
Then depending on the thickness of your sauce you can add back either some water or apple juice to get it the consistency your family prefers.

Without a food strainer you would place the hot pulp in a colander of some type and strain until the sauce is extracted.  Renae usually refrigerates hers and then cans it the next day or depending on the amount you make you can just eat it within a few days.  Here is how to hot water bath applesauce per the Ball® directions.  If you prefer your applesauce more sweet than it naturally is you can add sugar and/or cinnamon to taste.  This year we did 7 few pints of cinnamon sugared applesauce, based on the sweetness the kids liked and tasted beforehand.  The remaining 16 pints we just left as is--possibly slightly tart, but that is the way they all prefer it.  A big thanks to Jo and Frank from Renae for the freebie apples this year.


More Notes:
  • We use the aluminum Back to Basics Steamer Juicer.  They are between $60 - $70 depending on where you find them.  Renae buys the majority of her canning supplies locally at Mills Fleet Farm.  The food strainer runs around $35-45.
  • A tutorial with pics using a steamer juicer can be found here.  This is basically how we do it.
  • If you don't have one of these awesome steamer juicers you can still make your own apple juice. Ball
    ® Canning has a recipe for Homemade Apple Juice.
  • Here is another link that will show you how to do it without having to peel and core all your apples--which really is the deterrent, we think, to people canning apples in any form.
  • Making your own grape juice with a steamer juicer.  Emily has a nice free source where she lives and make lots of grape juice for her family.  


Monday, August 12, 2013

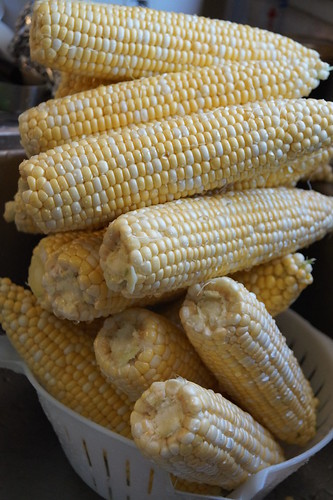
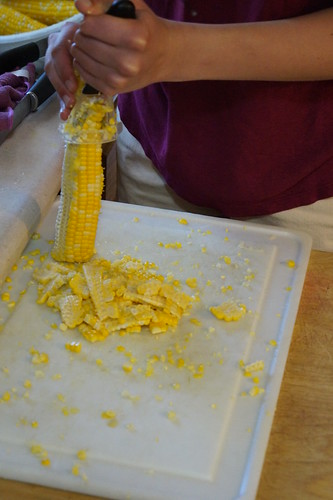
How to Freeze Corn

....otherwise known as stocking up when fresh corn on the cob is in season and on sale.


This past week or two I've noticed that most of the grocery stores here locally are running sales on corn on the cob.  $.10-.17 per ear.  Most have a limit per purchase too, which I find annoying when there are huge bins of corn just sitting there.  There are 7 people at my house...limit 10 or 12 doesn't even give us 2 ears each.

I work around that though and bring my kids or hubby with to each purchase their limit, OR I go thru the self check-out lanes and do a number of separate transactions.  I think that my kids think I am being dishonest this way.  Maybe.....anyway, I do it regardless.  If I didn't do it that way I'd just come back every day and buy my limit.

In anticipation of canning more vegetable soup in the upcoming weeks, I froze some corn to have it ready to go once I am.


Notes:


Monday, December 17, 2012

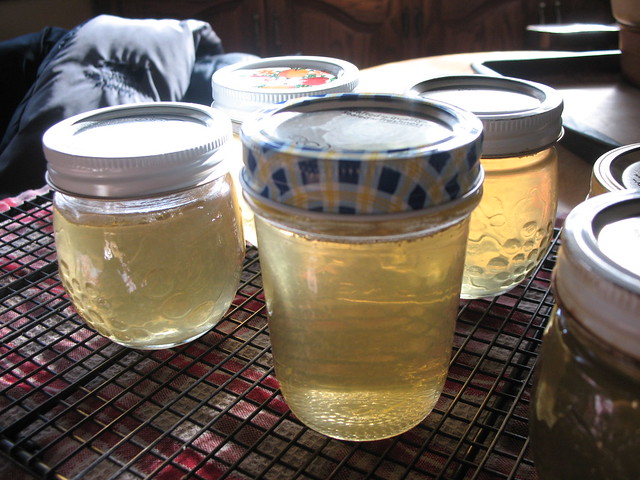
Lemon-Honey Jelly {Gift for the Teachers)

I don't know about you but sometimes we are good about giving the kids' teachers a nice gift for Christmas and sometimes we're not.  Usually I just wait until the end of the year to thank them for dealing with having my kids during the year.

This year I am little more inspired for the two elementary teachers.  I've been perusing some canning books from my local library to get a feel for anything new I might want to try.  Found a fun book from BH&G called Can It!.  I decided to try the recipe for Lemon-Honey Jelly.  I am a huge honey fan, especially on homemade bread.  So I thought the combo of these 2 would be so yummy and fun to give to the teachers for a little Christmas gift.


Some other recipes from this book that I want to try are:
  • Tangerine Marmalade, pg. 77
  • Lime-Kiwi Freezer Jam, pg. 123 (already made this and it is FABULOUS!)
  • Spiced Peaches (next summer), pg. 141
  • Farmer's Market Corn Salsa, pg. 159
Notes:
  • I used a zester instead of a vegetable peeler to remove the peel.
  • Scooped out the cooked zest and foam with a mesh colander instead of a spoon since the zest was so tiny.
  • I was able to can 6 half-pints and not 5.
  • And after licking the spoon when I was all done I am REALLY looking forward to eating some of this myself with homemade bread.  It is delicious!  The recipe says to wait 2 weeks before eating to let it set up good.

Tuesday, November 6, 2012

Canning Chicken Legs

Over the weekend I went to one of our local grocery stores to take advantage of a pork deal.  Took hubby with me so we could buy more as there was a limit on your purchase.  Well, the cashier must've been flirting with hubby (his words) because she told him that after 10 p.m. (It was around 11:00 p.m. at the time) the butchers put out their meat markdowns for the day.  Or maybe it was the fact that the only thing he was purchasing was a 10 lb. pack of pork and she thought since he's obviously a meat man he could use a little variety in his life.

Either way we went back to check it out and besides the pork deal ($1.29/lb. packs) we bought 5 - 3.5 lb. packages of drumsticks for $1.99/pkg.  Yep, $9.95 for 17.5 lbs. of chicken. Love it!  It was too bad there weren't any thigh packs.  We would've bought all of them too.  Canning chicken thighs is even easier than canning legs.

Yesterday I decided I would go ahead and can all those legs so that we'd have some chicken ready to go down the road for chicken noodle soup, enchiladas, chicken salad sandwiches or whatever we felt like.  And our upright freezer is starting to get a little crowded.   Hubby is still hoping to bag another deer before the season is over, so really I should make some room.


Happy day all seven quarts sealed!

Details:
Used 4 - 3.5 lb. pkgs of chicken legs for 7 qts.
Directions in the Ball Blue Book pg. 61.
  • Raw packed legs--I only removed the skin.
  • 1 tsp. salt per quart jar.
  • Hot water in jar leaving 1" head space.
  • Remove air bubbles and adjust lid.
  • Pressure can 1 hr. 15 min.at 10# pressure for bone-in chicken in qts. or 1 hr. 5 min. for pints.  Adjust pressure for altitude as needed.  Boneless chicken is 1 hr. 30 min. for qts. or 1 hr. 15 min. for pints.
NOTE: If you need more detailed directions you can check out the Ball Blue Book or google "canning chicken."  I found a couple blog posts with step by step pics.

Sunday, October 21, 2012

Canning Venison

It's deer season already--archery starts in mid-September and goes through the end of the year. Hubby is involved in some metro hunts and has had one already as well as one for our oldest daughter. They haven't had the chance to shoot anything yet, because so far their hunts have been antlerless deer only. So the bucks got to just walk on by this time around.  And so did the turkeys.

However, on one of those hunts another guy shot 2 and then didn't want them because he still had meat in his freezer.  Guess he doesn't have 5 carnivorous kids living at his house.  He gave them both to hubby and he brought them home to process.

We are still not done cutting and packaging it up for the freezer, but I had enough stew chunks to pressure can a batch of 6 quarts.  I'm hoping for at least 6 more by the time we're done cutting.


Basic Directions:
Check the Ball Blue Book for more detailed instructions.
  1. Cut meat into 1" chunks (venison, beef, pork)
  2. In a large pot, cover meat with just enough water and heat through.
  3. Add 1 tsp. salt to each quart jar, 1/2 tsp. to pints.
  4. Put hot meat into jars--leave 1 inch head space.
  5. Cover with hot water. (I usually heat up plain water instead of adding the liquid I used to heat the meat up in the first place.)
  6. Remove air bubbles.
  7. Place lid and ring on jar.
  8. Can in pressure canner at 10# of pressure (adjust for altitude) for 1 hr. 30 min. for quarts or 1 hr. 15 min. for pints.
Usually we just open this up and add it to our soup starter for an easy winter stew--1 qt. of meat to 2 qts. of soup starter.  You can also add some diced tomatoes or a little bit of salsa to spice it up--both to taste.

Rachel over at Adventures of a DIY Mom also has instructions on how to can deer meat.   
She adds peppers and onions to her jars.  I might have to try that version and do a comparison with my family.

Saturday, September 8, 2012

In a Jam....or jelly

My neighbor Vicki came over earlier in the week to use my canner to make some jam.  Her kitchen was slightly out of commission as her husband and FIL were putting in a new back door.  She had everything ready to go except for the cooking part and putting it in jars for processing.  It took us about about 45 minutes for 13 pints.

Process 10 min. for pints in a hot water bath or steam canner.

I don't normally make cooked jam.  I'm more partial to the freezer variety, but canned jam will last longer, especially if the electricity goes out.  I know that from experience, unfortunately.

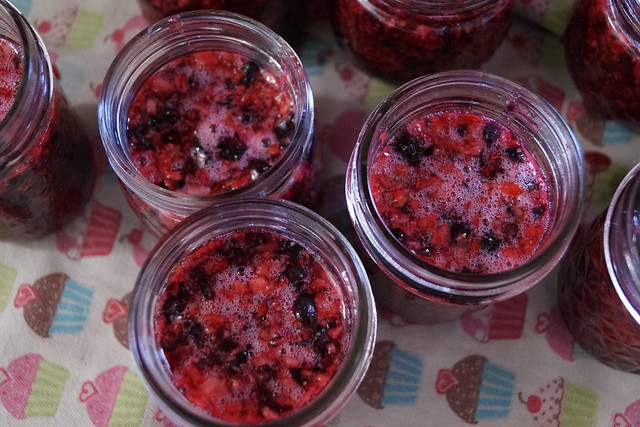
She makes this jam every summer (usually brings me a small jar) and uses the recipe off the Sure-Jell® package (yellow box) for Triple Berry Jam--raspberries, strawberries and blackberries.  (There is a no or less sugar recipe for this jam too--use the pink box.  I try to use the reduced sugar recipes for my family)  The only change Vicki makes is she prefers the triple combination with blueberries instead of blackberries.  Either way, super delicious.

She left me a pint as a "thank-you" for the equipment use.  I made homemade bread the next day--just for the jam.
 I love the deep red color of this jam.

Don't let those darker spots in the jam scare you--those are the skins of the blueberries

If you get the chance, try it.  I guarantee you'll like it.
____________________________

Earlier in the summer I also made some strawberry rhubarb jam.  With Idaho roots on our mother's side you just have to have a recipe or two for rhubarb in your repertoire.

Not remembering exactly what recipe I've used in the past, I used the recipe for Strawberry Freezer Jam found in the Sure-Jell® for Less or No Sugar Pectin box (pink).  Instead of using the 4 c. of crushed strawberries as the recipe indicated I used only 3 c. and then added 1 c. chopped rhubarb for a total of 4 c. crushed fruit.  Then followed the recipe as indicated on the package directions.

Daughter #2 and 3 both tried this jam and they are on board.  I might have to make more from some of my freezer rhubarb now that I'm not the only one eating it.

**The Ball Blue Book also has a recipe for cooked Strawberry Rhubarb Jam.  Or you can go to Ball's website for more recipes for jams and jellies. 

Friday, September 7, 2012

Canning Green Beans

A week or so ago my friend MaryAnn let me pick some green beans from her garden as she had already picked and canned her fill for what she and her family needed.  We picked 16 quarts worth of green beans and I was so happy to have them.

For a pressure canned item, green beans ares one of the easiest and quickest foods to can.  25 min. in the pressure canner is all you need, but you definitely have to use a pressure canner, not just a hot water bath canner. Probably the most time consuming thing about green beans is trimming the ends and snapping them.  Problem solved with 5 kids, a number of bowls, and a movie.  Mine finished up the job in no time and miracle of miracle, with no complaining.  Another lesson on "many hands make light work."


I know that pressure canning scares people.  However, I almost exclusively pressure can--even those items that don't require using a pressure canner.  Really, if you can read and tell time you can CAN.   Repeat after me, "Yes, I Can."  Repeat it a number of times if you need to.

Canning instructions for green beans are found here--from the Ball Blue Book, pg. 66.
You can print off a pdf tutorial here too for green beans including pics.
Or watch a video of canning green beans.

Basically you need:
2 lbs. beans per quart jar
Water
1 tsp. salt per quart
Process in pressure canner 25 minutes at 10# pressure.

Friday, August 17, 2012

Canning Garbanzo Beans (Chickpeas) and Homemade Hummus

I took advantage of cooler weather this week, especially in the mornings, and canned some more dried beans for the pantry--red kidney, pinto and garbanzo.  About 40 pints worth total.


Then I also made some homemade hummus with the garbanzo beans that I canned specifically for that reason.  I'm trying to be a little healthier around here as well as find some different recipes for our wheat intolerant daughter.

This recipe I found was in the book "4 Ingredients Gluten-Free: More Than 400 New and Exciting Gluten-Free Recipes Using 4 or Fewer Ingredients" by Kim McCosker and Rachael Bermingham.   Whew!  That is a mouthful of a title.

EASY HUMMUS
1 - 15 oz. can of garbanzo beans (or 1 pint jar home canned), drained and liquid reserved.
1 clove of garlic, crushed
1 Tbs. olive oil
1 tsp. cumin (actual recipe called for 2 but one was PLENTY in my opinion--and I like spicy stuff.)

Combine all in blender or food processor with 1/2 tsp. sea salt.
Blend at low speed, gradually adding the reserved bean liquid 'til desired consistency.


Notes:
When using home canned beans I find that there isn't as much liquid to reserve vs. store bought cans.
I didn't use much of the reserved liquid making this--maybe a tablespoon.
I can't imagine putting 2 tsp. of cumin in 1 cup of hummus......WOW that just seems like SO much.
Tried this with carrot sticks, celery sticks and tortilla chips and loved it.

Friday, July 6, 2012

Life interrupted

Just when I think that my life can't get any crazier this first month of summer I am proved wrong.
Oh so wrong....

Tues. morning I took my mother-in-law to the airport and was planning on getting a bunch of sewing done that needs to take place.  However, before that on Monday I got a call from my friend Jenny about a slamming deal on tomatoes.  FREE! ones.

I went to check it out and lo and behold there were free vine-on tomatoes.
Not to be greedy, but I will use them all, I took 5 boxes (pictured below--16 x 24 inches) 
when there was a pallet full 4 per layer and about 7 feet high.
A couple hours later I went back with the plan to get 5 more.
There was about 10 boxes left.  I only took 2 more.


And then as they say, the real work began.
Because these babies were not going to wait much.
And did I mention that we're having a "lovely" heat wave here in MN.
Nothing like canning when it is 100 degrees outside.

Luckily I had a few willing helpers.

Coring the 'maters before the skinning.


In 24 hours time I canned (above) 2 pints of diced tomatoes
7 quarts of Vegetable Soup
10 pints of Carrot Pepper Salsa
and
25 pints of Jalapeño Salsa

We've eaten some and I even made a batch of this fresh salsa for the 4th of July party.
And to think I was originally wishing I had 10 boxes, and not just 7.
So yesterday I got serious and finished off the last 3 boxes and the big bowl in the fridge.

I really wanted to do tomato soup, but couldn't find a recipe that interested me.
So instead, I just canned tomato juice--13 quarts worth.
I'll use that as the base for homemade tomato soup this Fall.

It was just too hot for me to think and be creative about any soup recipe.
I just wanted them done.....so I could sew.

Friday, June 1, 2012

Canning Ideas and Recipes

Here is a list of the canning recipes we have posted over the course of the last couple seasons.  Hopefully we've caught them all.  We will be adding to them as we post more recipes we've tried.


Pears and Peaches


Regular Raspberry Freezer Jam


Apple Pie Filling #2

LinkWithin

Related Posts Plugin for WordPress, Blogger...