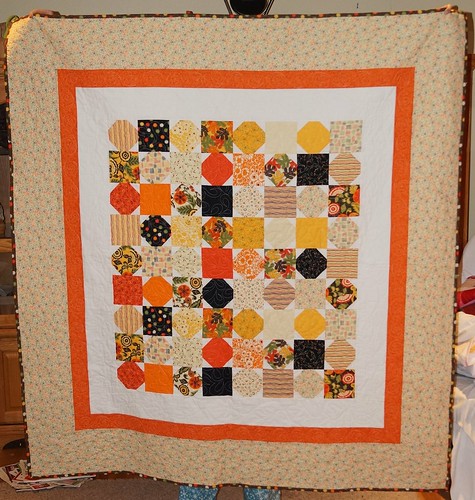
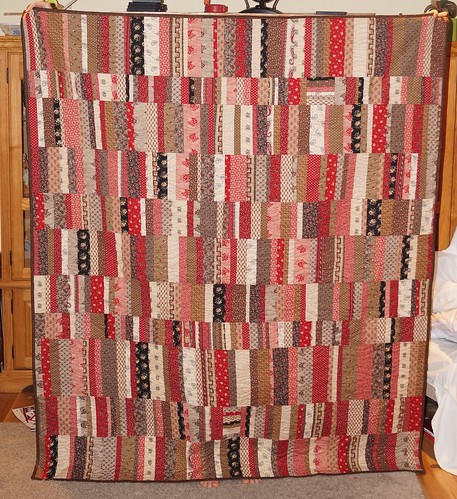
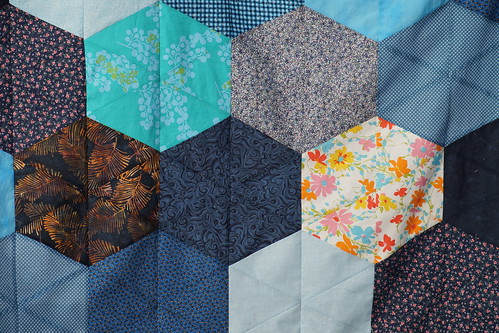
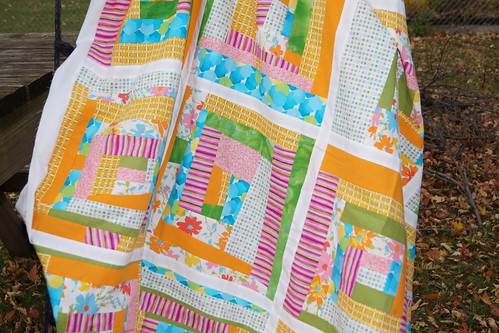
Merry Christmas to my MIL Carla!
I had to wait a day or two before posting so there wouldn't be a slip up on the surprise.
Bound in a fun yellow print (not the same as the yellow hexagon) but hard to see that it is a print in this pic.
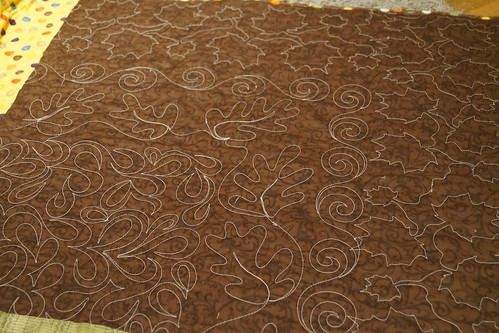
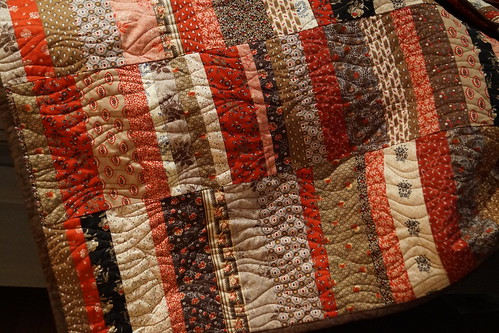
Fun swirly machine quilting from Lynn. Look closely at the navy hexagon. She did that in each block.
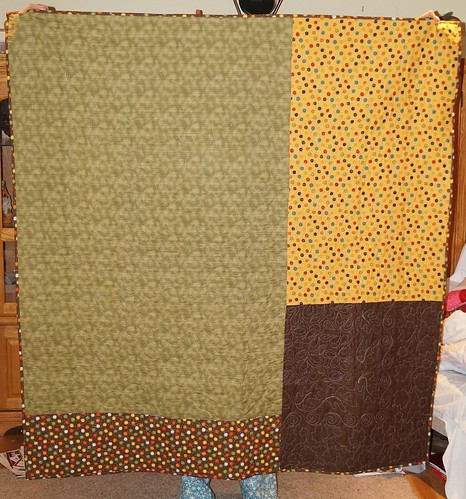
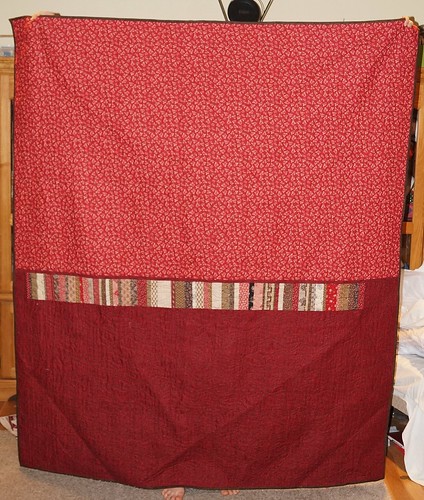
Back is entirely from that blue/yellow floral.
And Carla, if for whatever reason you don't like the quilt, L. says she'll happily take it from you.
She was a tad disappointed that it wasn't coming to her.
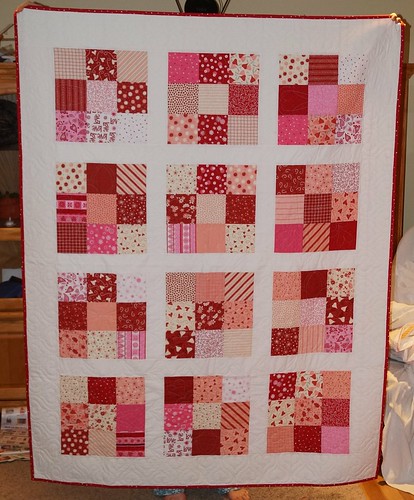
I forgot to take measurements before sending it off to Idaho, but that is my 6 footer daughter holding it up with only her feet peeking out.
Here is the beginning of this quilt.
Friday, December 27, 2013
Monday, December 23, 2013
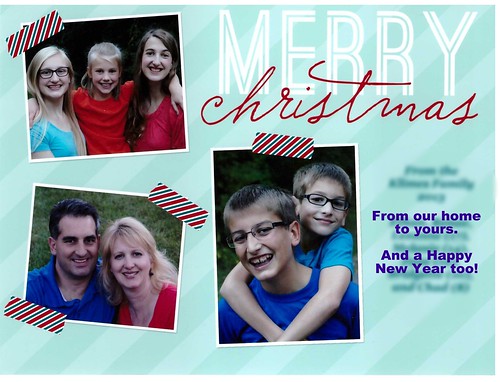
Christmas Card 2013
Enjoy the season!
Renae & Family
Renae & Family
Sorry, changed the card slightly for blogging.
Friday, December 20, 2013
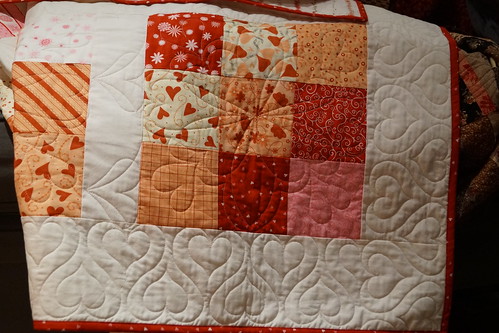
Love is in the Air quilt finish
I was going to try and come up with something super creative with these charm packs that I found at the thrift store, but ran out of steam and just wanted it finished. A 9 patch design was the way to go.
It is now dubbed the "love" quilt. Which means we can put it out at Valentine's season or it can be the "love" quilt (wink wink) or if one of my kids thinks they need to take it with them when they leave home down the road it can be the "Mom loves you" quilt.
Lynn's fun heart quilting.
Sometimes simple is just the way to go.
Monday, December 16, 2013
Happy Fall Y'all Quilt
Here is another quilt that I got the binding all done.
A little late for Fall around here, but we'll use it anyway.
Pieced backing
Close-up of Lynn's quilting. She did each of the borders in a different leaf motif.
She also quilted "Happy Fall Y'all" on some of the solid blocks.
Here's to getting another one completed.
A little late for Fall around here, but we'll use it anyway.
Pieced backing
Close-up of Lynn's quilting. She did each of the borders in a different leaf motif.
She also quilted "Happy Fall Y'all" on some of the solid blocks.
Here's to getting another one completed.
Friday, December 13, 2013
Candy Coated Finally Completed
I've been working on the bindings of the quilts that all arrived together.
Emily tells me that this one was the favorite of everyone who saw it. Who would've thought that it would've turned out so lovely when I bought those Marcus Bros. Civil War print fat quarters at the thrift store. She even took it once to her quilt club while it was still out in Utah. One of my aunts was eyeballing it according to my cousin.
I am SUPER pleased with how it turned out.
Love the quilting that Lynn did for me.
Just some nice wavy lines across all the strips.
I wanted something fairly basic to not out-busy the quilt itself.
We've already used it a couple different times while watching T.V.
It has been SUPER cold here. And I do mean S.U.P.E.R.
Pieced back--using the scraps of the scraps for a portion of the back.
Quilt pattern I used--Candy Coated from Sunday Morning Quilts.
Thursday, December 12, 2013
Slouchy knitted beanie knock-off
It is dangerous to let your children browse Pinterest.
When mine do then it usually turns into another project for me.
Daughter #1 saw this cap and wanted it.
At $14 it wasn't a bad price, but when I said we could make one she looked at me a little incredulously. I've made many a knit cap using circular needles and I knew I could come awfully close to this style.
I made a practice one with some yarn from her stash and came up with the pattern adapted from the cap pattern I usually use.
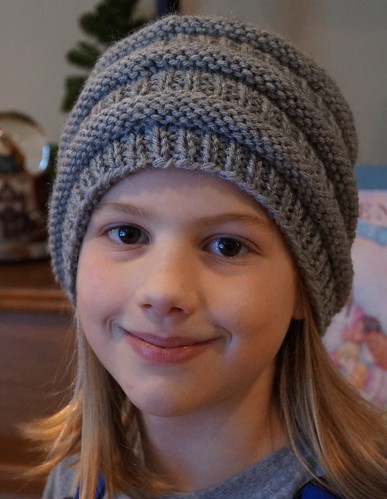
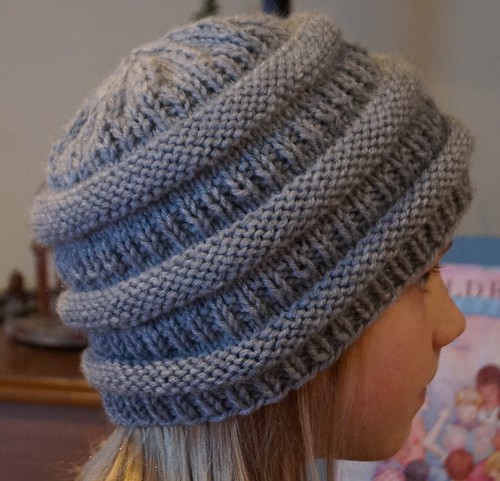
Here's the first prototype modeled by my youngest daughter who has also commandeered this hat.
The yarn I used was junk, to be quite honest. But is was a freebie and it worked just fine for practice. It is just really stiff once it is made up and so it doesn't really slouch. Although, the pattern allows for some great stretch to accommodate a ponytail underneath.
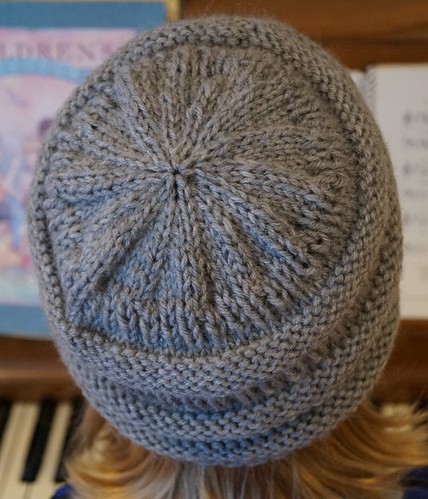
Top view of crown shaping
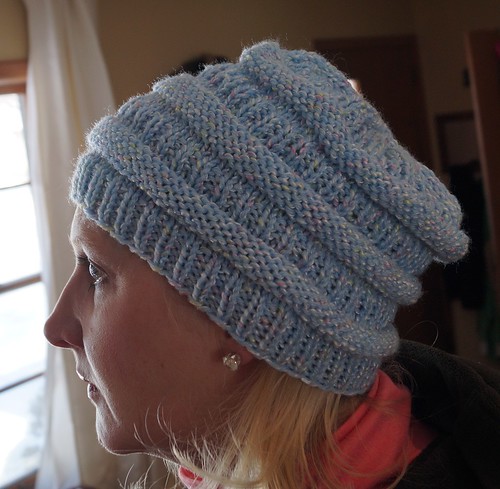
On the second hat (that goes to daughter #1) we decided that 6 rows of ribbing instead of 4 was better for the edge.
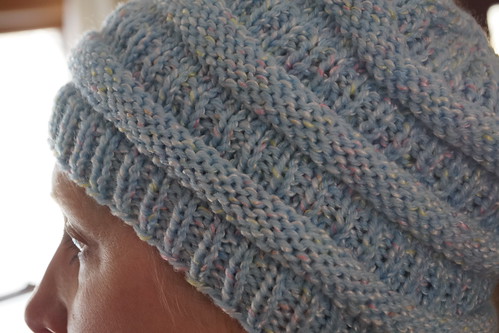
Detail of pattern
And this yarn was a bit softer and slouches better.
______________________________________
Slouchy Knit Hat
Finished hat circumference 20” and from edge to top.
Size 8 – 16” circular needles
Size 8 double-pointed needles
Cast on 84 sts.
Ribbing:Join and work 6 rnds in k1, p1 rib.
Body of Hat:
*Knit 3 rnds.
Purl 5 rnds
Knit 3 rnds.
Work 3 rnds in k1, p1, rib.*
Repeat above section between (* *) 2 more times.
Knit 1 round
Shape crown, working decs as follows, changing to dpns when necessary.
Rnd 1: *k2tog, k4; rep from * -70 sts.
Rnd 2, 4, 6, 8 knit
Rnd 3: *k2tog, k3; rep from * -56 sts.
*Start using Dpns at Round 5
Rnd 5: *k2tog, k2; rep from * -42 sts.
Rnd 7: *k2tog, k1; rep from * -28 sts.
Rnd 9: *k2tog; rep from * -14 sts.
Rnd 10: k2tog 7 times -7 sts.
Cut yarn. With tapestry needle, run tail through remaining 7 stitches and fasten off. Weave in ends.
________________________________________________
Notes:
My suggestion for a slouchy-ier hat would be to add to the purl rounds and/or to the ribbing rounds. Give it a bit more length and then therefore more slouch.
OR
Add another section repeat (for a total of 4) if you like your hat really slouchy.
I'm working on #3 for me. Love the green.
Enjoy! And stay warm.
We've got 20's today and it feels balmy compared to our past week of sub zero wind chill temps.
Thursday, December 5, 2013
Thoughts about Christmas Trees
So....here is the dilemma for many of us every year, especially once we are married and have kids that are old enough to voice their opinions (which is at about 2 years old):
Real vs. fake tree.
White vs. green tree.
Colored vs. white lights.
Star or angel on top.
Traditional decorations or not.
Same decorations every year or change of theme.
Stockings hung all season or just the night before.
The list probably goes on and on when you try and mesh two family traditions into one.
My hubby grew up in Idaho where every year they drove up into the hills and cut down a live tree and brought it home to decorate. I grew up in Kansas. No hills. When we got a real tree it was at the tree lot down the road. That was my normal.
I vividly remember our neighbors, the Sauers, had a white tree with pink decorations (early 70's decor). I was in kindergarten or first grade then. A white tree was not right to me at that age. I just couldn't believe that they had this ugly fake white tree.
Then somewhere along the line we got a fake green tree. Less mess, you know exactly what size it will be from year to year and you can wire on the decorations and leave them if you want. I also went to college and apartment living requires fake trees.
Once I got married and finally got out of apartments and into a house we went back to real trees. Then we had more kids and less room and those trees you buy at the tree lot become a lot bigger once you open them up. I bought a fake SKINNY green tree on clearance one year. It has made me really happy because it doesn't overwhelm my whole living room.
Then last year during the holiday season I found a skinny white tree at the thrift store and bought it. I had visions of the Sauers' tree once again, in disbelief that I was seriously entertaining the idea of a white tree for my own home. But it really made me excited to think about it.
I warned my family that the following Christmas (meaning this year) I'd be putting up a white tree and that there had better not be any complaining. It didn't mean that we'd always have a white tree, but this year we would. So basically....deal with it.
Here is how it all turned out.
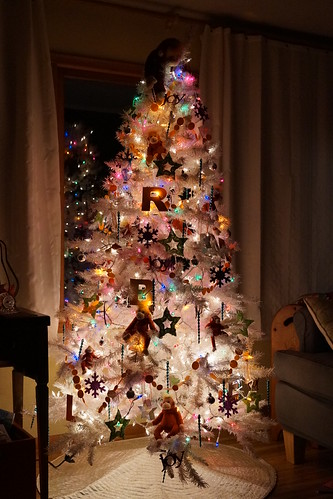
A lit view at night.
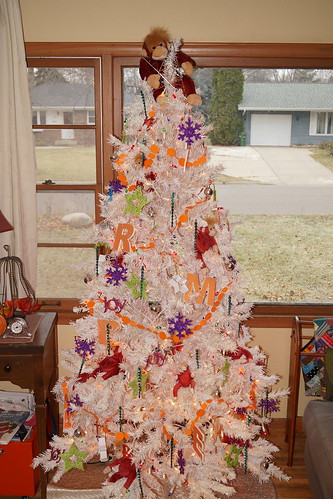
And a daylight view (before our dumping of snow yesterday)
My oldest son told me that he prefers the white tree. (that is a bit shocking)
My oldest daughter said, "I don't get the monkeys."
The other kids replied, "It's just 'cuz they're fun."
Yep, that's about it.
Our neighbors across the street told me that they like to see our tree at night through the window too. Thank you! I hope you all take some time to sit by your tree, at night, with only the tree lights on and enjoy some time by yourself or with your family.
Details:
- Silver wire star thrift store purchase for $2
- Stuffed Beanie Babies orangutans acquired at the thrift store for $.75 each, except large one on top for about $2.
- Initialornaments inspired by this pin.
- Various clearance ornaments (purple snowflakes, green stars, joy, blue icicles and silver disco balls) last year from Target and Wal-Mart.
- Made the orange dot garland from scrap paper and thread.
- White star cookie cutters turned into ornaments.
- Both colored AND white lights on the tree. Oooh! Who knew you could actually do that.
Labels:
Christmas,
Corners of My Home,
Easy,
Holiday,
Inspiration
Monday, December 2, 2013
Quilt Bindings Bonanza
I hope everyone enjoyed their Thanksgiving weekend. We had a nice relaxing time. Thursday I put the turkey in the roaster around noon, we left to go see the movie Frozen with the kids, and when we came back it was almost done and my parents were almost here. It worked out great.
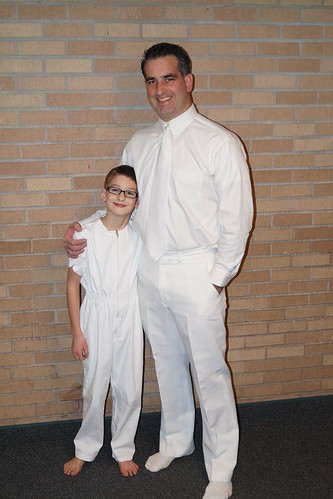
Saturday our youngest son was baptized. He is a funny guy and didn't want "people he didn't know" to come. I told him that I didn't think that anyone who didn't know him would just show up because they felt like it. Regardless, it was a small group that came to support him and our family. He was happy with that.
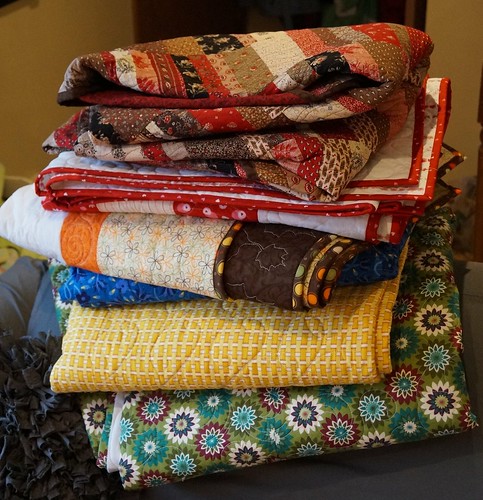
Along with some other things, my parents brought my pile of quilts (6) that I had sent out to Utah to Lynn for quilting It was fun to get them all back in a large pile. The bindings are next on my project list along with pajama bottoms for the kids for Christmas....once I get all the flannel pre-washed and dried.
I have to say that I already did 3 bindings while my parents were here.
I just couldn't stand it, and I already had the fabric.
That top one was apparently being coveted by a few while in the process of being quilted.
I am super happy with it and it was used a couple of times over the weekend.
The blue one is partially attached and the bottom 2 are next.
I had to go buy a piece this morning for one of the bindings.
Enjoy your upcoming holiday season.
I'll be posting a few things here and there, but mostly trying to make this time calmer than it has been in years past. Wish me luck!
Tuesday, November 19, 2013
Starting class quilts again
This is my year again for class quilts. I try and do them every other year, as doing them every year would probably put me over the edge. And I just don't want to do it every year either. Plain and simple.
My youngest daughter is a 5th grader this year, last yr. of elementary school, so she was begging me to do this with her class.
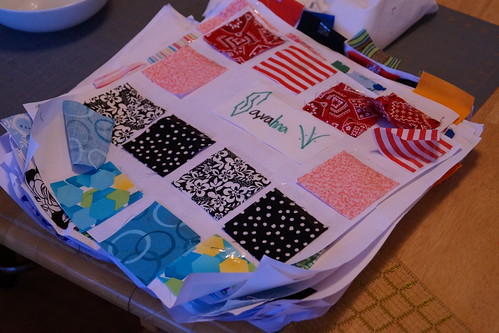
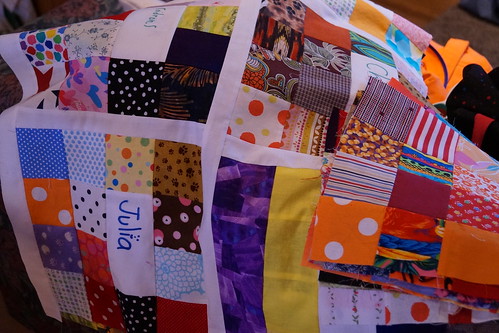
I picked a little different block design than I've done in the past. I felt the need to change it up a bit even though I am still trying to use my scraps. (I swear that they just don't end) I really like how it worked out. Below are a couple sample designs that I made and took with me to show the kids what they might do.
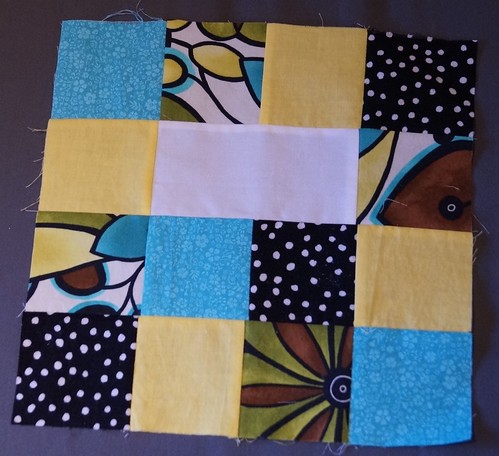
Cut 3 inch squares placed in a 4 by 4 design.
White piece for their name is 5 1/2 by 3
Yesterday I went and set up the station and then had the kids rotate through. As usual some of the boys were a little more obnoxious than others. Typical for 10 yr. olds. We survived, made a mess in the foyer outside their classroom, and now onto sewing the blocks together.
I had already visited my son's second grade class back in October and their blocks are complete. I am in the process of putting those all into a quilt top.
Since I don't have to actually have these 2 quilts completed until February I am doing well. My goal is to complete them by the time that school starts up again after Winter/Christmas break. Because I know that I will want to be doing something else by then.
Note:
Put your kids to work.
My kids love helping do the layout part.
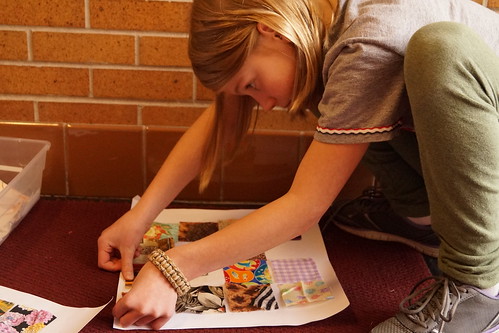
We spread the blocks all out on the floor and then they move and arrange them to how they think looks good. Even the bigger kids give their 2 cents worth to the layout.
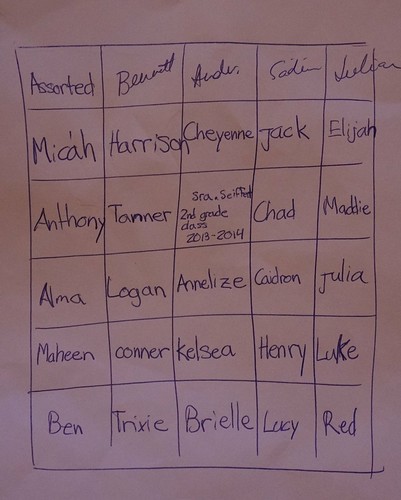
This is my daughter's note for the 2nd grade quilt once the layout was in place.
27 kids' blocks
One block for the teacher's name, class and year
2 blocks for opposing corners with all assorted squares--no name block.
5 x 6 configuration.
My youngest daughter is a 5th grader this year, last yr. of elementary school, so she was begging me to do this with her class.
I picked a little different block design than I've done in the past. I felt the need to change it up a bit even though I am still trying to use my scraps. (I swear that they just don't end) I really like how it worked out. Below are a couple sample designs that I made and took with me to show the kids what they might do.
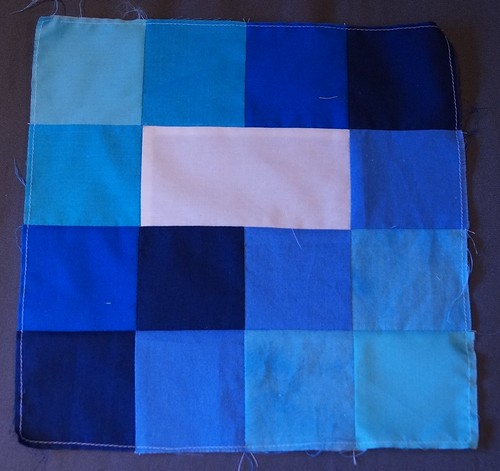
Cut 3 inch squares placed in a 4 by 4 design.
White piece for their name is 5 1/2 by 3
Yesterday I went and set up the station and then had the kids rotate through. As usual some of the boys were a little more obnoxious than others. Typical for 10 yr. olds. We survived, made a mess in the foyer outside their classroom, and now onto sewing the blocks together.
I had already visited my son's second grade class back in October and their blocks are complete. I am in the process of putting those all into a quilt top.
Since I don't have to actually have these 2 quilts completed until February I am doing well. My goal is to complete them by the time that school starts up again after Winter/Christmas break. Because I know that I will want to be doing something else by then.
Note:
Put your kids to work.
My kids love helping do the layout part.
We spread the blocks all out on the floor and then they move and arrange them to how they think looks good. Even the bigger kids give their 2 cents worth to the layout.
This is my daughter's note for the 2nd grade quilt once the layout was in place.
27 kids' blocks
One block for the teacher's name, class and year
2 blocks for opposing corners with all assorted squares--no name block.
5 x 6 configuration.
Friday, November 15, 2013
Thrifted Fall Wreath
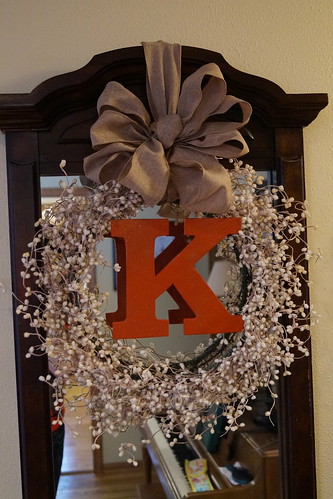
I have this large mirror hanging just inside my front entry and I try to change it up with the seasons so that it has a little more character. I found it on the curb for free and have had plans to paint it, but so far haven't done it. Maybe I don't want it painted that bad.
Anyway, last year I just kept my Halloween wreath up thru Thanksgiving, before putting up the Christmas decorations.
However, I found this pretty wreath on Pinterest early this year and wanted to do something similar for my house.
I lucked out at my thrift store and found a cream-ish version of those berries for about $2.
Bought burlap ribbon from Jo-Ann's. $2.50/roll after 50% coupon.
Cut out and painted my own initial from hubby's scrap wood and this is what I ended up with.
I may change to a cream/gold/sparkly "K" for Christmas and New Year's....because I can.
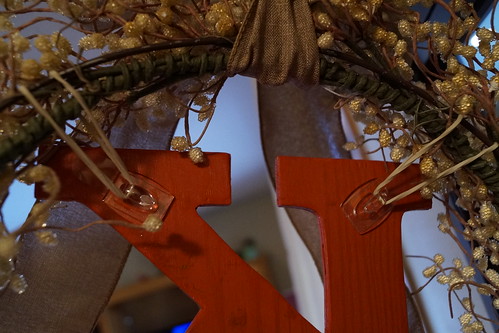
This is how I attached the letter.
3M reusable hooks and a couple rubber bands.
It was a small moment of genius for me.
My kids were thoroughly intrigued as to how that letter was just hanging there so perfectly.
I am enjoying the pretty wreath and the pop of color.
Rustoleum 2X Ultra Color Paint and Primer -- Satin finish in Fire Orange
Wednesday, November 13, 2013
Modern Cross Stitch Quilt Top
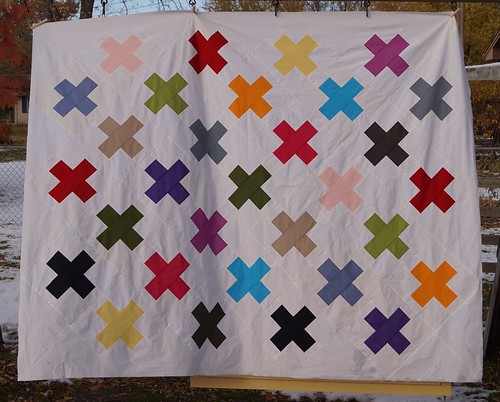
This quilt top makes me happy.
Love the solids.
Love the size.
Easy to put together.
I think it would also be great using a bunch of prints too.
May have to make a second version.
Love the solids.
Love the size.
Easy to put together.
I think it would also be great using a bunch of prints too.
May have to make a second version.
Modern Basics II--14 Easy Patchwork Quilt Patterns, by Amy Ellis
Modern Cross Stitch Pattern
Amy's quilt pic from book
I like that the + is set on point and not straight up and down.
My version
I had to hang this quilt sideways as it was literally dragging the ground.
I had also originally planned to give this away, but hubby changed those plans. The intended person is going to receive something different now and this one will stay with us.
I've decided that with all the quilts we have at home that once my kids start leaving for college (which is in less than a year) they can pick a quilt or two to go with them. I think daughter #2 might have already put her dibs on this one.
Monday, November 11, 2013
Scrappy Hexagons
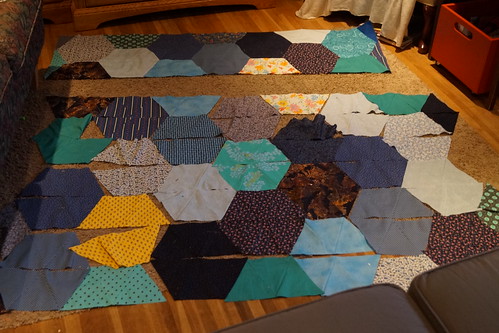
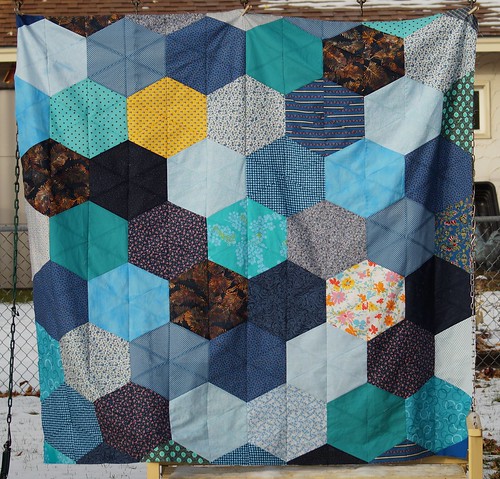
This quilt came about sort of by accident. I had planned out a different quilt based on the cover quilt of Urban Views by Cherri House but the scrappy prints weren't working for me in that configuration. Even my kids thought it was meh!
So then I shifted to scrappy hexagons since I had all these pieces cut out.
This was coming together better than the original plan.
Here we are completed....and hanging sideways because of the size.
I like it better.
I think once Lynn gets it all quilted for me I'll like it even better.
My blue loving oldest daughter thought it was awesome.
Sorry, this one isn't for you.
Thursday, November 7, 2013
Wonky Log Cabin blocks from the kiddos
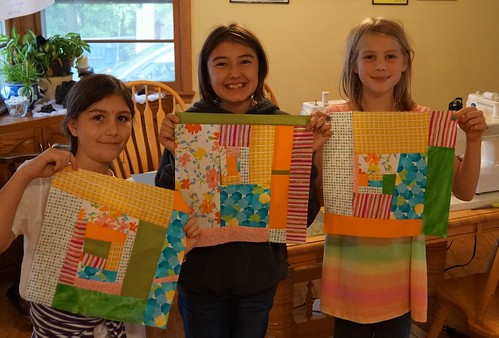
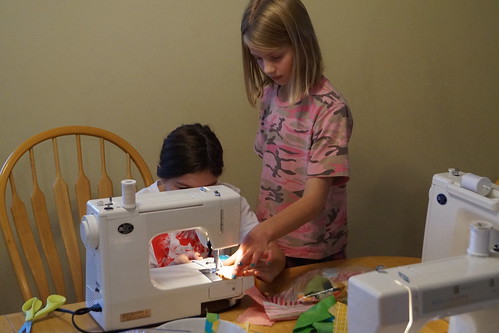
After sewing with the ladies, I still didn't have enough blocks for what I wanted to do for the quilt top. The next day two of my kids wanted to make a block and so I set them up and showed them the basic concept. They got to work while I was doing other things there near them.
During their sewing the neighbor girls showed up to play with daughter #3. She invited them in to watch her sew. How fun for them.....Not! Eventually I set up ANOTHER machine and got them going on a block each too.
I have to say that helping four newbie kid sewers at the same time is a bit much. I'd recommend only 2 at a time.
But we all survived, or I should say I did...with my sanity still intact at the end. However, I was so ready to take a shower and move on to something else.
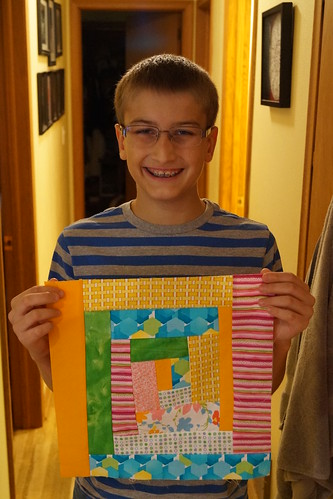
Here are their creations which I did put into the quilt top AFTER they ran down to their house and showed their mom what they had made.
Ages 9, 11, and 10 (#3 daughter on the right)
My #1 son, age 12
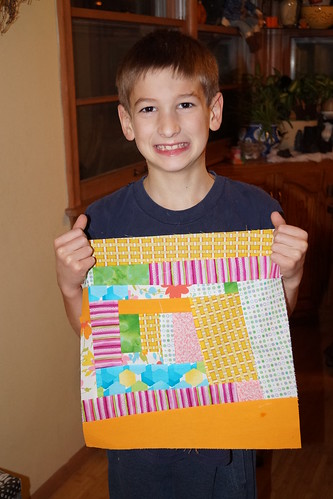
Then on a different day my youngest wanted to create a block too. I did the sewing, but he directed me as to the colors and sizes.
Littlest guy age 7
On a side note: the fake smiles my boys are giving are just killing me. They look like they are in pain or something. Why do they do that?
Wednesday, November 6, 2013
Sewing Group Project--Quilt #2
I finally was able to put together the quilt top from our second collaborative sewing night.
It felt like it went more smoothly than last time. Not sure if it was my planning, fabric choice, block choice, etc. or the ladies that were involved. Either way, I felt like everyone had a good time.
Thanks to Cindy, Cassie, Ann, Tana, Sue and Marci for their help.
Great job ladies!
Details:
It felt like it went more smoothly than last time. Not sure if it was my planning, fabric choice, block choice, etc. or the ladies that were involved. Either way, I felt like everyone had a good time.
Thanks to Cindy, Cassie, Ann, Tana, Sue and Marci for their help.
Great job ladies!
Details:
- Wonky Log Cabin pattern from Block Party--The Modern Quilting Bee.
- Blocks cut to 14"
- Finished 1" white sashing between blocks. Just to calm it down a bit.
- 2 inch white border all the way around.
- Sending off to Margaret's Hope Chest for her great charity work.
Labels:
Charitable Sewing,
Do With Kids,
Scraps,
Sewing,
Thrifted
Wednesday, October 30, 2013
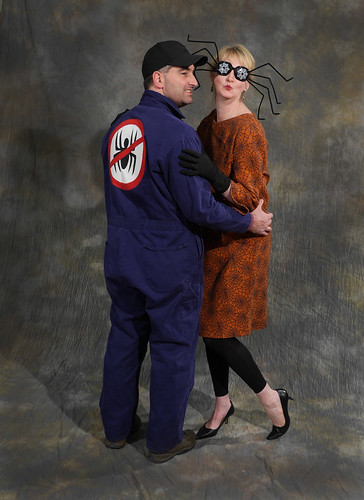
Opposites Attract Costume for Couples
My husband and I haven't always done a couples costumes for Halloween. Most times, in the past, we've just done our own thing. Which usually translates into I have a costume of some sort and he just shows up in his hunting gear to the party, having just come straight from actually hunting.
Last year we did this and now it seems we have set a precedent for ourselves and an expectation from everyone else to come up with something again this year. Our original plan A fell through, or at least we weren't able to get it all together in a timely manner, so we'll save it for next year. (I'm already thinking through it some and will probably hit the thrift store post Halloween to round up the things we need).
Anyway, plan B came about in a long way. I had the fabric for my dress in my Halloween stash. I had bought it last year and was going to make some pillows or use it as a tablecloth or something. I just never did anything with it. So this year, when I found it again I decided I would see if there was enough to make a dress. Then I could be a witch or a spider lady of some sort.
I started getting excited about my costume and then hubby was like "well, what am I going to be?"
Hmmm, not sure. I hadn't really thought about it.
He decided he would be my pet spider at first and then he had a brainstorm.
Be very careful when someone else comes up with a "brilliant" idea that you then have to execute.
When we first met he was selling pest control door-to-door for the summer.
So the new plan B for him was to be an exterminator.
We'd be "opposites attract"--the Spider Lady and the Exterminator.
After all the drama surrounding the costume situation I couldn't say no.
Details:
- Dress based on pattern Butterick 5522. Just cut the sleeves one piece instead of 2-tone. Added a back zipper since the pattern is for stretch knits and this fabric is not.
- Glasses from this idea. I am LOVING these! They were a hit at the party (although really hard to see out of at night)
- Bought black leggings and gloves.
- You could also make your own and use pattern Butterick 5695
- Coveralls $7.99 thrift store purchase
- "No spiders" sign inspiration from here.
- Used WonderUnder and fabric to assemble and then topstitched it onto the back of the coveralls.
Tuesday, October 29, 2013
Halloween Costume Ideas for couples or groups
Last weekend we attended our Church's Halloween party.
Always fun and always great to see creative costumes.
Here are some costumes that might spark your creativity.
Jenny and Patrick and their son.
He was the firefighter that rescued them from a "house fire" in the middle of the night
Natalie with her son and his friend.
Medusa, Jason Grace and Percy Jackson
Cindy, Larry and kids
Minions from "Despicable Me."
One more minion for good measure.
Go B.!
Cutie siblings
Burglar and S.W.A.T. team members
Our cousin Nancy & hubby John
Lovely garden gnomes
Shelby, Kerry and kids plus one friend.
Eowyn and Aragon plus assorted other costumes
Happy Halloween Everyone!
Subscribe to:
Posts (Atom)