Showing posts with label Home Decor. Show all posts

Monday, April 18, 2016

Dumpster Chair Rescue

I first saw this chair with its pretty claw feet sticking out of a dumpster in front of someone's house about a year and a half ago Fall.  I was hoping there was a pair of chairs but I could only find one.  Rats!!  It made the cut during our move last Spring and I finally decided to tackle this chair after I found a cute remnant piece of fabric at the thrift store.


Here it is before--on the backside there are actually pieces of plastic sticking out where there was once plastic covering the entire seat.


I took it apart, which just meant unscrewing the attached seat from underneath the chair.
Gave the chair a good cleaning.  Some of the wood was yucky.

And then headed outside and painted the chair (in August of 2015).


It sat some more while I tried to find the staple gun in our stuff, post move.  Once I found it I ripped off the old fabric and stapled back on the new piece and reattached the seat.  It looks real pretty sitting in our living room.


Details:

Friday, April 1, 2016

Makeover for Grover

Meet Grover.

He resides over our fireplace mantel.
Unfortunately he had a fatal accident with an automobile in the Fall of 2014 in the city of Maple Grove, MN (hence his name).  Hubby was on a call list for road kill, yes, I know it's a bit Redneck, but once we saw him we decided to give him a second chance to strut his stuff.


This is how he has been displayed for the past year or so in our living room.
I hadn't completely figured out what I wanted to do with this room, but I do like Grover right there greeting us as we come in the front door.


I finally decided that I wanted to frame Grover out and give him a more substantial place over the mantel.  I found this frame below that I felt would work.


I bought a piece of burlap fabric the width I needed and then cut it down to size and used spray adhesive to put it right over top of the picture that was in this frame.  (A somewhat ugly floral print)


With lipstick on the back hook of Grover I positioned him on the frame so that I would know where I wanted him to sit.

Then I took a large Forstner bit from my hubby's shop and attached it to the drill and drilled out a hole for the spot where Grove already hung from the wall.


Positioning the frame over the hook I found the spots to hang the frame and attached it then placed Grover over top of the frame on his previous spot.


As you can see the picture underneath sort of shows through.  I need to take it all down, and either flip the picture of spray paint over it so that the lighter flower outlines don't show through.  It's not super annoying....just slightly.  UPDATE: I did just that and now you can't tell there is anything underneath.  Just flipped the picture to the back.


Details:

Thursday, June 25, 2015

Fireplace Redo

This is the first of a couple projects I've done recently using Rustoleum High Heat Spray Paint.

Originally I went looking for some flat black paint to redo this chandelier in our house that I am going to change from the brown Tuscan look to black and clear glass. And I am also going to move it from over the dining room table.  Too many of us have hit out heads.  I just feel it is too big for right there.


I still haven't done that project, but I found the black flat paint!

Anyway, back to what I did do.


Here's the fireplace when we bought the house.
Fine.
Nothing too crazy awesome or horrible, but that brown paint HAS to go!


In the process of painting and random mantel display as I was unpacking boxes.
Not bad for having no real plan in mind.


Here we are with all the painting complete and the fireplace actually painted.
If you go back to the top I spray painted the brass slats on the fireplace itself to black.
The fireplace face all comes off easy.
I did two coats to make sure it was all covered.
I also cleaned the glass.
What a huge difference that made.
Without the brass we all like it better.

The mantel is sort of put back together now (not in this picture), but we are waiting on a deer mount to be finished to hang right there in its place of honor.  Can't wait to see it all done!

Notes:

Thursday, January 22, 2015

More photos from our home listing

This house selling business has been quite the journey.
Last Thursday afternoon our listing went live and from Friday thru Monday of this week we had 15 showings, plus an open house with 15 people attending, 4 offers, and we sold on Monday night around 8 p.m. for higher than our listing price.
Even then we had another 4 showings scheduled for Tues. and Wed.

Absolutely CRAZY!!!!
I'm still trying to wrap my head around it.

We had more showings and people seeing our house in those 4 days than we did the entire 5 months of it being listed last Summer/Fall.
We have had people ask us what has made the difference.
I mean, we sold our house in 4 days in January, in Minnesota.
For us I would have to say that the staging advice was key as was having the right realtor.
That has made all the difference in the world.
This second realtor was so much more motivated and aggressive and when you are dealing with your most expensive investment that is what you want.  Someone working FOR you!

Now onto finding the next house.
The one I had wanted and was available for MONTHS is gone.
Already cried over that and got it out of my system.
Our realtor assures us that he has never left a client homeless and that he will find us an even better home.
I am holding him to that.

Here are some final shots of the rest of the house and what we did to get it sold.


Boys' room.  The bed is a trundle so they both sleep here at least until we move and then we'll figure out different sleeping arrangements and accommodations.

Girls' room sans metal bunk beds.  Queen bed up on risers so we can shove all their stuff underneath the bed. And I do mean stuff--laundry basket, viola, American Girl doll and her paraphernalia in a large bin, some blankets folded up that only get used at night.

Hubby's workshop.  Mine is right next door on the right.  It wasn't presentable enough at the time to take pictures and share on our listing.  It looks more organized now.

Interestingly enough a single gal has bought our house.
She is going to have so much room to work with.

Tuesday, January 20, 2015

Master BR Staging

I have to say that I have this weird-ish feeling about showing you my master bedroom.  It feels like I am showing you the deepest part of my life.  I'm not sure how I feel about that.  But really, putting your house on the market is a weird experience.  There are friends of mine who haven't ever been in my bedroom and now I am posting pictures online to sell it and letting total strangers meander around my house to look at whatever they want.

It's just weird.

Our master BR is 10 feet by 13 feet (plus a few inches).  Decent size for a 1960 built rambler.  We have a king size bed with a very large headboard.  That doesn't leave a whole lot of extra room.  But we haven't really cared.  However, in order to sell our house, the staging ladies recommended we remove the headboard so the room will more accurately reflect the size.

6040 Ensign Ave N, New Hope, MN 55428

Here is the picture of our master BR from the first round of trying to sell.

And here we are after completing their recommendations.

Same room, same bed, same big pillows just recovered differently.

And here is our little powder room / master half bath off our bedroom.

We moved the entire headboard out to the garage.
Added risers so we could have some more storage space underneath the bed.
Flipped the duvet to the plain navy side.
Got rid of some pillows and changed the coverings of others.
Added this quilt to the end of the bed for some color.
Took the lamp table from the LR and put it as a side table.

Details:
  • Bed risers bought at Wal-Mart for $7 and some change for a 4 pack.  We needed to buy 2 packs  because for a King size bed you need 6 risers.
  • White bedskirt/dust ruffle made from thrifted Queen size flat sheet.  Used the piece that goes between the boxspring and mattress from the previous dust ruffle.
  • White European pillow shams from a thrift store fabric purchase.  Paid $4 or less for about 4 yards of 60 inch wide white poly-something fabric.  Tied like this.
  • King size pillows--made simple white satin pillowcases from thrift store fabric hase for less than $2.
  • Quick reference for standard pillow sizes.
  • Paint for baskets in the bathroom is Rust-Oleum 2X Ultra Cover Paint + Primer Satin in Eden.

Monday, January 19, 2015

LR Staging Changes

This past weekend we started round 2 of trying to sell our house.
This whole process has been an "experience" to say the least, and not one I hope to repeat any time soon.

The end of November we cancelled our contract with our previous realtor, took our house off the market after 5 months of lots of showings and no offers, and took a breather of sorts.  I could do a whole rant post about our previous realtor but I will spare you those details.  I am trying to move on and move forward.

Two weeks into December we had picked a new realtor, met with their staging ladies and got their recommendations and started feeling hopeful again.  Some of their suggestions we could do easily and right away, others needed more time, energy and muscle power.  And really I just couldn't deal with a lot of it right before Christmas and trying to get our oldest daughter off to college the first week of January.  My brain could only deal with so much.

Here is the previous photo of our LR for our MLS listing last year.

6040 Ensign Ave N, New Hope, MN 55428

The staging recommendation was to move some of the larger pieces out to make the room appear as large as possible.

The bookcase on the left and the 2 side pieces of the TV cabinet were moved out.
Packed up most of my quilts and just about every single book we own.
I think I only have 4 or so on my side table in our room and that is about it.
The furniture placement was altered as well as the rug placement.
And the shoe bin/bench (lower right corner barely visible above pic or below about the middle of the pic by the couch) will get put in the back of the van for showings, along with 2 cellos.  With as many people as we have in this house and trying to reduce clutter, there is no way we can completely eliminate shoe storage, in Winter no less.

6040 Ensign Ave N, New Hope, MN 55428

Thankfully we didn't have to move the piano.

Here we are now that the changes are completed.

What a difference!

In the first 4 days after our listing went live we had 14 showings and an open house where 15 people attended.

Seriously, what a difference!


Monday, November 24, 2014

Getting into the Holiday spirit

We put up our tree last week.
We needed it.
It was feeling drab and down in our house.

The theme of our tree this year is "hodge podge".
Whatever boxes of Christmas items we could easily find in the POD and whatever I could find at the Thrift store or dollar store is what we used to decorate.  The kids even made some cookie cutter ornaments to hang on the tree.


I want to go buy some more of those cute snowy owls to have for the future.

This tree was my great Friday Find of last week.
Since our tree is waaaaayy in the back of our POD I decided to find another one to avoid the couple hours of unloading, finding, and then reloading in order to get it.  No thank you.  We already did that one Saturday looking for Winter coats.

As luck would have it, I found this tree at the thrift store.  Brand new, still had the assembly tags on it and no price.  The store priced it for me at $12.99 and with it being their 25% off day it came to $9.74.  Woohoo!!  My kids were kind of hoping for a real tree this year, but honestly we do not have much space in our current living room and live trees are wide at the base.  And turns out they are more expensive than this tree.

The other change I made was to add this:


My lighted JOY marquee I made last week at a Home Depot Do-it-Herself Workshop. It is an Ana White design plan and we completed it all that night.  The kids thought it was TOTALLY  COOL when I brought it home, especially when I showed them that the lights have 3 different lighting modes.  I am so glad that I went--invited a couple friends to go with me too.  Home Depot does this the 3rd Tuesday of every month so check your local store for their projects.

The garland swag above the sign is made from the weeds I picked a number of weeks ago that had been sitting on the piano in a vase.  I just split them in half and then duct taped them in the middle and wrapped a pretty burlap ribbon around them.  It hangs from a little 3M hook placed above the marquee.  It gives the sign something a little extra.  Without it the marquee seemed a bit boring.

Once Thanksgiving is over I will adjust the vignette on the piano and add some nativities.  At least I hope that I can find some easily in my packed up life.

Tuesday, October 28, 2014

Burlap Wreath

All my Fall and Christmas decorations are in bins at the VERY back of the POD sitting in my driveway.  A couple of the kids have complained about the lack of holiday decor in our home right now, but I am not digging through the POD to get at our stuff.  It just isn't worth it to me right now.

However, the other day while at Michael's I scored a screaming deal---3 - 10 yd. rolls of burlap ribbon for the price of 1.  I think it was $6.99.  Lucky me they had actually left the tag up from the day before and so I got the sale price.  Yeah!

I've been looking at burlap wreaths on Pinterest and while they are probably everywhere, I still like them.  I had decided to just hold onto the ribbon as I knew I had a wire wreath frame also packed away somewhere in that POD. But at the dollar store I happened to see those frames and for $1 I bought another one.  I felt like I need something crafty to do to keep my mind sane.


Here is a backside view of my wreath.


There are plenty of how-tos online, but basically I just took loops of burlap and pulled it through the wire sections until it was as full as I wanted.


I then added some flowers that I already had sitting in a vase and cut them with wire cutters and just shoved them into the loops of ribbon.  I didn't want the flowers to be permanent.  I had some brighter flowers that I thought I wanted, but this turned out more calm and earthy.  For now I am just using what I have on hand. And I may want to change it seasonally down the road.

For now it is hanging in my dining room.  I didn't think I wanted to leave it outside to possibly get ruined.

Details:
  • 2 rolls of 10 yd. burlap ribbon
  • 1 - 14" diameter wire wreath frame 
  • Flowers or other additions to add to wreath.

Friday, January 11, 2013

Friday Finds and a White Christmas Tree

The kids are back in school this week and I'm relieved.
I took down all the Christmas stuff on Monday; however, the majority of my finds are Christmas related.
It is what it is....


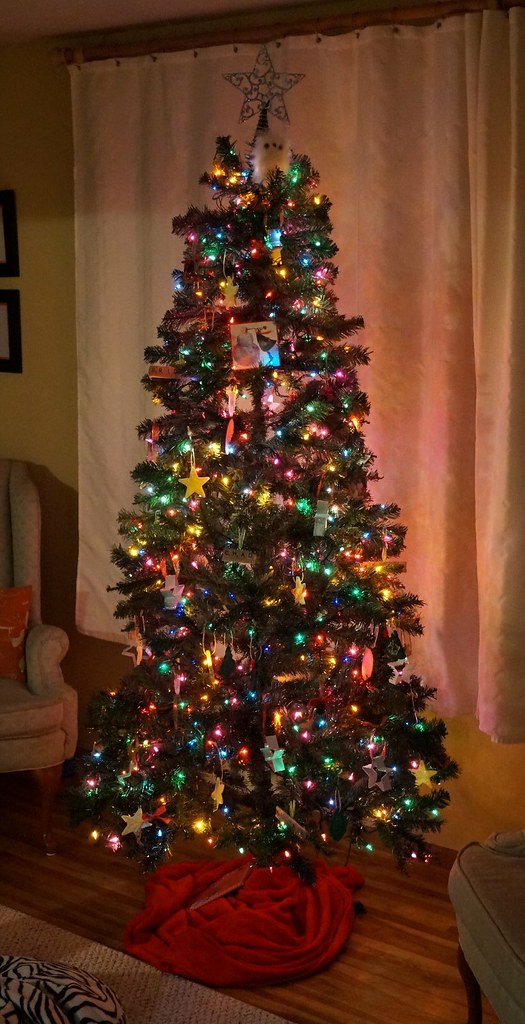
Found this white Christmas tree a couple weeks ago in December at one of my local thrift stores for $12.46 on one of their 50% off day sales.  I checked on white trees at our local Menards store and they were selling one the same size for $99 or pre-lit for $149.  Woohoo!!  I'll take my $12.46 tree thank you very much.  It is a 6 footer and although I don't want to use it every year, I want to try it once in awhile--next year for sure--you know, change it up a bit at our house.  And for that price I can store 2 trees and decide what mood I'm in for that particular year.

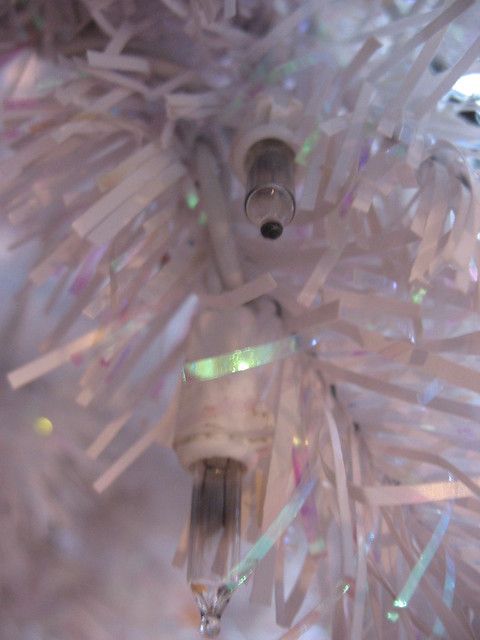
After bringing it home I discovered that the pre-lit lights we're all blown out.
I didn't really care, because I may be putting colored lights on it anyway.

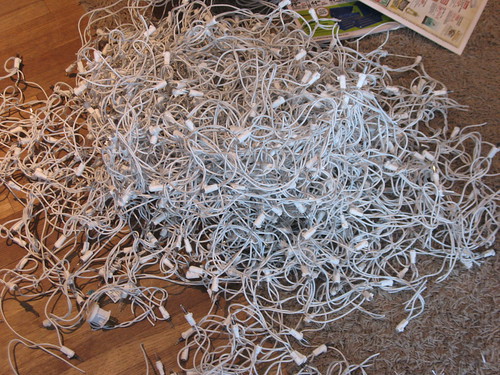
White lights should not look black.  The entire strands over the entire tree were like this. I'm not opposed to buying replacement bulbs, but with ALL of them blown it was not cost effective.  They had to come off.  I have to say that pre-lit trees are great UNTIL something happens with the lights.  Then they are a royal pain in the backside.  This is the second pre-lit tree that I've taken off the lights and it is a not a quick job. Those workers who attach the lights to pre-lit trees do an A+  job of making sure they won't come off--practically E.V.E.R.


An hour and a half later, and after getting out the wire cutters five minutes into this project, this is what was left of the burnt out lights.  Bye-bye!  So glad that I took care of this now.  That way I can just pull it out and decorate for next season.

A couple other finds that I've scored over the past couple weeks.

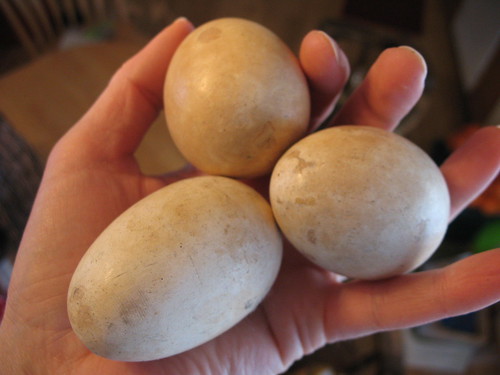
Wire chicken basket and wooden eggs for $4.50.


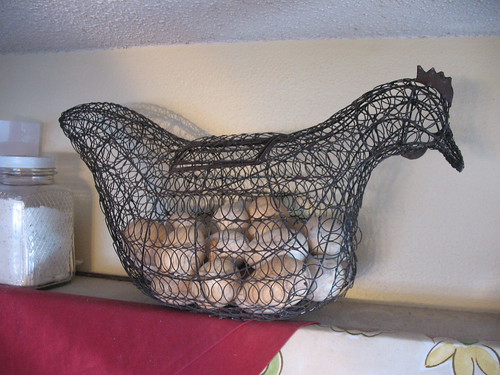
I actually bought this for the cool wooden eggs--thinking to Easter upcoming.  The poor chicken had a broken leg--one leg hanging loose by some wire.  I tried to fix it so she could stand up but couldn't get it quite right.  She still kept falling over, especially when I put the eggs inside her--a little bottom heavy.  So we did a little surgery and both legs came off and now she roosts up on my cornice in the dining room.  I still may just use the eggs come Easter, but for now I like her up there.


8 pack of star cookie cutters, still with tags on them, for 96 cents that I am going to use as ornaments for the white tree.  I may or may not spray paint them a different color.


Various strands of white corded lights for the white tree--all less than $2 each.  One in particular for 96 cents that has colored lights and 16 different lighting combos (i.e. slo-glow, chasers, etc.)  LOVE it!!  I might have to be on the hunt for another one of those somewhere.

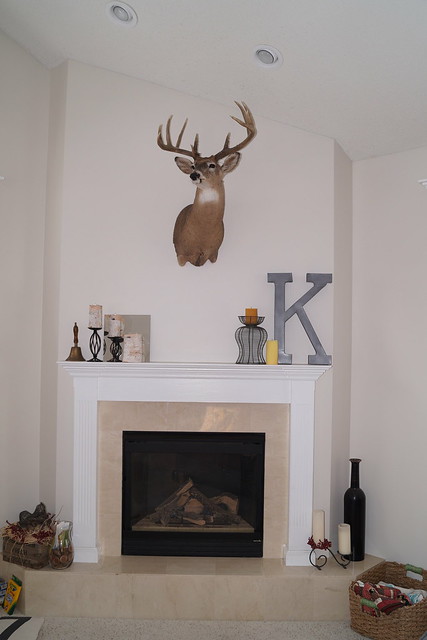
PEACE brass stocking holders for $3.

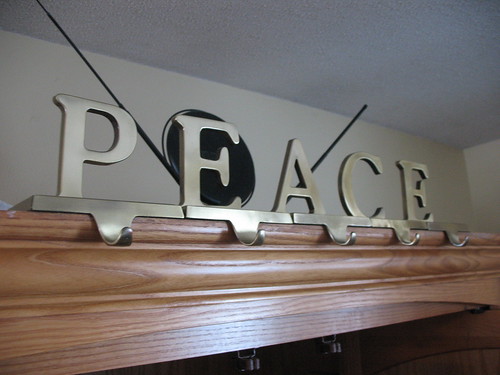
I just saw them before Christmas at Target retailing for $30 for the set of 5.  We've never had a place to hang stockings before, but with our new (Craigslist) entertainment unit (see first pic) we were able to use that this year and the kids were thrilled.  I now may have to make new stockings since the other ones were just whatever stockings that only came out on Christmas Eve.

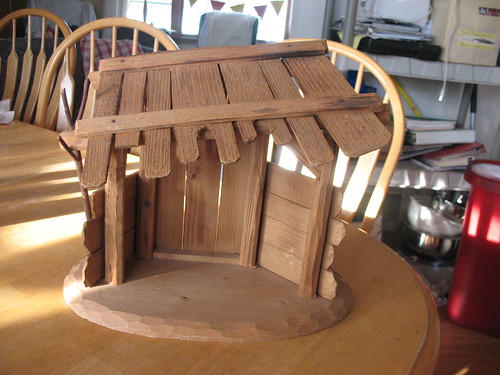
A wooden stable for one of my nativities for $4.45.


A cool tall (16 inches) wicker pumpkin for $2.47 to go with my other twiggy pumpkin.


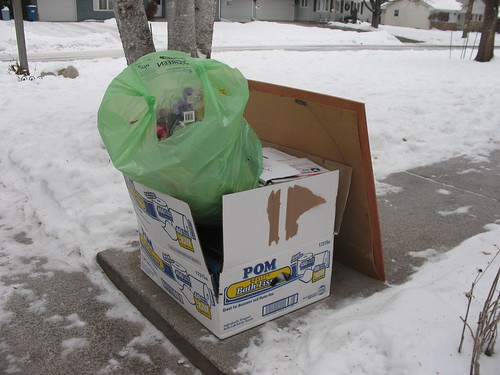
And lest you think I'm becoming a hoarder, here's the pile that left my house last week to go to the DAV. (I just love charity/donation pick ups at your home).  And that is besides the couple things we've sold recently on Craigslist.

See, I do like change....along with a good dose of order among the chaos.

Thursday, December 13, 2012

Snowman Wreath

While we're talking wreaths this week I'll show you one more that I put together this season.

This is a fairly easy project that I put together for our front door.
Wreaths bought at the thrift store and post ripping off all the ugly decorations.

I couldn't get all the hot glued Spanish moss off of this one.
I just sprayed over it and will use this as the back side.

 Hung up the wreaths on the swing set with some jute.
Sprayed and let dry some before bringing them in to completely dry.


Detail of the glitter scarf fabric and embellishment

Details:
  • 3 wreaths from the thrift store for around $6 total
  • Attached the wreaths together using zip ties.
  • 1 can spray paint--white matte finish
  • Craft foam black hat found at Michael's--cut in half
  • Red glitter scarf fabric for about $3.
  • Scarf embellishment from the dollar store--safety pinned on.
  • Inspiration here on Pinterest.  I also liked the greenery versions I saw, but they wouldn't have looked as nice on my dark front door.  Much better if you have a white or light colored front door.

This is Emily's version that I sent her for her birthday.
Hers is a little smaller version, but still cute.
She says she'll probably change the hat once Christmas is over 
so that she can still leave it hanging through the remainder of the Winter months.

LinkWithin

Related Posts Plugin for WordPress, Blogger...