It was a freebie that someone didn't want to deal with .
We drove past it once and I told myself that if it was still there when I came back that I'd grab it.
It was.
I did.

It was a bit rough in spots and the seat was coming undone, but when I saw it I had other visions in mind. Pretty bright paint and a cushioned seat, possibly with upholstery tacks.

During the process B. was more than happy to do a little hand sanding on it to help get "her" chair ready.

Primed

I wasn't sure exactly how I was going to finish off the seat/cushion so don't do your chair redo in this order.
I thought I was going to just make a pad that you could tie onto the back of the chair and then set it on top of the wicker seat. However, it ended up being too worn and would break through after some time. So after painting it we decided to get rid of the wicker seat. It would be easier and better to do this first, then your painting. It already needed another coat so doing it this way didn't completely screw up the plan.

Basically we snipped all the way around the seat to cut the connections and then we had to go back and get rid of the weaving underneath. I used an Allen wrench to poke it down thru the hole and then pulled the strings from underneath. Just keep working your way around until it is all gone. You can always get a pair of pliers to help pull it out.

For the seat cushion I cut a piece of 3" foam in a circle the size of the seat.
Added a little more batting to give it some umph!
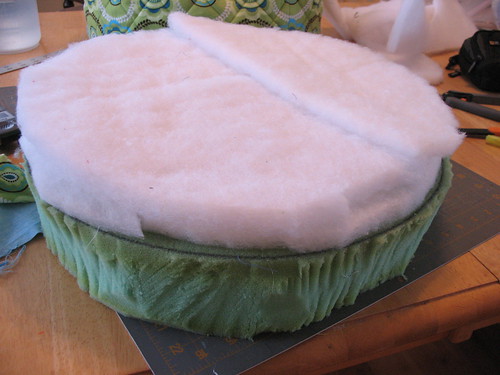
Then I made the fabric covering.
I machine quilted the fabric with some batting and muslin.
I wanted it to be sturdier than just the fabric.
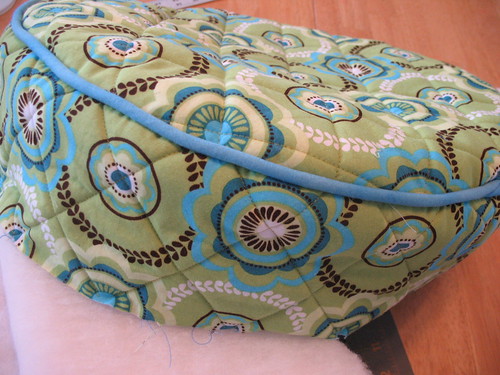
Made my own piping.
And then double checked the sizing.
I went ahead and serged around the bottom edge before I stapled it to the seat cushion bottom.

This was then screwed to the chair itself up underneath.

And Voila!!
I was going to give this to Miss B. for Christmas but it seemed she was already getting more than everyone else. So I just held onto it and waited until this past week.

Now this chair makes her desk look horrible.
Guess that will be the next redo project--in the Spring.She wants it lime green to match the chair. Not sure if I'll go that direction or not, but I'll think about it.
Details:
- Rustoleum 2X spray paint in "Lagoon"
- Replaced the feet pads to avoid any scratching.
- Fabric from the stash.
- Foam pad and batting from the stash.
- Bought the piping fabric because I couldn't find anything in my stash to match the way I wanted.
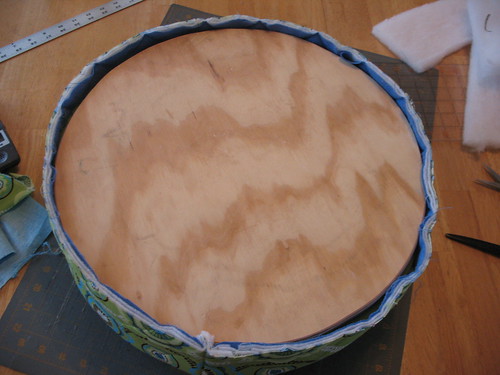
- Hubby cut new circle seat bottom out of scrap from his stash.
Linked up to Be Different, Act Normal's Show-n-tell Saturday
You did a really nice job on the chair. It looks really good and I'm sure B likes it a lot. Those kinds of projects take lots of patience and sticktoitness (is that a word?). Anyway, very nice. M
ReplyDeleteIt looks amazing! You are so inspiring!
ReplyDeleteHard to tell it is the same chair - you have great vision! ...J
ReplyDeleteSimply amazing! My grandma always said "one man's trash is another man's treasure". You did such a wonderful job; the chair looks like you purchased it from a fine furniture store. I especially love that you quilted your fabric before making the cushion.
ReplyDelete