Friday, April 30, 2010
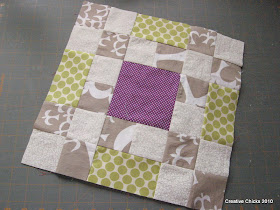
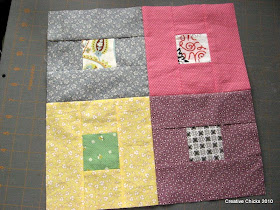
Finished Blocks and a Broken Machine
Thursday, April 29, 2010
Pattern Winners
Wednesday, April 28, 2010
His + Hers {Part One}
You might recognize Hers from the other day.

Funny thing is, my 17 year old babysitter and my 17 year old niece both want quilts. Their fabric requests were: pink, blue, yellow, and green old antique/floral prints. The babysitter saw this done and said, "I want a quilt with all these fabrics, too!" (minus one piece she thought was too modern) So, the tastes of a 79 year old woman and two 17 year old girls are the same...
I made a label and had my kids each sign their names. She'll love that part best, I'm sure! It's now boxed up and ready to be sent to her for Mother's Day. I hope she likes it!
I found the backing at JoAnn's. I think it tied all my fabrics together very well.
UPDATED: His {Part Two} HERE
Monday, April 26, 2010
One Shoulder Swimsuit
 and this question from B.,
 .jpg)
 Then I flipped it over, matched the center line and copied the other half.
  Instead of drawing the strap and neckline I made a line from the top of the shoulder down to the opposite side armpit.
  I was hoping that I wouldn't have to make any more adjustments than that. In my case it worked out perfectly. Yeah!!! Just be prepared for some tweaking as you don't want it to cut too high into the armpit, or too low and show off more skin than you should.


Here is the completed swimsuit:

.jpg) B. wanted a double strap on the opposite shoulder and it turned out really cute. The straps ended up being about 8 inches long-finished. And even though her drawing showed a little flower there at the spaghetti straps she didn't want it once we attached them.
B. wanted a double strap on the opposite shoulder and it turned out really cute. The straps ended up being about 8 inches long-finished. And even though her drawing showed a little flower there at the spaghetti straps she didn't want it once we attached them.

Height 50”
Chest 26”
Waist 23”
Hip 27”
Thursday, April 22, 2010
I Will Not Apologize for My Messy House...At Least Not Today.
I read Kathy's post this morning and got a good laugh. I think we all can relate on some level.
So in the interest of keeping it real, I'm posting a glimpse into my life one day last week:
When I was taking pictures of this quilt, I thought to myself, "If only everyone could see my house today!" So, I took a picture, not knowing if/when I'd ever post it. But today is the day!
The simple truth is, I would rather quilt than clean. I do make my family pick up, but honestly, with 6 family members, the clean house only lasts between the hours of 7:00pm and 7:00am, better known as when the kids are asleep. Sound familiar?
What are your thoughts on the subject?
Monday, April 19, 2010
Zig Zag Quilt


Friday, April 16, 2010
Twins
Not identical, more like fraternal:
And to the lovely lady who stopped me in my local JoAnn's today: Even if I never sew a stitch for you, the fact that you liked my little quilt made my day!
Thursday, April 15, 2010
Butterfly Jumpers
Bigger girl pattern:
McCall's 5425
(This is actually a woman's pattern. We made a size 6 for my 5'3" 10 yr. old daughter)

 After wearing the jumper this past Sunday to church M. informed that it was a "little short" for her comfort zone and could I please add an orange band at the bottom. I'll take care of any modesty request that comes my way--so since then we've added about a 3" band of orange along the bottom hem. Still looks cute! And M. is happier about it when she sits down.
Little girl pattern:
Simplicity 5578 (out of print)
 (I combined the jumper pieces into one piece for this version.)
 1 pkg. of 1/2" double fold bias tape will do the trick on this jumper. I did use larger double fold bias tape on the neck edges, but that is because I was trying to use whatever I had in my stash.
 Now that M. has a band at the hem of her jumper B. wants a black one on hers. We'll see...
Here is the first version made as the pattern indicated. I did lengthen the last piece about 3 inches or so in order to have it be long of enough for my 6 yr. old.
 Nothing like a little winter time Hello Kitty to cool you off for the summer!
Wednesday, April 14, 2010
Vintage Sheet Winners
Purge
I am trying to purge my fabric stash, so go check out my etsy shop. I'll give our blog readers 50% off any fabric that you might want. I've even included my fabric bundles and my s{crap}-tastic blocks. :) Just put blog50 in the instructions when you checkout and I will issue you a refund or email you out an updated bill. As always, I'm willing to trade for vintage sheet FQ's, plaid shirts, whatever. Email me if you're interested. The 50% off will last for a week (April 21st).
Happy Sewing!
Monday, April 12, 2010
Vintage Sheets and a Giveaway
I'm participating in the Vintage Sheet Swap next month on flickr, so I spent the weekend cutting up my sheets. Here is my stack ready to be mailed out...
I tried to find a variety of prints. Hopefully they are appealing to the masses.
Some of the pieces are smaller, but most are almost fat quarter size. They'd be great for quilting or other small projects.
To enter, leave a comment telling me about any vintage treasures you collect. If you don't collect, that's fine too, just say so. I'll pick two winners on Thursday.
Friday, April 9, 2010
Class Quilts

I do not have the scrap stash that Carin does, so I wasn't equipped to do exactly how she did it. Instead, I decided that we could do Crazy 9 patch quilts. That way the kids really could do WHATEVER they wanted and we'd all be happy about it together. We started this project back in February as part of the kids' Valentine's Day parties.
It was interesting to see how the kids responded to this project. We did one quilt with 1st graders and then one with 5th graders. Some kids totally got into it--both boys and girls. Some only wanted to do 1 block, even though I was hoping for 2 apiece. Some were very meticulous and organized in which scraps they chose. And others just threw whatever together and called it good. Only one 5th grade boy had the "I'm too cool to do this" attitude. We eventually got him to put a block together anyway (alternating lime green/black). Funny enough, he was the first one lined up to sign his name by his block when I came back to the classes with the tops completed.
.jpg)
.jpg)
5th Grade Class Quilt
.jpg)
Thanks teachers and kids! I hope our combined efforts are a success at the auction.
Monday, April 5, 2010
Tie Dye Baby Quilt
.jpg)
We weren't sure how to do the quilting portion, but finally decided it would be fun to outline the geometric shapes some within the individual blocks. We are pleased with the results.
.jpg)
Finished Dimensions:
33 1/2" square
6 1/2" blocks
2 3/4" sashing between blocks
1 1/2" light blue outer border sashing
2 3/4" dark blue outer border sashing
Solid red backing
Note:
It has been so long since we started this that I couldn't remember exactly where we found the idea for the blocks. However, I double-checked at the library and it is this book. Chp. 6, pgs. 40-45.
Thursday, April 1, 2010
More Quilt Along Blocks
Jelly Roll Sampler: Trying my best to stay excited about this one, but my confidence is beginning to wane. Maybe using my scraps wasn't such a good idea. I'm only 3 blocks in (out of 12) so I'll keep going, for now...
But, I'm crossing my fingers that they don't turn out like my s{CRAP}-tastic blocks.
On the other hand, my Pinwheel Sampler blocks are looking so cool. My fabrics are coming together nicely.


