Part of what we did today was to make a necklace together. She loves the color orange and anything somewhat funky. So we decided on this style of necklace where the beads appear to "float" on the wire. She picked out the beads and put them in the order that she wanted and then I attached them for her and crimped them in place. It turned out really cute and she was very happy with it.
Monday, August 31, 2009
Birthday Necklace
Part of what we did today was to make a necklace together. She loves the color orange and anything somewhat funky. So we decided on this style of necklace where the beads appear to "float" on the wire. She picked out the beads and put them in the order that she wanted and then I attached them for her and crimped them in place. It turned out really cute and she was very happy with it.
Friday, August 28, 2009
Colorful Coins Quilt {Finished}
This quilt was my original inspiration. I saw it a couple years ago and loved it! I started collecting my coins right then for my future project. I started out making this so that no two coins were alike, but since I wanted it to be big I ended up using some duplicates. I don't feel bad about that at all, it still has a great scrappy feel!
(This picture isn't doing the back any favors, but I wanted to show you the scale of the print and stripe.)
(This picture is much more flattering and true to color)
The details:
Finished quilt measures 60" by 72" (152cm by 183cm)
My coins are 3" by 5" (7.6cm by 12.7cm) before sewing, sashing is 3" and top/bottom sashing is 6" (15.2cm) before sewing.
August Winner!!!
"relaxing at home and playing at the playground with my daughter. and lots and lots of sewing while she napped!"
Congrats and please email us your address so we can send out your skirt.
Happy Friday! and hopefully some weekend sewing.
Sunday, August 23, 2009
August Giveaway

Leave a comment to be entered to win and tell us how you spent your summer vacation.
Toddler skirt in navy with white polka dots. Fits age 2 or 3.
10.25" in length
waist is 16.5" around.
Winner will be announced Friday, Aug 28th.
Wednesday, August 19, 2009
Selvage Edges Pencil Case
As I was checking out the various lists of supplies I decided to try a little something different for pencil cases. I know you can go buy them cheap, but then they don't last through the school year and you have to go buy another one down the road. So this year we decided to make some.
I decided to try my hand at using selvages--topstitching them down on a piece of muslin or other scrap fabric about 13" square. Added an exposed zipper, and then some straps to put them into their binders.
Friday, August 14, 2009
Gifts Ungiven
I have been working on a project for a little while and from the beginning have had the intent to give it away as a gift. However, now as it is almost completed I am having second thoughts--which I find a little weird for me. I am actually making 2--one for me to keep--but now I am not sure I want to give the other one away. It is not that I think the receiver won't love it--they have somewhat requested this item--or won't appreciate it; I know they will. And it isn't like this project is so overwhelmingly wonderful and perfectly put together, or so expensive that I can't part with it. But for some reason I am feeling rather selfish and stingy about giving it away. Really, I don't need two, I could use them both for sure, but I definitely don't NEED two.
So has anyone else ever had this situation arise and if so, what did you do? If you haven't ever felt this way then maybe I am just going through a selfish period and need to keep it to myself until it passes. I'd love to hear what you ended up doing when faced with a similar situation. How did it all work out?
Monday, August 10, 2009
Recycle Redecorating


.jpg)
Friday, August 7, 2009
Puppy Love Pillowcase
This is the fabric she chose for the contrasting band.
M. was able to make the pillowcase all by herself--only straight seams necessary--and I walked her through it easy enough. Total cost for the fabric: $5.49
Below are the measurements that I have been using since I got them from a Hancock Fabrics Holiday Craft Show in 2000.
Basic Pillowcase
Approximate pillowcase sizes—
21” x 31 ½” Standard
21” x 35 ½” Queen
21” x 41 ½” King
Materials needed:
¾ yd. fabric (standard) OR 7/8 yd. (queen) OR 1 ½ yd. (king)
1/8 yd. coordinating fabric A (narrow band)
1/3 yd. coordinating fabric B (wide band)
Thread
Cut:
27” x 43” piece (standard) OR 31” x 43” (queen) OR 37” x 43” (king) of main color (MC)
2 ½” x 43” piece of fabric color A
9” x 43” piece of fabric color B
Directions:
1. With right sides together (RST) stitch both the narrow band (A) and wide band (B) each along their short edge. You'll be making a circle of sorts.
2. Press open seams and then fold each band in half wrong sides together (WST). Still maintaining a circle.
3. With RST, fold pillowcase (MC) in half, stitching one end and the side piece. Finish seam allowance. Press.
4. Align both the narrow and wide bands with raw edges matching. If you need to baste the raw edges together. Still maintaining a circle.
5. With RST match the narrow band side to the pillowcase and stitch. Finish seam allowance. Press seam towards pillowcase.
6. Topstitch along band seam, if desired.
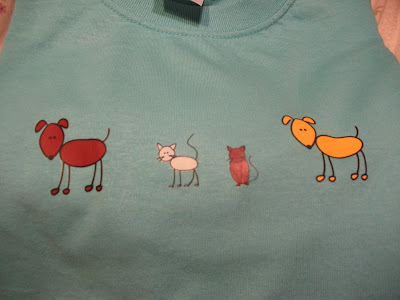
This is the other part to her present--matching tees that she ironed on some cat and dog decals.
The two shirts and all the iron-ons cost us less than $10--barely, but still less.
Monday, August 3, 2009
Long time, no post....
This is one I've been wanting to finish. It's a size two. The white tee is from Target. I used scrap fabric for the yo-yo's. The skirt is made from fabric I purchased at a local quilt shop a very long time ago. I used this skirt pattern.


This was inspired by a JCrew outfit I loved, but refused to buy. Here's the JCrew version (no longer available):

Saturday, August 1, 2009
Swimsuit Answers
I buy my fabric locally at Mill End Textiles. I went on their website and they specifically say they do NOT take internet orders. However, if you live in North or South Dakota, Minnesota, or Wisconsin you can locate a store near you and head their way. Love that store and their prices!
I came across this site as I was searching for something swimsuit related--Pattern School--for free patterns and how to tweak your own style of swimsuit. I haven't delved too much into that site just yet, but I am going to more thoroughly check out how she designs her suit. I really like the look of this suit--Empire tank suit. Pattern school also lists on their website where they have bought fabric online around the world and their recommendations.
You can go visit Dana and Su as they are doing a swimsuit sew along. They have a couple good hints too. Dana says she bought fabric from Spandex World. Based on what I am used to paying their prices look a bit spendy to me. But if you can't find anything you like locally then it appears they have a great selection. I did find a coupon online for Spandex world if that is something you are interested in.
Friday, July 31, 2009
Family Reunion Theme Night: Hawaiian
Here are a few pics from that night--first the boys doing their best Mauri warrior moves....or something like that. We made them pareos (or sarongs) out of pieces of fabric. Little Mr. P. originally told his mom, Emily, that he "wasn't wearing a skirt", but as you can see, he got into it and had a fun time. (***For adult sizes you need a 1 yd. by 2 yd. piece.)
For both my M. (not shown) and B.'s dresses (on the right) I used Simplicity 8488. Although this wasn't the original site where I saw the idea you can click here for a nice tutorial on how to attach rick rack to the bottom of a hem. I put it on the sleeve hem of B.'s dress. I really like how it turned out. The bigger girls all just had a piece of fabric to use as a pareo wrap. Mom found nice authentic Hawaiian shirts for all the men at one of her thrift stores. They live near a military base and so all the transfer guys from Hawaii must give their shirts away once they realize they "aren't in Kansas in anymore".
Emily had made little pillowcase dresses for some of the nieces so that they could match everyone else in their Hawaiian garb. (2nd and 4th from the left and the 2 little ones being held by their older cousins.)
For dinner we had Hawaiian haystacks! We didn't end up doing our limbo contest, but still had a great time with our family!
Wednesday, July 29, 2009
Family Reunion Theme Night: Fiesta
Gotta have a pinata for Fiesta Night--we had 4 of them. We wanted to make sure that all who wanted the opportunity to whack the pinata, could. The kids thought they were awesome!
We started from youngest to oldest. The really little ones got to take a whack at it without blindfolds, but the bigger ones had to do it with.
At the end the uncles had a go at it. The kids really loved watching them swing and miss--more than once.
Here is our tip for pinatas--if you can, find the star type shown below. And instead of hanging them by the one little loop that is provided, wrap your twine, or whatever you use, around the actually body of the pinata and it will last through a lot more hits.
For food we ate super nachos (the man name for taco salad), soft tacos, refried beans, and spanish rice. And check out Leslie's creativity for our other Fiesta Night activity!
We also went here on this day.
Monday, July 27, 2009
Family Reunion Theme Night: 70's Tie Dye
Shauna had originally suggested doing theme nights each night of our family reunion. How it worked: All family members were asked to dress up for each night in theme related attire. When the dress up idea was first thrown out, our brothers/brother-in-laws were not exactly loving the idea, but in the end even they participated and had a great time! We also had food and games that were in keeping with the nightly theme.
.jpg)
If you'll remember L. had knitted herself some legwarmers. She has worn them a couple times already, but pulled them out for the 70's night--think late 70's. We all got a kick out of her.
Our Mom thought that hula hoops would be fun to have for the 70's night. Who knew that it would seriously be such a HUGE hit with all the kids. Once they figured it out--and almost all of them did--they would just go out on the cabin patio and hula hoop for hours.
Food for 70's night was pretty basic: Hamburgers and Hot Dogs on the grill. We also did a Family Bingo game, where each square was a fact about a family member.
Here is where you can see how Emily made her tie-dye shirts. Or Here for Renae's family shirts.
Saturday, July 25, 2009
Skirts
I've been living in these skirts for most of the summer. Wearing them pretty much everywhere. So much cuter than my current wardrobe of ill-fitting shorts!
Hawaiian Fabric from JoAnn's ~ pink shirt from Old Navy
Monday, July 20, 2009
Bright
For the three youngest girls aged 5, 3, and 1.
There was another green one for the 8 year old--but no picture.
(For these skirts I used this pattern again)
At the last minute I also made these 2 skirts for the teenage sister and a sister in-law. You can't see the fabric detail, but it has tiny orange dots on the white. Again, the two big girls loved their skirts, also. It made all the hard work and late nights worth it. But, remind me the next time I volunteer myself for something like this...maybe I should think twice!
Saturday, July 18, 2009
Cowboy Salsa
I was introduced to this salsa by my cousin Tricia on the 4th of July. I could've eaten an entire bowl full of the stuff all by myself. Instead I just embarrassed myself by going back for a second helping, then a third, and a fourth...before the chips finally ran out! Good stuff, I tell you!! And it must be sorta healthy since the only "bad" ingredient is Italian Dressing. (Never mind the bag of chips you eat along with it!)
Enjoy!
Cowboy Salsa
1 can Black Beans, rinsed & drained
2 cans Whole Kernel Corn, drained
2-3 Tomatoes, chopped
2 large Avocados, chopped
1/2 a Red Onion, diced
1 c. Cilantro, chopped
1 pkg. Good Seasons Italian Dressing Mix
Prepare Italian Dressing as instructed on package. Set aside. Combine remaining ingredients in large mixing bowl. Pour dressing over top and gently stir until mixed through. Chill and serve with tortilla chips or as a salad.
There's also a version of this recipe that adds: (I added these to mine!)
1 t. Season Salt
1 t. Garlic Powder
the juice from one lime (about 2-3 T.)
Wednesday, July 15, 2009
Family Reunion Quilt
I wanted something fun and easy that everyone could do regardless of their age. It was a last minute project. Now that it's done, I'm brimming with ideas on how it could've been improved... Maybe next reunion!
My squares are 10" (25.4 cm) and the sashing is 2.5" wide (6.4 cm) before sewing. We have 33 people in our family including our parents, siblings, in-laws, nieces, and nephews. I made the quilt 5 squares by 7 squares.
Here is what Renae embroidered on the two "extra" squares.
I used this lodge-looking print for the sashing since we spent 4 days at a cabin in the mountains. I think it works perfectly.
I brought paints in different colors so everyone could take turns adding their hands and writing their names on the quilt. I made everyone go in birth/family order so that it wouldn't be completely random. (I like order! :)
Everyone was good sports about adding their hands.
I have a really great lodge-looking print for the back. I'll post a picture of the finished quilt...whenever I get it done.
Anyone else have other ideas for a "Reunion"or "Anniversary" style quilt? My in-laws 50th Wedding Anniversary is next spring and I'm trying to come up with something for them. That side of the family doesn't do crafty, so it needs to be something I can do on my own or easy (like this quilt) for everyone to be involved in. Any suggestions would be greatly appreciated!
EDITED: FINISHED QUILT CAN BE FOUND HERE