Saturday, October 31, 2009

Sewing With a Purpose

Here are a couple of charitable projects that I've worked on this month. If you care to join along, follow the links for more information.

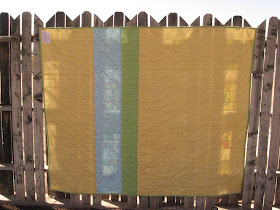
My QOV blocks for amandajean. I think she has collected all the blocks that she needs, but the Quilts of Valor project is always looking for help.


Okay, I admit this one was a little sneaky. I emailed her about this project even though her deadline had passed. I was hoping that she needed more blocks and that I could get her address for the nine patch project. Luckily for me she needed my blocks. I think I ended up making 8.

While I was making them I decided I should make my own scrap quilt version of this maverick star pattern. I don't think I'll start on it until after the first of the year, but it's on my list.


Pillowcases for the Hole in the Wall Gang.

Now that I am quilting more than sewing, I only had a few large pieces of fabric left in my stash. But I thought these were well suited for kids pillowcases. I ended up sending 8.

If you are interested in helping contact Jackie. The deadline isn't until April 2010. And pillowcases are a cinch! We've made a gazillion of them. Basic directions can be found here.

Lastly, I have 2 small quilts that have remained unfinished that I'm hoping I can get quilted for Margaret's Hope Chest. I better hurry, the deadline for this one is November 15th!

Are any of you "sewing with a purpose?" I'd love to hear what you are doing! (Include links to your projects so I can take a peek.)

Thursday, October 29, 2009

SK8TR Boy Knit Hat

My oldest son loves skateboarding. He and one of his friends are dressing up as skateboarders for Halloween. Love it! That means I am not too involved in coming up with or making his costume.

However, he was trying to explain to me what kind of cool hat he needed when I showed him this hat named "We Call Them Pirates" from Hello Yarn. That clenched it. I should have kept my big mouth shut, because then he HAD to have this hat for Halloween.

Being ever the non-conformist (not really), I made some adjustments to the pattern to make it work for what needles and yarn I already had, and to hopefully help it go more quickly since I only had 10 days to make it--along with everything else going on in my life. So here is my revised Chunky version:

Materials:
Size 11 (or 10 1/2) US 16" circular needles
Size 11 Dpns
Lion Brand® Wool-Ease® in BLACK (1 skein)
Red Heart® Soft Yarn in WHITE (1 skein)

***I just have to say that the only reason I have 2 different brands of yarn is because neither brand carried the other color when I was at Jo-Ann's. What is up with that? Aren't black and white the basics? Anyhoo....

Cast on 60 stitches using double strand of Black.
Tie ends together, place marker.

Ribbing:
Knit rounds 1-3 in *K1, P1* pattern, repeated thru entire round.

Body of hat:

Round 4:
Change to White (double strand also) and knit entire round
Round 5:
Change to Black and knit entire round

For Skull Pattern:

I eliminated columns 1 & 2 and started with column 3 and continued with pattern thru column 32. This pattern gets repeated one more time during a round. If you need to place a marker after the first complete pattern to keep track of your position.

I only copied rows 9-20. Whereas the original pattern ends up with 24 skulls on the hat, this pattern will end up with only 4 skulls, albeit rather large ones.


Finishing of body:
Knit 1 round BLACK
Knit 1 round WHITE
Knit next 6 rounds in BLACK

Shaping Crown:

*K4, K2tog*, repeat til end of round (50 stitches)
Knit entire round
*K3, K2tog*, repeat til end of round (40 stitches)
Knit entire round
*K2, K2tog*, repeat til end of round (30 stitches)
Knit entire round
*K1, K2tog*, repeat til end of round (20 stitches)
Knit entire round
K2tog repeated til end of round (10 stitches)
K2tog repeated til end of round (5 stitches)
Cut a tail and weave end closed, tying off on inside of the hat.

Happy Halloween! Be safe and have a great night!

Monday, October 26, 2009

Library Book Storage Box

We love our local library here at home. We probably go at least every week or two to get new books, movies, or attend story time. However, with 5 kids, even if I limit them to only 4-5 books apiece we still end up with lots of books floating around our home. And really, they have a hard time limiting themselves to just a couple books. I'm not sure I want to limit them either--after all, we're talking about them being excited about books and reading.

Anyway, I used to have a basket sitting under one of my lamp tables in my living room to store all the books in one place. It has worked out really well, until recently when the basket has been so used and abused it is literally falling apart in front of us. I've tried to find another basket that I like and figured what I really needed was something more substantial since it will get so much abuse.

Years ago I saved this project sheet for some stacking totes (scroll to pg. 151 if viewing it online) out of the Reader's Digest magazine, Feb. '06, pg. 213. The pattern actually comes from the Reader's Digest Complete Do-It-Yourself Manual, check with your local library too--mine had some copies of this book.

I asked my favorite hubby if he could come up with a similar box--complete with handles and rolling casters so that we could have a new book box. Luckily in HIS shop he had some scrap wood that worked out just great for this project. He put it all together for me and then we attached the casters and I spray painted it to protect it somewhat.

It holds more books than the previous basket and I won't have to worry about it falling apart. The finished box measures 11" H x 15" W x 18" L, not including the height of the casters. Here's to reading!

Friday, October 23, 2009

Advent for November--Count Your Blessings

I used this great tutorial from Elizabeth at Oh, Fransson! to create a little November goodness.
Often times Thanksgiving is all about the food, but I like the idea of focusing on our blessings during the whole month of November. I'm hoping my family will go along with my idea this year and make it an annual ritual.


I am thinking that I will put little treats in each of the pockets, along with a verse of scripture that focuses on gratitude/blessings/giving thanks. I think that after we read a scripture verse each night we can then write down some of our blessings and put them in the pocket. Maybe we'll save them and read them next year...I don't know. It's an idea that is still evolving.


I used a charm pack (5 inch squares) called Pumpkin and Spice for my pockets. It was easier than cutting out all those 4.5 inch squares. Besides, I don't have a stash of fall fabrics to chose from. The charms worked beautifully! I did find the orange piece in my stash that was big enough to use for the border, backing, and binding.

My free motion quilting is getting better. I need some more practice time on my machine before I love it, though.


In a bit of randomness, I found this "bunny shape" in my quilting and made the mistake of showing it to my older kids. You know "Hey, kids! What does this look like to you?" Now every time they pass by it they point out the bunny. Nice! Anyone else ever notice weird shapes in their quilting or is it just me?
If you make this pattern, be sure to upload it to the Flickr group!

Wednesday, October 21, 2009

Loveseat Transformation Begins

This is beginning of the re-upholster project for the loveseat. I've done this before and so I do know what I am getting into. Let's hope it all turns out well enough to make me happy.

Love the shape of this little loveseat. And it is rather sturdy even though you can see that it and the slipcover are O-L-D!

Someone obviously washed the slipcover and it shrunk. Mental Note--pre-wash your fabric when you are making your own slipcover so that you don't have this same problem after your first washing.

I want to refinish the legs and then let them be somewhat exposed. They are such a pretty little shape.
Here I am so you can get the size and scale of the loveseat. Let's hope this works out the way I envision. And I just realized that we have never owned a new sofa (not including the futon we used to have) in our entire married life of 14 years. Every single one we've owned has been a thrift store purchase (during our college days), given to us free, or we've rescued it from somewhere and then redone it. Well...I guess the trend continues. Hmmm,...maybe one day I can get that nice leather sofa I want--new and ready to use immediately.

Monday, October 19, 2009

Racecar Baby Quilt

After the Pinewood Derby in the Spring the Cubscout leader gave me 2 pieces of this racecar print because he figured if anyone could come up with something to do with the pieces I could. I made the baby quilt sometime after that and I have just been holding onto it until I felt like I wanted to give it away. Well, this weekend I gave it away to someone at church who just had baby boy #2.

The back is definitely a little obnoxious, but all in all I do like it--obnoxious or not. The baby's big brother was ready to claim the quilt for himself, so it can't be totally bad. The yellow pieces are flannel, but the rest is cotton.

Unlike Emily, I am a machine binder. I figure on baby quilts especially they'd be used heavily and so warrant machine binding instead of hand binding. Plus, really, I do not enjoy hand sewing. So welcome to the world Baby D. I hope your brother doesn't steal your quilt too often.

Friday, October 16, 2009

Blogger's Quilt Festival

I hesitated to join, but here I am...on the last day!
hosted by Amy at Park City Girl.

Here is my submission: The Fabulous at Forty Quilt I made for my sister Shauna's birthday in March.

I love it because it was my first big quilt finished, my first gift quilt, and because it was so fun to surprise her with it.


My 2 sisters and I flew to Shauna's house, without her having a clue, and surprised her for her 40th birthday. It was a great weekend! Good Times, good times... So, for that reason alone, this will remain one of my all-time favorites!

Monday, October 12, 2009

One a Day Quilt Along and a Plea for Help

I finished my nine patch quilt top from amandajean's one a day quilt along. (Her two finished ones are here and here. Directions here.) Most of my blocks were done before we moved this summer, but I needed to finish up the rest and add the sashing. I am SO HAPPY to have this one done. It really makes me happy to look at it. I was a wee bit skeptical when I was putting all my blocks together that it would look like a jumbled mess of ugly fabrics, but white sashing makes the world a better place, don't you think?!


Lots of pretty fabrics in there, lots of reminders from other projects, lots of fabrics!!! I am slightly embarrassed to say that there are no 2 fabrics that are alike on the whole quilt. That means I have more than 126 different fabrics in my sewing room (or maybe...more!). Granted, most are smaller scraps, but still...that's a whole lotta fabrics. But, somewhere a pioneer woman is smiling down on my use of so many random fabrics together, right?


(A few of my favorite blocks)


I did a slight variation to the directions. Instead of 2.5 inch squares, mine started out 3 inches (I was using my 6 inch square stash and couldn't justify all that re-cutting). Because I didn't follow the directions that meant I didn't need quite as many blocks. I ended up with 63. It measures 67" by 86" before the scrap border. This one is H-U-G-E for me!! Because it is already so big, I am putting the scrap border on the back like this. (That's the advantage to being late to the party, you get to copy other people's great ideas.) Hopefully I can get this one quilted before I die...Wish me luck!!


Also, did anyone notice that amandajean said she was wanting to make a THIRD quilt like this so her and her sisters could all have one, but felt like she didn't have it in her to do it again? I personally think that all the people that love and appreciate her quilting knowledge and inspirations should band together to help her out. Wouldn't it be cool to send her 70 completed 9-patches so she could make that third one? I'm sure she'd never ask for others to make her blocks, so I'm doing it for her!! Who's with me?? Leave me a comment if you're in--all you need is one finished 9 patch (Use 2.5" squares like her directions--not my 3" ones) and we'll make her mailbox a happy place! Spread the word!

Friday, October 9, 2009

For Christine


This quilt is a commission for Christine. It is for her new baby girl. She's decorating her nursery in a French country, shabby chic sorta way. Her main fabrics are the red gingham and a yellow toile with lots of white eyelet.

I used the old standby kidz quiltz design, only bigger. This one measures 48" by 60". It should be big enough that when her little girl grows up, it will grow with her.

(Matching Doll Quilt)

It took me awhile to find a quality piece of red gingham. Who knew there were so many 'cheap' (not in a good way!) ginghams around. I searched high and low before finding this Michael Miller piece that was suitable to use.


In the end it worked wonderful! And who doesn't love a gingham binding?!

(Christine's baby came a bit early, so her quilt arrived just in the nick of time. Congrats!)

Wednesday, October 7, 2009

A little something for Baby M

Congrats to Leslie!

She had her baby a couple of weeks ago -- a week before her scheduled induction and 16 days before her due date -- But everyone is doing well! We went and visited them this week. Brought along some baby goodness for New Miss M.


My favorite part of this quilt has to be...


Leslie's reaction!! Not that she didn't expect a quilt, but I was pretty sneaky. I used all of her favorite fabrics without her even knowing!


She had given them to me awhile back-- even went as far as cutting the squares, but couldn't figure out how to make them look nice together in a quilt. So I took them, added the grey dot and, Voila! I love surprises!


The only piece I bought was this pretty pink polka dot (from JoAnn's) for the border, binding, and backing. It goes so well with the other fabrics--so dainty and sweet!


So, to Miss M, we say Welcome to the family!


Monday, October 5, 2009

Apple Pie Filling

One of the beautiful things about Fall are all the fresh apples. You can't beat homemade applesauce, cider, or the creme de la creme: apple pie filling. I love being able to just dump all the ingredients for an apple pie right into the crust and in the oven it goes. This is probably the best canned apple pie filling that we've found. Originally we got this recipe from the Sweet Celebrations company--they are a candy and cake decorating supply co.

Canned Apple Pie Filling
Sauce for 7 qts.

Mix:

4 1/2 c. sugar
1 c. cornstarch or Clearjel
2 tsp. cinnamon
1/4 tsp. nutmeg
1 tsp. salt

Add:
10 c. cold water
Mix well. Heat and bring to a boil and cook until slightly thickened.

Add:
3 Tbs. lemon juice and mix thoroughly.

You need a little over 1# of apples per quart jar for the filling.

You can either peel, core, and cut apples and then add them to the sauce and fill the jars, or just add the apples to the jars, and then pour the sauce over top. I usually do the latter.

Hot water bath for 25 minutes.

Last year I canned 23 quarts, which was 3x the above recipe, and I used 25# of apples. **I have to say that I am not too terribly picky about which apples I use for this recipe. If I can get them free or really cheap somewhere those are the apples I am going to use.**

To make the pie:
Make a double pie crust. Lay down bottom layer. Dump in 1 qt. jar of pie filling, spreading evenly. Top with 2nd layer of crust. Bake at 400 degrees for about 45 minutes or until browned slightly.

The Ball Blue Book or Ball Complete Book to Home Preserving (pg. 170) also have an apple pie filling recipe. Either recipe you use are great tasting. I also quickly checked online at my local library and they have a couple copies of the second book listed. So if you think you might be interested, check with your local library to see if they too have copies. Or they may have copies of other canning books. The second book also has recipes for Blueberry, Peach, Raspberry, Rhubarb Strawberry and Cherry pie fillings. YUMMY!!

Friday, October 2, 2009

Leaf Rubbings

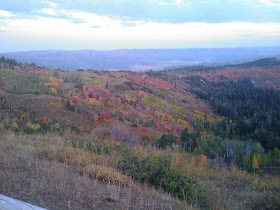
I have a great view of the mountains near my house. (The canyon is only 5 minutes away.) So when the leaves start changing I get a front row seat!

We took a drive up the canyon with our kids the other night and they kept saying, "It looks like a painting up here!" I couldn't agree more. The canyons are so beautiful right now!


While we were up there we collected leaves for a project I like to do every year -- Leaf Rubbings. I'm sure you've all seen this before. It's a fun and easy project you can do with your kids no matter what their age. I've done this a bunch of times with my kids. And even as they get older, they still seam to enjoy it.


So, here's all you need: Broken crayons with the papers torn off of them, any size/color paper you choose -- I prefer brown postal wrap (you could also use the inside of a paper grocery sack) or white butcher paper, and any size/shape of leaves you can find.


Directions: Put a leaf under your paper with the right side up, lay your crayon sideways on the paper, and rub until your leaf starts coming through. Voila! Instant fall leaf pictures! (I find it easier to do one leaf at a time.)


I turned our masterpieces into place mats for our dinner table. My local copy store charges less than $2.00 for hard lamination sized 11" by 17" -- the perfect place mat size.


Once upon a time I had visions of doing these rubbings from the leaves of the trees from each of the houses we have lived in and then framing them some cool way. It hasn't happened, but I still think it would've been a cool way to have something from the many places/cities we have lived.