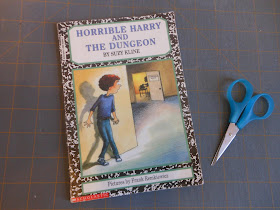
Today we are sharing a great tutorial on how to cover paperback books.
This comes from our sister, a veracious reader, who has been covering her books for years.

If you are a lover of paperbacks then you know that they can get dog-eared and destroyed pretty quickly. Well-loved children's books can be trashed even faster. So, this little trick has been a life-saver to our family library.
To get started:
You will need contact paper and scissors.
Contact paper comes in a roll, and can be found in the kitchen section of your local big box grocer near the shelf liner paper. It comes in a shinier version and a non-glare version. I prefer the non-glare version.
Begin by:
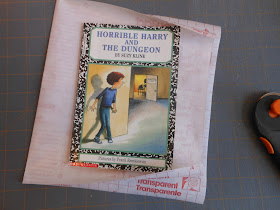
Measuring and cutting your contact paper, adding a few extra inches to the top and bottom dimensions of your book. I prefer not to cut any off the width of the contact paper, if only because of pure laziness. For this particular set of books I cut my contact paper at 10 inches by the width of the contact paper.
Fold your contact paper a little off-center to accommodate for the spine. (The bigger the spine the more off-center it should be.)
Peel away half of the contact paper to the crease. It will be easier if you only do a half at a time.
Use the fold line as a marker to align the spine of the book to the center of the contact paper. Smooth out any air bubbles from the contact paper on the back of book. This might require you to reposition the contact paper a bit.
After smoothing, cut a slit a quarter inch (give or take) away from the spine on the top and bottom, as well as front and back of the book. Leave those "tabs" for now.
It will look like this.
Cut the corners out of the contact paper as shown above.
Fold and smooth the top and bottom flaps to the inside of the book,
making sure you crease the folds really well.
Fold and smooth the side flap to the inside of the book,
making sure you crease the fold really well.
making sure you crease the fold really well.
Repeat the above steps for the other half of the contact paper.
Peel, cut slits, cut corners, crease and fold.
When you are done you will have these little flaps left over near the spine.
Now is the time to cut those off.
Here is what the inside of the book will look like when you are done

Congrats!
Now go enjoy your book! :)
Emily
All my books were thrifted for around $0.75 a book. Score!


I used to do this to all my paperbbacks.Love that you did a tutorial
ReplyDeleteI've often wondered how to get a cover similar to the ones at the library. This is a fantastic tutorial! Thanks for the great pictures!
ReplyDeleteHey this is great! Why didn't I think of this. I usually make a paper book cover when people borrow our books then through the cover away when we get the book back. This is much better. Thanks!
ReplyDeleteI was just wondering the other day if you can still buy contact paper. I'll have to do this with some of our favorite paperbacks.
ReplyDeleteI used to do this for my daughter's elementary school library.
ReplyDelete