As I've said before my children have complained about the lack of holiday decor at our house.
I don't necessarily go all out anyway during Halloween, but I do like some Fall flavor in the house.
Near my house is a frontage road to the highway. Over the past number of weeks as I drove that direction I wanted to see these weeds (the dark ones in the pic below) up close and personal because I thought they might work for a cool vase display.
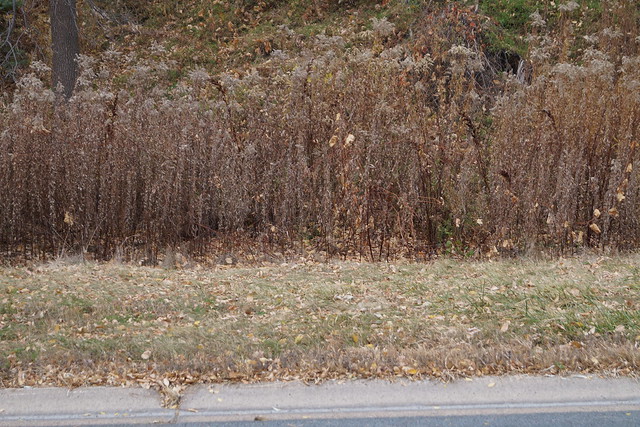
These white ones would probably make an interesting display too, but I was after the dark ones.
Finally one day my oldest son and I just hopped in the car with a pair of scissors and cut some down.
I gathered them all up in a vase and set them on our piano.
I like it.
The kids have since added some red leaves from our Maple tree out back.
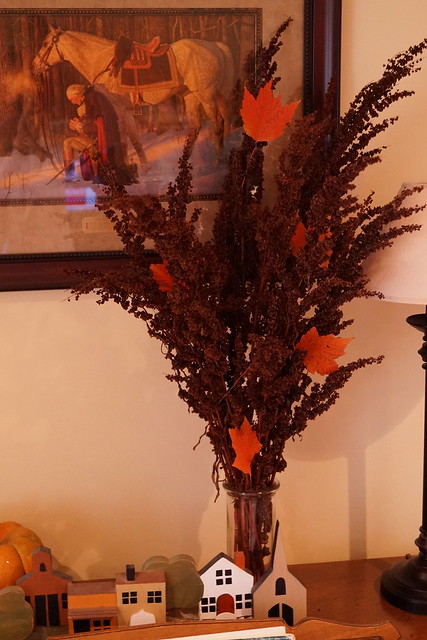
Here are what those weed things look like up close--those little pods dropped like crazy when we were arranging them. But if we leave it alone they stay put just fine.
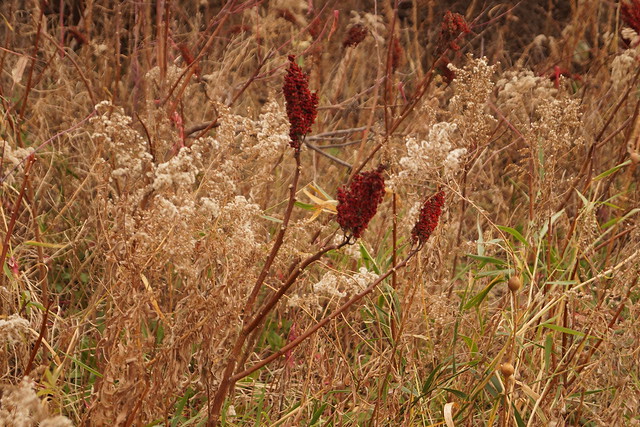
A couple other weed options I've noticed around my neighborhood.
And this feather grass something......
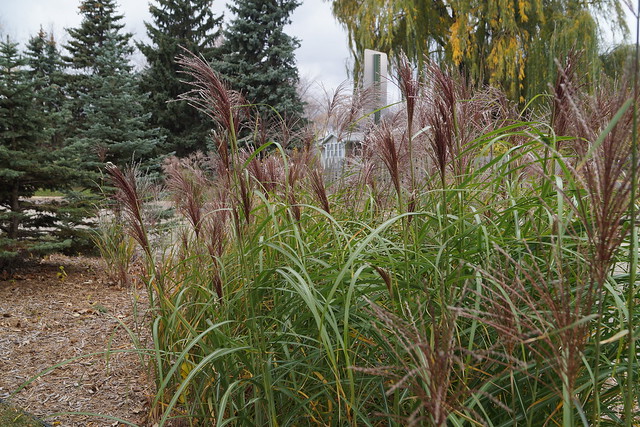
I am going to retrieve some of this.
While taking pictures I noticed that I will need something to cut it. Those stems are thick.
And the feather ends are bigger than my hand.
They were awesome blowing in the wind when I took these pics.
I need to plant some of this at my house too.
Hopefully you can find some interesting weeds around your home to use.....for free.
Enjoy your weekend.
Happy Halloween!
Thursday, October 30, 2014
Tuesday, October 28, 2014
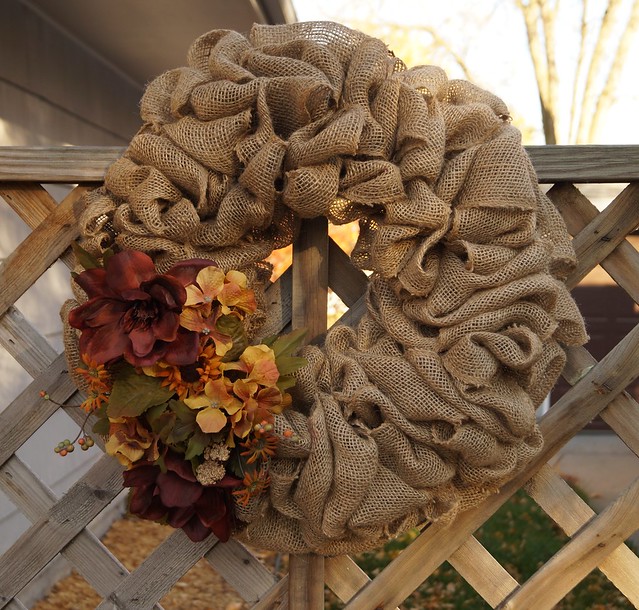
Burlap Wreath
All my Fall and Christmas decorations are in bins at the VERY back of the POD sitting in my driveway. A couple of the kids have complained about the lack of holiday decor in our home right now, but I am not digging through the POD to get at our stuff. It just isn't worth it to me right now.
However, the other day while at Michael's I scored a screaming deal---3 - 10 yd. rolls of burlap ribbon for the price of 1. I think it was $6.99. Lucky me they had actually left the tag up from the day before and so I got the sale price. Yeah!
I've been looking at burlap wreaths on Pinterest and while they are probably everywhere, I still like them. I had decided to just hold onto the ribbon as I knew I had a wire wreath frame also packed away somewhere in that POD. But at the dollar store I happened to see those frames and for $1 I bought another one. I felt like I need something crafty to do to keep my mind sane.
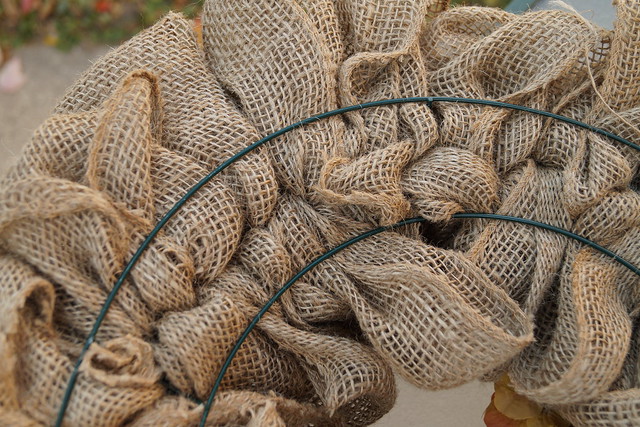
Here is a backside view of my wreath.
There are plenty of how-tos online, but basically I just took loops of burlap and pulled it through the wire sections until it was as full as I wanted.
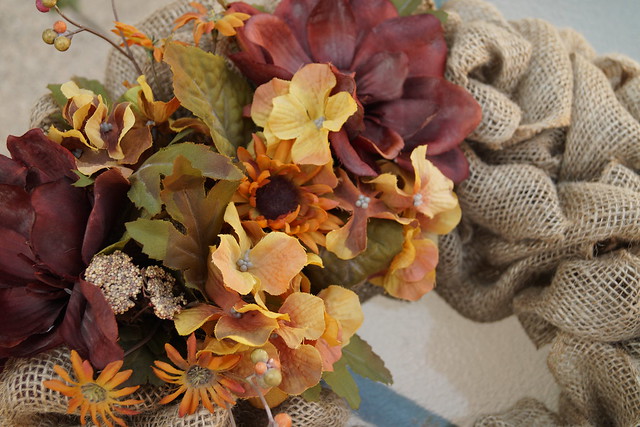
I then added some flowers that I already had sitting in a vase and cut them with wire cutters and just shoved them into the loops of ribbon. I didn't want the flowers to be permanent. I had some brighter flowers that I thought I wanted, but this turned out more calm and earthy. For now I am just using what I have on hand. And I may want to change it seasonally down the road.
For now it is hanging in my dining room. I didn't think I wanted to leave it outside to possibly get ruined.
Details:
- 2 rolls of 10 yd. burlap ribbon
- 1 - 14" diameter wire wreath frame
- Flowers or other additions to add to wreath.
Wednesday, October 22, 2014
Despicable Me costumes
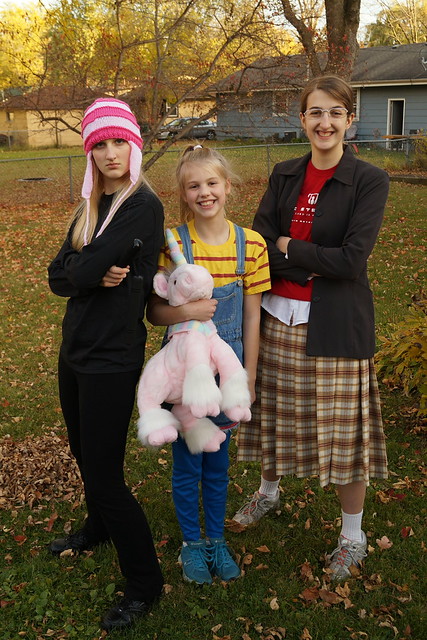
This year my girls wanted to do a group costume and this is what they came up with.
Meet Gru's girls.
Edith, Agnes, and Margo from Despicable Me
Love how it all came together.
Margo
Plaid skirt--we made this.
Thrifted jacket and white shirt
Add a graphic tee over top--she already had this
Bought dollar store wire frame readers and popped the lenses out.
Tennis shoes and socks
Hair back in a low ponytail.
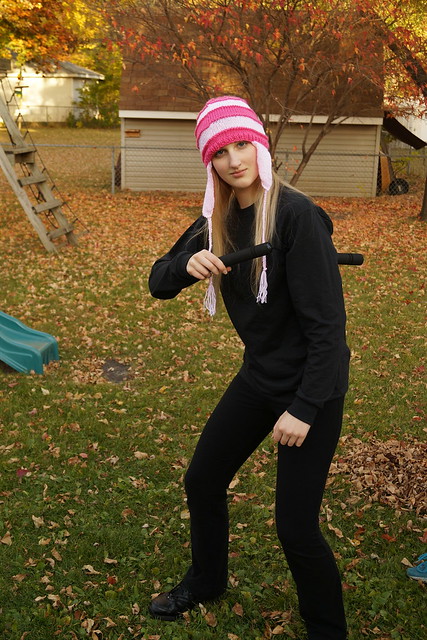
Edith
We went with the Ninja version for ease of costuming
Black t-shirt and pants.
Nunchucks ($1 at the dollar store)
Pink striped stocking cap--knitted this up, winging it as we went but turned out great. Based on this pattern.
If you didn't have long blonde hair like my daughter you could easily throw a blonde wig on under the hat.
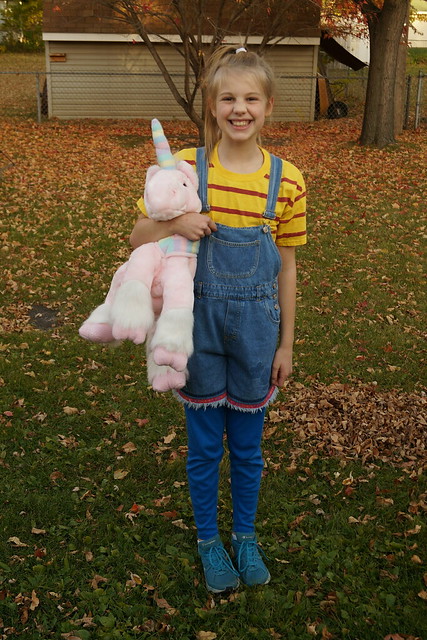
Agnes
The unicorn is what makes it.
We found ours amazingly enough at the thrift store for $3.
Short overalls also thrift store purchase.
Yellow t-shirt w/ red stripes. Made ours by painting the stripes onto a Michael's bought tee.
Ponytail on top of your head. Later on we sprayed her hair black, but it wasn't for this picture.
Happy Halloween everyone!
Monday, October 20, 2014
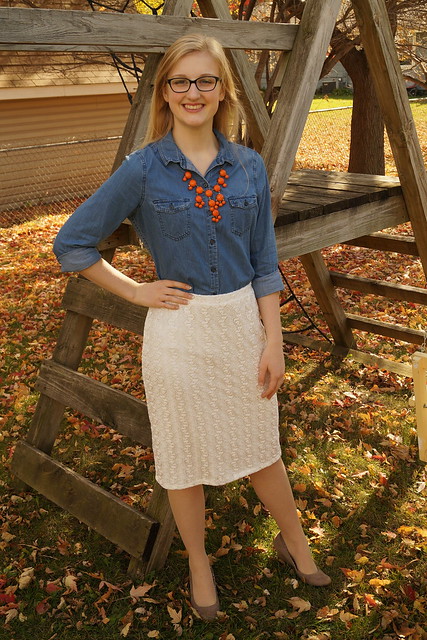
Stretch Lace Skirt
I made this skirt for my second daughter.
She wanted a cream lace skirt.
This one is super easy.
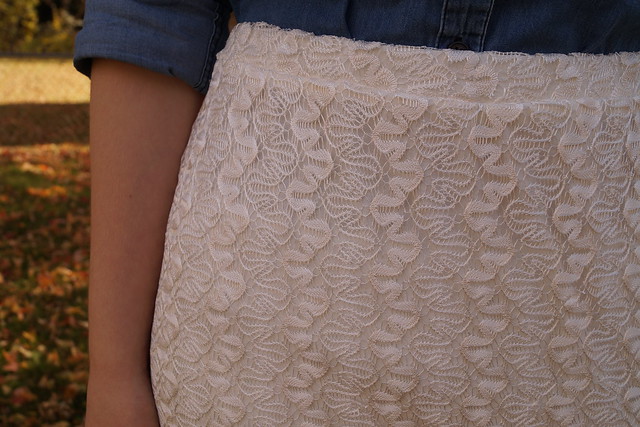
T-shirt fabric with a stretch lace overlay and elastic waist.
Can't get much easier than that.
Details:
She wanted a cream lace skirt.
This one is super easy.
T-shirt fabric with a stretch lace overlay and elastic waist.
Can't get much easier than that.
Details:
- McCall's 6654--LOVE this pattern. Lots of options for easy knit skirts--pencil or a-line and lots of different lengths. View A/B option to get knee length.
- Thrifted cream knit sheet
- 1 yd. stretch lace--about $6/yd.
Friday, October 17, 2014
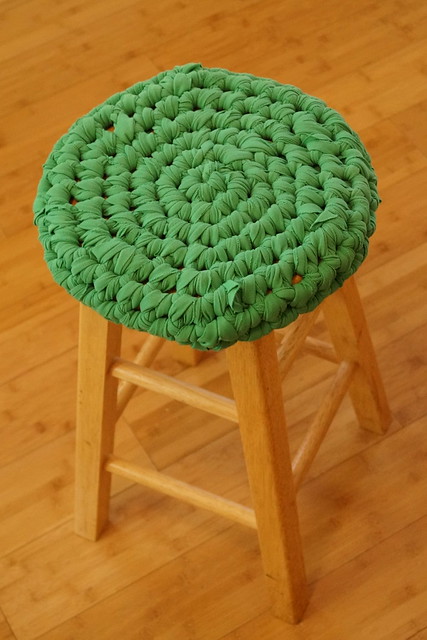
Crochet bar stool cover for a Friday Finds
My birthday was this week and really I need nothing---except some time and someone to buy our house.
I did ask my oldest daughter if she would be willing to make something for me for my birthday--as a test of the pattern and style.
I saw this on Pinterest and knew she could do this for me.
I wanted to see if I would like it as much as I thought I would.
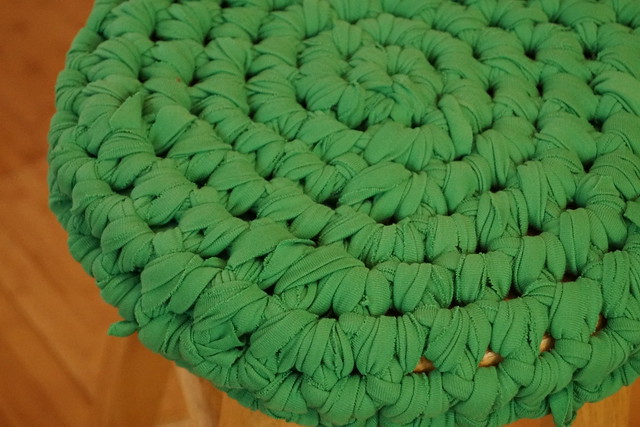
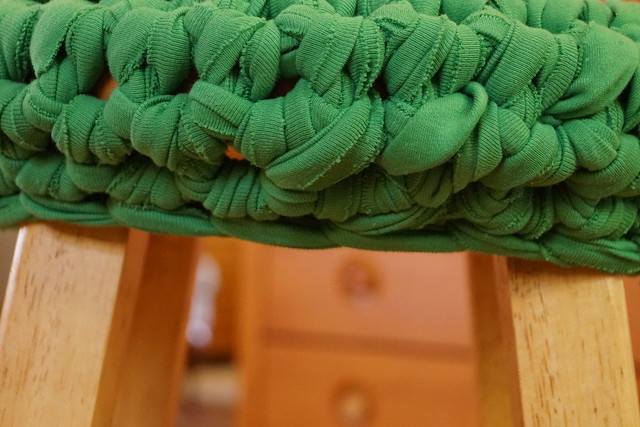
I cut the fabric yarn and she crocheted it. Literally it probably only took her about a 1/2 hour total from start to finish. Those are really large single crochet stitches--9 rounds is all you make.
We are super happy with how it turned out.
Much softer on the seat than straight wood.
I have enough fabric for another one and then I am thinking of what other color to choose--royal blue--or each stool a different color all together. I have 4 stools, 2 short and 2 taller. 3 of them I got free off Craigslist and the other one for $1.99 at the thrift store = 50 cents apiece. I am also debating on whether or not to paint the stools white and then have the colored cover.
They don't have a place in my current house, but I have plans for the future house, which amazingly is still available for sale. I tell my husband that it is my house---just waiting for me. However, all this house business is about to kill me....I just want my house sold.
Details:
- Pattern instructions found here.
- How to cut the fabric yarn here. I thought that 2 1/2 yards of cut fabric sounded excessive, but really you do need that much to make this cover.
- Green knit from the stash--about 6 yards that I bought at the thrift store for probably about $4.
- Crochet hook Q--I went and bought one specifically for this project.
Thursday, October 16, 2014
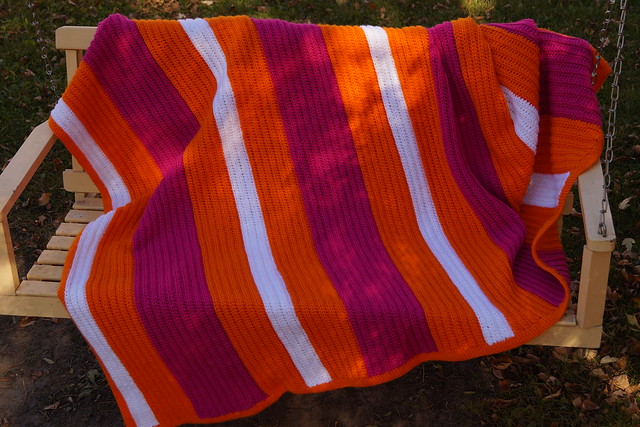
First crochet project--the striped afghan
My #2 daughter (15 yrs. old) wanted to try her hand at a knitting or crochet project to fulfill a requirement for her Young Woman personal progress. She decided that she wanted to make an afghan for one of her value projects. My mother makes afghans: usually for baby gifts, graduations, or weddings. At times she will use up her extra yarn and make random striped ones and then gift them to a local charity for their needs.
I think the M. must've got the idea from her.
So for Christmas last year Santa gave her all the yarn she needed to make herself a striped afghan in the colors she wanted. She and Mrs. Claus had conversed about that beforehand. She started working on it and at first was quite frustrated with the experience. She is a bit of an A-type person so it doesn't make her too happy when it doesn't work out perfectly right away. Nothing like picking a large project to complete for your first EVER project.
However, she persevered and it came more natural to her as time went on.
She would go in spurts with her crocheting and finally in August she finished her project.
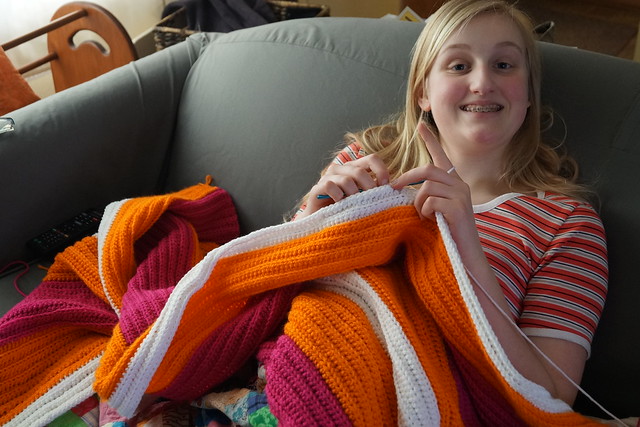
Here she is sometime in March and in the middle of the project.
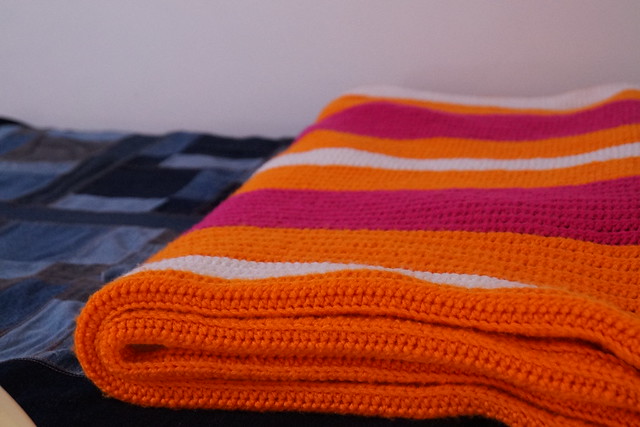
All completed. She designed the striping herself and is thrilled with the end result.
I am happy she stuck to it and met her goal.
Details:
- Finished dimensions 67 inches by 74 inches
- Red Heart Super Saver yarn (7 oz skein) in White, Pumpkin--which is neon orange in my book, and Shocking Pink. We think we remember having 4 skeins of each color. For the white we may have only needed 3--guessing, 'cause we really can't remember.
- Crochet hook size--guessing a G.
Friday, October 10, 2014
Friday Finds
Here are a couple of my finds over the last couple of weeks.
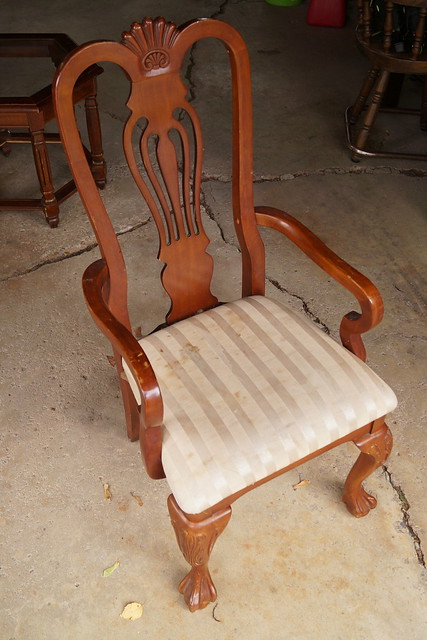
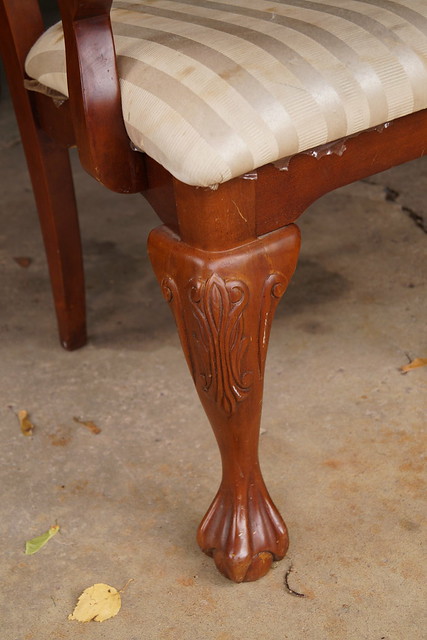
After driving by this LARGE dumpster in front of a house at least 2 times in a couple days I decided to stop for this pair of chairs I could see the legs sticking out. The dumpster was completely full of all sorts of stuff, mostly household stuff, but I just wanted the chairs.
I knocked on the door of the house more than a few times, but no one answered. Since it was in the dumpster I just took it.
Turned out it was only one chair---at least where I could get to.
The other legs belonged to the pedestal portion of a table.
No table top that I could see.
The chair is cool, and so was the pedestal, but I didn't want to think about figuring that part out.
I just took the chair.
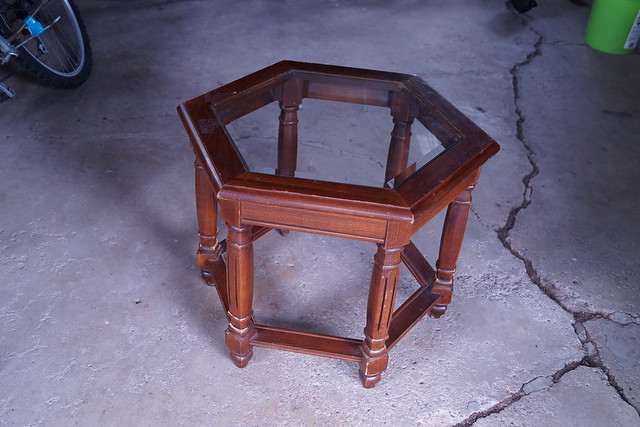
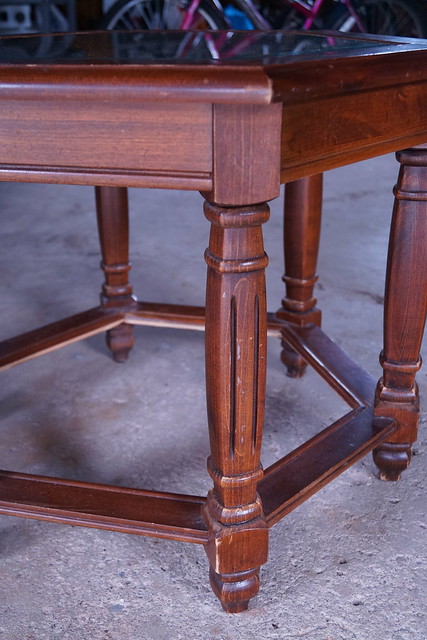
Then a different week on a different street and after passing by a freebie pile in someone's front yard about 3 times in a couple days I decided to rescue a hexagon side table with a glass top.
I think I will put a wood piece on the bottom to make another shelf. There might have been another glass piece there on the bottom, but it is now gone. I may replace the glass top with wood too, but not sure just yet. Here is an upcycle option I saw on Pinterest.
Last week hubby asked me if I went to the thrift store every day.
"No, just Tuesdays and Fridays on their 25% off days."
"Oh", he says, "it just seems like you go every day."
Maybe, but really I don't.
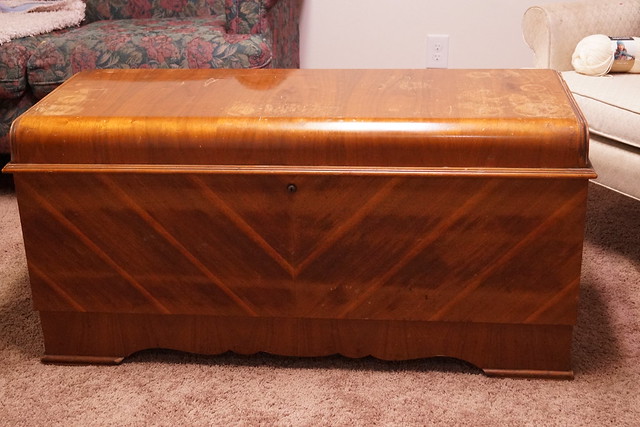
Funny thing about him though, the very next day he comes home and says to me, "Do you want a cedar chest? There is one just around the block with a FREE sign on it."
I grabbed my shoes and off we went.
Now we have another cedar chest--hubby plans to give it to our daughter, which is certainly fine with me.
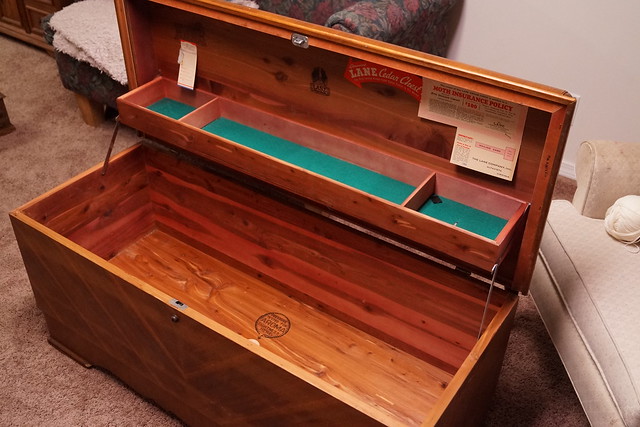
She was excited about it once she saw it after work and then they were doing some research on it and it turns out it is a Lane cedar lined chest that was made in July 1942--we know this from the serial number underneath.
It still has original paperwork inside attached to the lid--dated Jan. 1944. And the inside looks brand new.
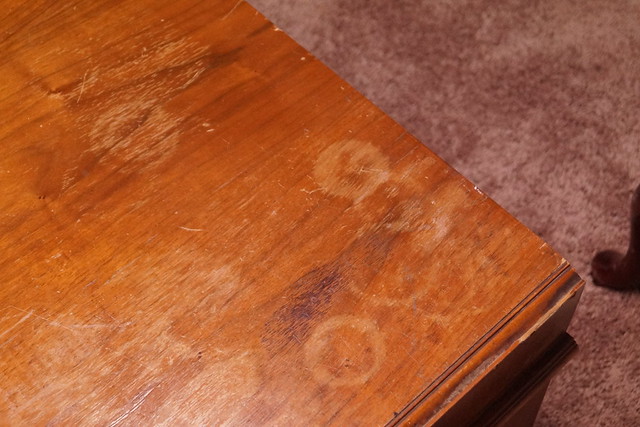
Other than some glass water marks on the top and a slight crack on the inside drawer which can be easily glued together it really is in great shape, especially as old as it is. Hubby says he doesn't think the owners knew what they had. Probably not, but that's fine. We'll take good care of it.
Just wish I knew some of its history.
Thursday, October 9, 2014
No more braces!!
This doesn't especially have anything to do with being creative, but we are celebrating the day as my daughter got her braces off this morning.
She looks gorgeous!!
I think she'll be smiling like this for some time.
We should all be smiling like this.
She looks gorgeous!!
I think she'll be smiling like this for some time.
We should all be smiling like this.