Monday, December 31, 2012

Fabric Pull

We are smack in the middle of finishing our basement.  I'm sure if any of you have been through that process you know what a "joy" it can be.  My husband is doing all the work himself so the trade off of saving lots of money is that the process takes a bit longer than normal.  While I dream of the day we can actually live in a whole house and not a partial house (we've never lived in a house with a finished basement) there is lots of design planning/scheming going on in my head.  

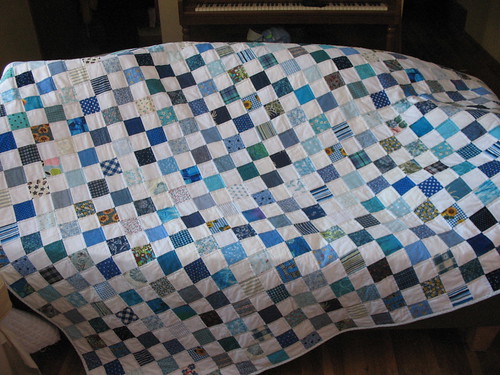
  First off will be a new tween room for the 11yr old sans her 6 year old sister. She is my Hawaii loving daughter so a room with ocean colors is her request.
 (Her REAL request was a room with turquoise and lime walls...Um, no!)

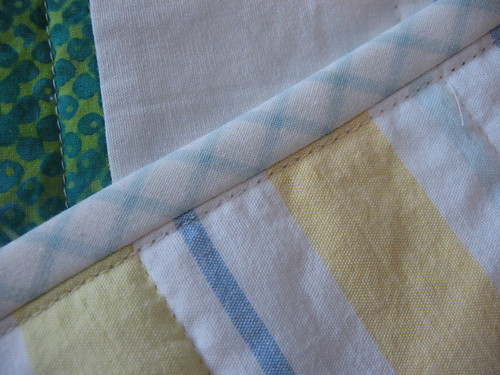
  We did a little fabric pull over the weekend and came up with this lovely stack.

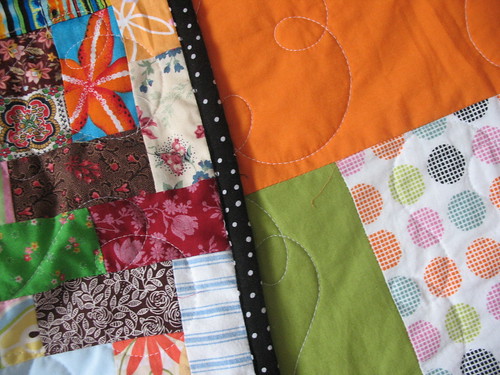
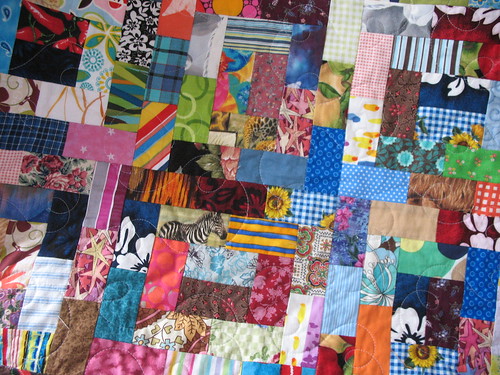
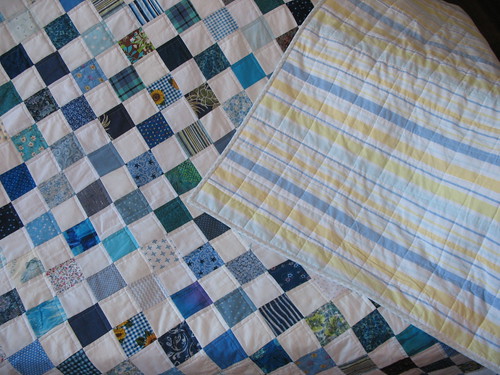
We started with the backing fabric.  I found it at JoAnn's and liked that it was in the colors she loved as well as being a big/bold print.  The rest of the fabrics came from my stash.  Some are long-hoarded pieces and some not.  But I love the mix of eclectic prints.   I'm thinking the quilt/color scheme should satisfy my need for "beauty" and her need for "bright" colors.

Happy New Year!
Emily

Friday, December 28, 2012

Scrappy Rectangle Finished

Well, it didn't quite take me a year like I predicted, but it did take some time.  I finished the top in mid-July and then debated on whether or not to quilt it myself or have Lynn do it.  Ultimately I decided that it was just too big for me to handle with my current machine, even if I just did straight line quilting.  So thus began it's journey to see Ms. Lynn in UT.

First a car ride to Nebraska in Aug. for our nephew's wedding reception.  From there our parents took it with them out to Utah in October for their big trip to visit everyone.  While they were there it was quilted and then they brought it back to NE in early November.  Then when hubby had a work trip to Iowa the end of November he took an evening jaunt over to see the folks, had some dinner, picked it up (and the Red Rail Fence, too) and eventually brought it back home to MN.

Phew!  So glad it is here.


Hubby's reaction to the quilt:  "Wow!....."   and a pause.
Me: "Yeah, it's crazy."
Hubby: "I know, but I like it."

Me too!

The kids have said it is their new favorite.


Back view--little modernness to it.


Love the b/w polka dot binding, and Lynn's loopy quilting.


Here's some of the scrappy loveliness that I used for this quilt--fabric from all sorts of projects and people.

Details:
  • Pattern from "More Favorite Traditional Quilts Made Easy" by Jo Parrott, Pg. 39-41
  • Cut 1620(!!!) - 2 x 3 1/2" rectangles = 90 blocks
  • 9 blocks across and 10 down.
  • Spent about $3 for a yd. of b/w polka dot binding fabric because nothing else I had worked for me.  The black seems to mellow it out some.
  • Backing--Dot thrifted sheet and other scrap fabric (or sheets).
  • Finished size: HUGE (Hubby is actually underneath the first pic of the quilt.  It's too big for one person to hold up alone--and it was cold outside the day I took the pics)
  • Actual dimensions: 81 1/2 inches by 90 1/2 inches

Wednesday, December 26, 2012

Family Puzzle

"Family Puzzle" by simple girl, simple life
Just wanted to pop in and say hello! We are hunkered down in our house enjoying the after Christmas lull and lots of fresh snow, while I sent the hubs out in the day-after-craziness in search of a "bargain" mini tree for next year.   He is a keeper for sure!!

I also wanted to share this fun little gift we received from Leslie this year. A "family puzzle" in the truest sense. We definitely had fun putting it together. :)

Hope all is well with you and your families!
Emily

Monday, December 24, 2012

Wednesday, December 19, 2012

Checkerboard Quilt

Here is my version of Amanda Jean's Checkerboard Quilt from her book Sunday Morning Quilts, pg. 128.


This is going to daughter #1 for Christmas since she loves blue AND she needs a larger quilt for her 6' body than one that she is currently using. (I'm hoping once she receives this one she'll be more willing to donate the other one--it's not my best work and really too small for her to use).  It should look nice on her bed against her yellow wall too.

Details:
  • Cut 3 inch scrap squares in variety of blues.
  • Also used scrappy white squares cut 3 inches.
  • 25 squares across by 35 squares down.
  • Thrifted yellow and blue striped sheet for the back
  • Binding is a thrifted blue and white plaid sheet
  • Finished dimensions: basically 64 inches by 90 inches

Monday, December 17, 2012

Lemon-Honey Jelly {Gift for the Teachers)

I don't know about you but sometimes we are good about giving the kids' teachers a nice gift for Christmas and sometimes we're not.  Usually I just wait until the end of the year to thank them for dealing with having my kids during the year.

This year I am little more inspired for the two elementary teachers.  I've been perusing some canning books from my local library to get a feel for anything new I might want to try.  Found a fun book from BH&G called Can It!.  I decided to try the recipe for Lemon-Honey Jelly.  I am a huge honey fan, especially on homemade bread.  So I thought the combo of these 2 would be so yummy and fun to give to the teachers for a little Christmas gift.


Some other recipes from this book that I want to try are:
  • Tangerine Marmalade, pg. 77
  • Lime-Kiwi Freezer Jam, pg. 123 (already made this and it is FABULOUS!)
  • Spiced Peaches (next summer), pg. 141
  • Farmer's Market Corn Salsa, pg. 159
Notes:
  • I used a zester instead of a vegetable peeler to remove the peel.
  • Scooped out the cooked zest and foam with a mesh colander instead of a spoon since the zest was so tiny.
  • I was able to can 6 half-pints and not 5.
  • And after licking the spoon when I was all done I am REALLY looking forward to eating some of this myself with homemade bread.  It is delicious!  The recipe says to wait 2 weeks before eating to let it set up good.

Friday, December 14, 2012

Red Rail Fence Quilt

While the Pink Version of this quilt was given away to a friend, I am keeping the red version for us.


For my version I didn't use any sashing between the blocks--just a slightly different look than the pink quilt.

My 11 yr. old son helped me arrange the blocks and get it so that none of the strips were touching another strip of that same fabric.  It was like solving a puzzle.  We finally got it down to one last block and it just wasn't working.  I even had 2 extras made and none of them would work.

He finally said to me, "Why don't you take this one piece off and just sew a different piece to this end?"
Brilliant!
Voila! problem solved.
This is why 2 heads are better than one.

And then he says to me, "Since I helped you can I have some chips?"
Boys....they are pretty easy to please.


Here's me in "action".
Not sure which kid took this and when, 
but I found it as I was loading the other pics for this quilt.

I really love the back--almost a bit more than the front.  That bird print just makes me happy.
And daughter #3 wants a skirt from it.  Not sure it will happen for Christmas, but....


Details:
  • Fabric from my scrap bag bundle bought at the thrift store.
  • Finished size: 60 x 72 inches
  • Rail fence pattern--cut 2 1/2 inch by 12 1/2 inch strips of various scrap fabrics.
  • Sewn in strips of 6 for 12 1/2 inch finished block
  • 5 blocks across by 6 blocks down.
  • Machine quilted by Lynn.
**You can check out another version here too in yellow and grey that Emily made for our sister-in-law.  She also has the tutorial listed on that post.

Linked up over at CrazyMomQuilts

Thursday, December 13, 2012

Snowman Wreath

While we're talking wreaths this week I'll show you one more that I put together this season.

This is a fairly easy project that I put together for our front door.
Wreaths bought at the thrift store and post ripping off all the ugly decorations.

I couldn't get all the hot glued Spanish moss off of this one.
I just sprayed over it and will use this as the back side.

 Hung up the wreaths on the swing set with some jute.
Sprayed and let dry some before bringing them in to completely dry.


Detail of the glitter scarf fabric and embellishment

Details:
  • 3 wreaths from the thrift store for around $6 total
  • Attached the wreaths together using zip ties.
  • 1 can spray paint--white matte finish
  • Craft foam black hat found at Michael's--cut in half
  • Red glitter scarf fabric for about $3.
  • Scarf embellishment from the dollar store--safety pinned on.
  • Inspiration here on Pinterest.  I also liked the greenery versions I saw, but they wouldn't have looked as nice on my dark front door.  Much better if you have a white or light colored front door.

This is Emily's version that I sent her for her birthday.
Hers is a little smaller version, but still cute.
She says she'll probably change the hat once Christmas is over 
so that she can still leave it hanging through the remainder of the Winter months.

Wednesday, December 12, 2012

Winter Wreath Update

I need change...more than my family does, but I like a little bit of change every now and again.


Last year at the thrift store I found this wreath for less than $3 and it worked great on the outside by my front door. As I was browsing the web the other day I found this pretty wreath.  Instead of making a completely new wreath we just added some birds, a nest that someone had given my daughter from something or other, and some eggs to last year's wreath.  Changed the look completely and daughter #3 is so happy.  She loves birds.
I'm happy I only spent less than $2 to change it up.

Details:
  • Pair of cardinals for $1 at the Dollar Store. (wired onto the wreath)
  • Sculpey clay from Michael's to make the eggs. (used a 50% off coupon = $.79). (Hot glued to the nest which is wired onto the wreath.)
  • Paint from the stash.
And one more little update to my home.
A little wreath I made for my front entry mirror for around $6.
Bought the "glass" balls from the dollar store and strung them onto a wire frame 
and then added a little gold lame ribbon for hanging.  So happy with this one too.

Monday, December 10, 2012

I am no longer the world's worst mother...

Way back in the summer, somewhere between swim lessons and a family vacation, I agreed to make my daughter a new school bag.  She picked out fabric while I blissfully thought how "fast" of a project it would be to whip up.  Ha!  Famous last words...

Fast forward five months and her new bag was still a pile of fabric.
I was trying not to feel like the world's worst mother, but truth be told, I felt kinda like the loser mom.
  It was time to redeem myself. 

 (Here are some hastily snapped pictures as she practically ripped it out of my hands when it was done.)
We decided on a messenger style bag.
It's not fancy, or even my most creative work, but my daughter dubbed me "the best mom EVER!" when I gave it to her so I'll take it.  Mom guilt, BE GONE!

 
Inside she wanted BIG pockets.  
These pockets will hold a regular-sized chapter book. 

I added a smaller "pencil pocket" to the outside (covered by the flap).
She wanted the owls to be the centerpiece. (This picture makes it look like I can't sew straight...but I assure you funky camera angles make it appear way worse:)

 Happily she has been carrying it to school for about 2 weeks now. 
No complaints, only reminders of how "awesome" it is!
My mom heart can rest easy.


Details:
All fabrics were chosen by the 10 yr old.
Green with Flowers is Happy Mochi Yum Yum by Lecien
Orange floral is Cabana Blooms

Thursday, December 6, 2012

The Last Blocks

As the year comes to and end, so too, does my quilt club's anniversary project.  
Here are the last of the blocks I made for the ladies.  

 A dresden for Nancy, flying geese for Connie, and red and black for JoLene.


And here's Kae's finished red, white, and blue quilt. Isn't it fun? 
So far she is the only one who has even put her blocks together, let alone finished her quilt.  The rest of us are either waiting for remaining blocks or slacking. :)  I am in the waiting group...

Overall I think everyone is pretty happy with this project and the blocks they received.  I imagine that next year there will be completed tops popping up at our monthly meetings.  At least that's my hope. I'm excited to see how they all come together.

As for 2013, we are brainstorming ideas for a new group project.  Any suggestions?


Tuesday, December 4, 2012

DQS 13


Nothing like another round of the doll quilt swap to stir up some anxiety and excitement.  I don't know why this swap makes me break into cold sweats, but it does.  And yet, I signed up again...


Here is the mosaic I made for this round.  My pics are a bit different than last round, a bit random even.  So let me explain why I chose these particular inspiration pieces:
I am currently obsessed with orange peel quilts.  They, along with double wedding rings, are on my quilting "bucket list".  Polka dots in any (or all) colors make me happy.  I like flying geese, simple solid quilts, traditional blocks made modern, hand quilting, and bright pops of color.  Denyse Schmidt fabrics are a personal fav right now.  And I am jumping on the text fabric love bandwagon.  

There you have it. My likes summed up in one little mosaic.  
What would your mosaic say about you?


LinkWithin

Related Posts Plugin for WordPress, Blogger...